How to Use PieEye Google Consent Mode Integration with Elevar Tag Management
Follow this article if you are a Shopify Merchant that is using the PieEye app to run your cookie banner and also are currently using or want to use the Elever Tagging and Tracking Management.
Overview:
Follow this guide to learn how to use the PieEye Google Consent Mode Integration with Elevar Tag Management.
Elevar ensures that all tags in your Google Tag Manager container are configured to fire only after visitors to your store have consented and granted the appropriate permissions.
Enable Google Consent Mode in PieEye
Add Domain:
- Log in Or Signup to PieEye web app account.
- Add New Domain- PieEye >Domain
- If your domain is not already added, please add it as a new domain.
- (See Figure 1)
- If your domain is not already added, please add it as a new domain.
 Figure 1
Configure Google Consent Mode:
- Begin on your PieEye homepage and navigate to the "Dialog" section of the page.
- (See Figure 2)

Figure 2
- Once in the Dialog section of the page, locate and click on the "Configure Rule" tab.
- (See Figure 3)
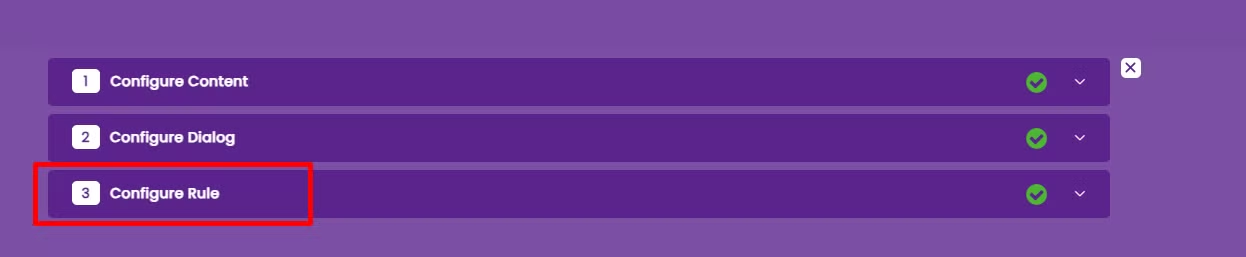
Figure 3
- Once in the Configure Rule section, you will find the Google Consent Mode option. Enable the toggle button labeled "Support GCM."
- (See Figure 4)
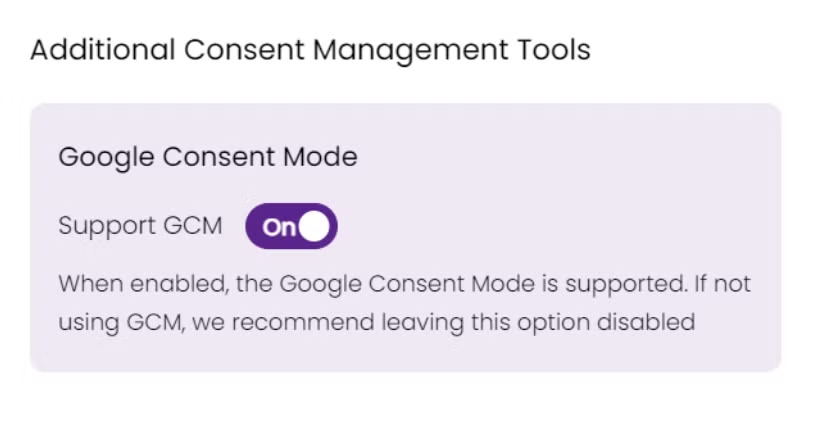
Figure 4
Add PieEye Script to Website Header:
- If you have not already added the script, insert the PieEye script into the header of your website.
- To locate the script, navigate to the PieEye settings.
- Once in the PieEye settings, navigate to the section of the page titled "Add Code to analyze your site" and copy this code to add to the header of your website.
- (See Figure 5)
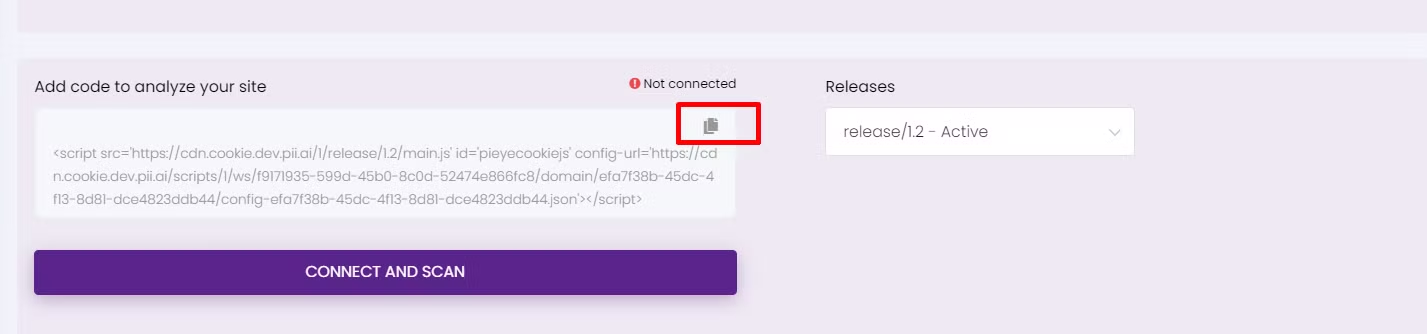 Figure 5
What's Next? Follow this guide to learn how to implement PieEye using Google Tag Manager template!
Updated 5 months ago
Did this page help you?