How to Include All Products in a Begin Checkout Email
Learn how to display all of your products in a the browse and checkout email in Klaviyo.
Overview
Follow this guide to learn how to display all of your products in a the browse and checkout email in Klaviyo. You can do this two ways, either by editing the table block or adding an HTML block to your email template.
Option 1: Using a Table Block
Access Cell Content:
- When you are editing your email template, locate and click on your table block.
- Navigate to the section of the left-hand menu titled "Cell content" and click on the "Image" button.
- Locate and click on the "Replace" button.
- (See Figure 1)
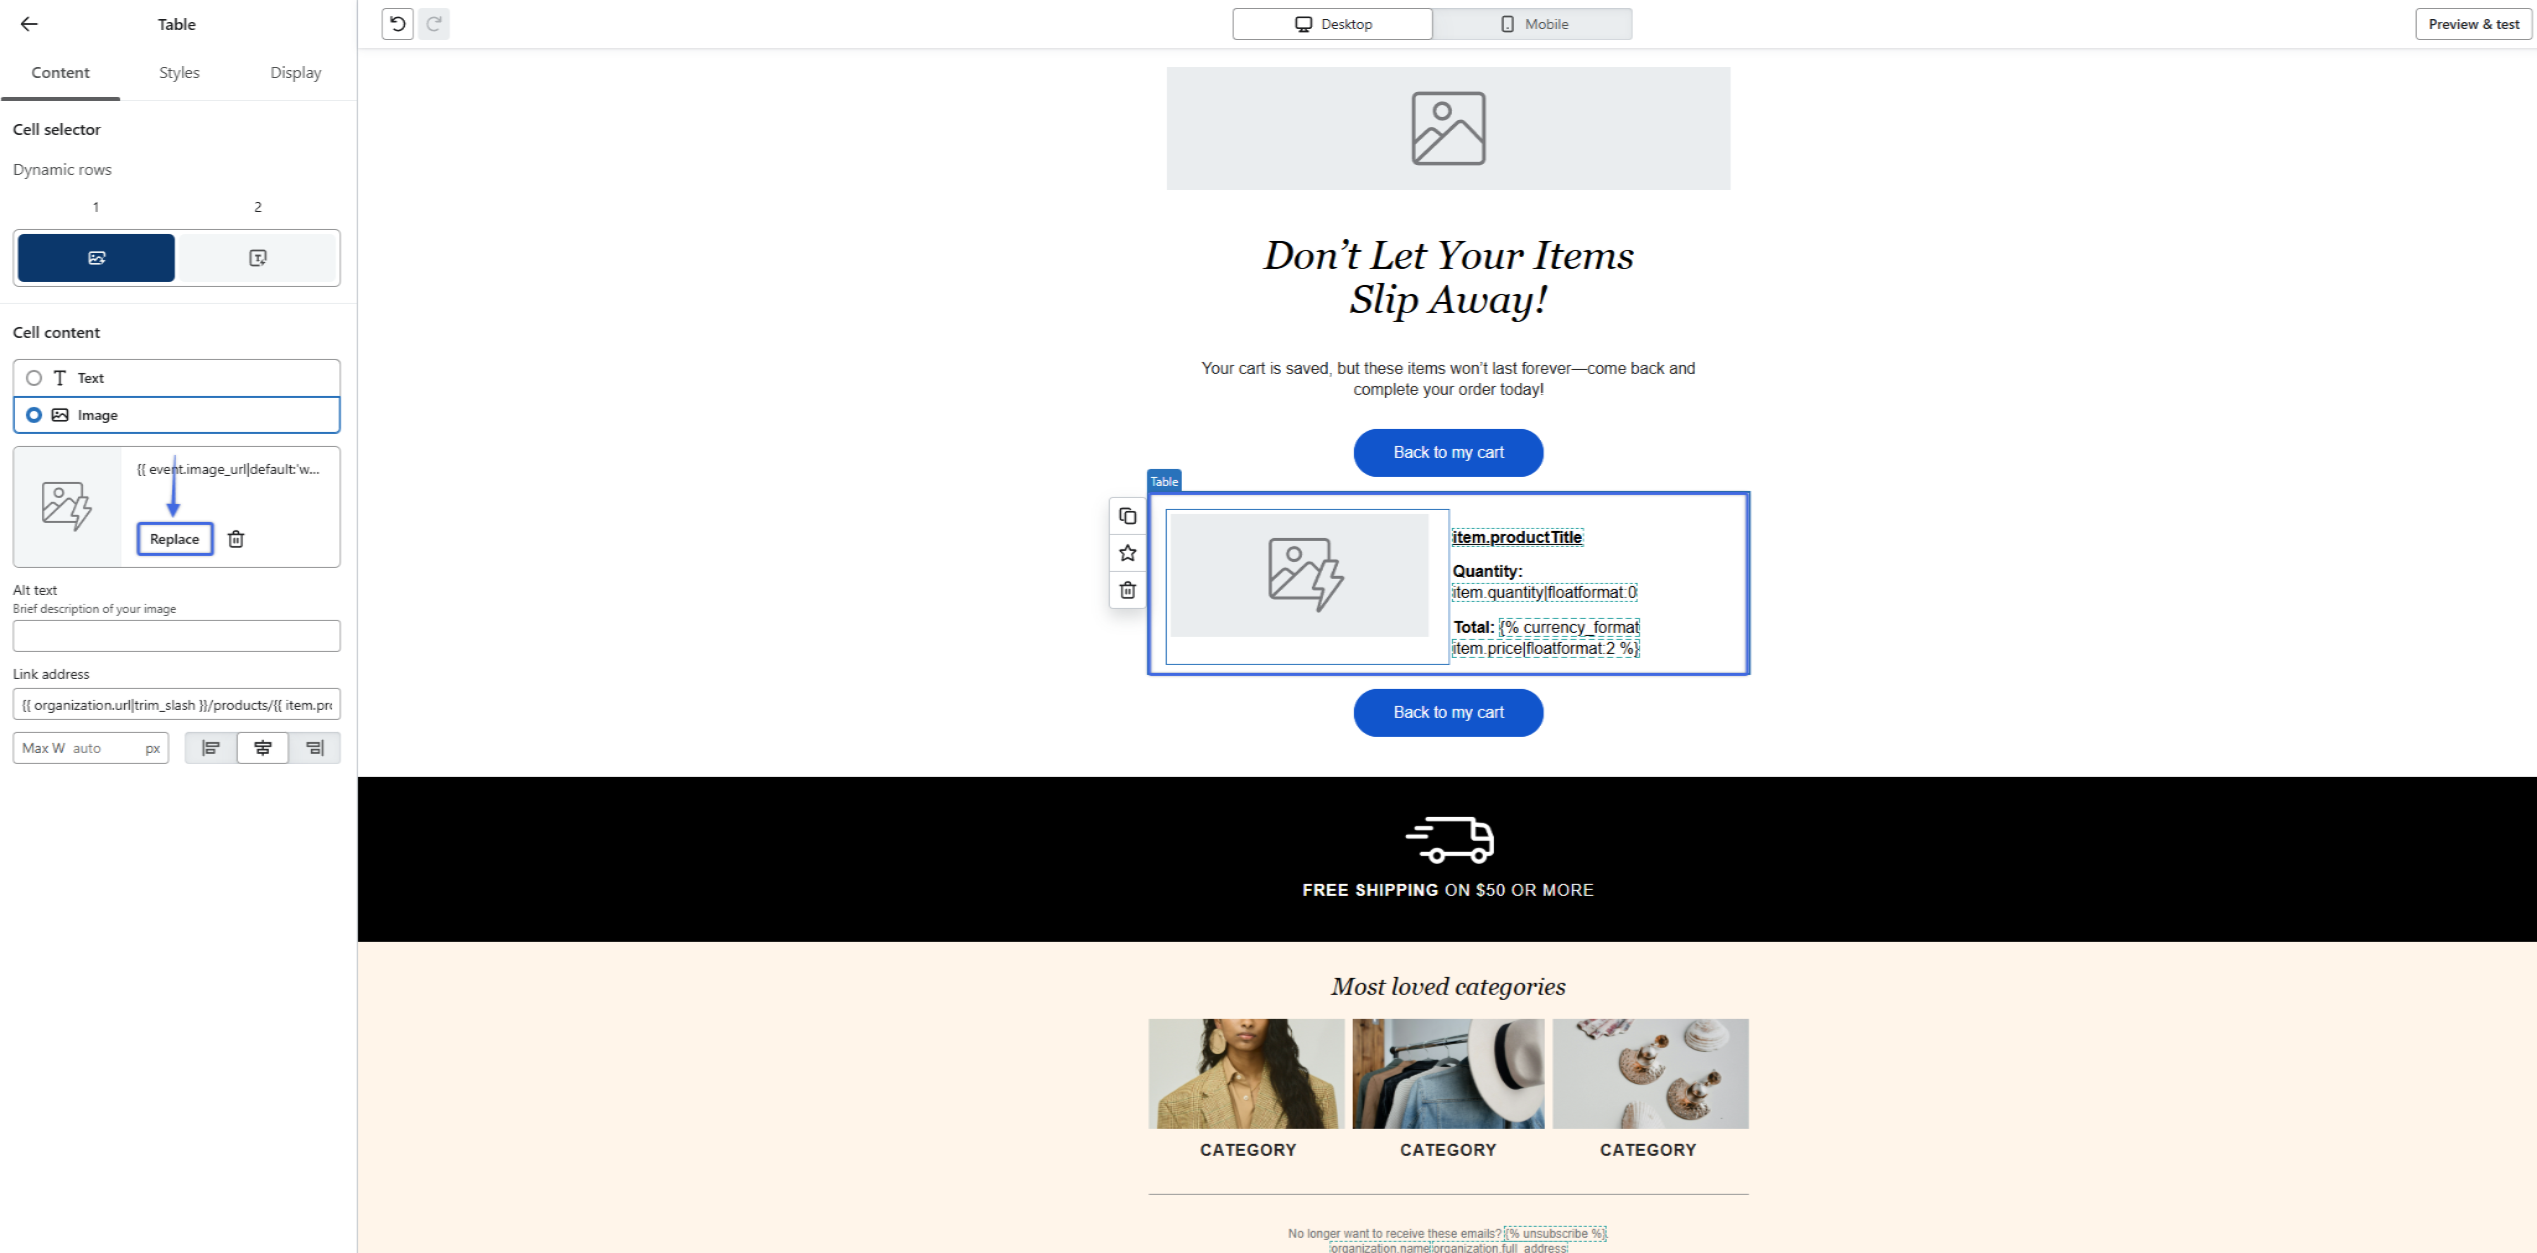
Figure 1
Edit the Table's Dynamic Image Variable:
- An additional window will appear titled "Select image". Use the top navigational menu and click on the "Dynamic image" tab.
- Navigate to the section of the page titled "Dynamic variable or dynamic URL" and use the text box to enter "{{ item.imageURL }}".
- Click on the "Save" button located in the bottom right-hand corner of the window.
- (See Figure 2)

Figure 2
Edit the Dynamic Variables:
- Once you have edited the table's dynamic image variable, you will return to your email template. Use the top navigation menu to click on the "Styles" tab.
- Navigate to the section of the menu titled "Data" and select the "Dynamic" option.
- Navigate to the section of the menu titled "Row collection" and use the text box to enter "event.items".
- Navigate to the section of the menu titled "Row alias" and use the text box to enter "item".
- (See Figure 3)
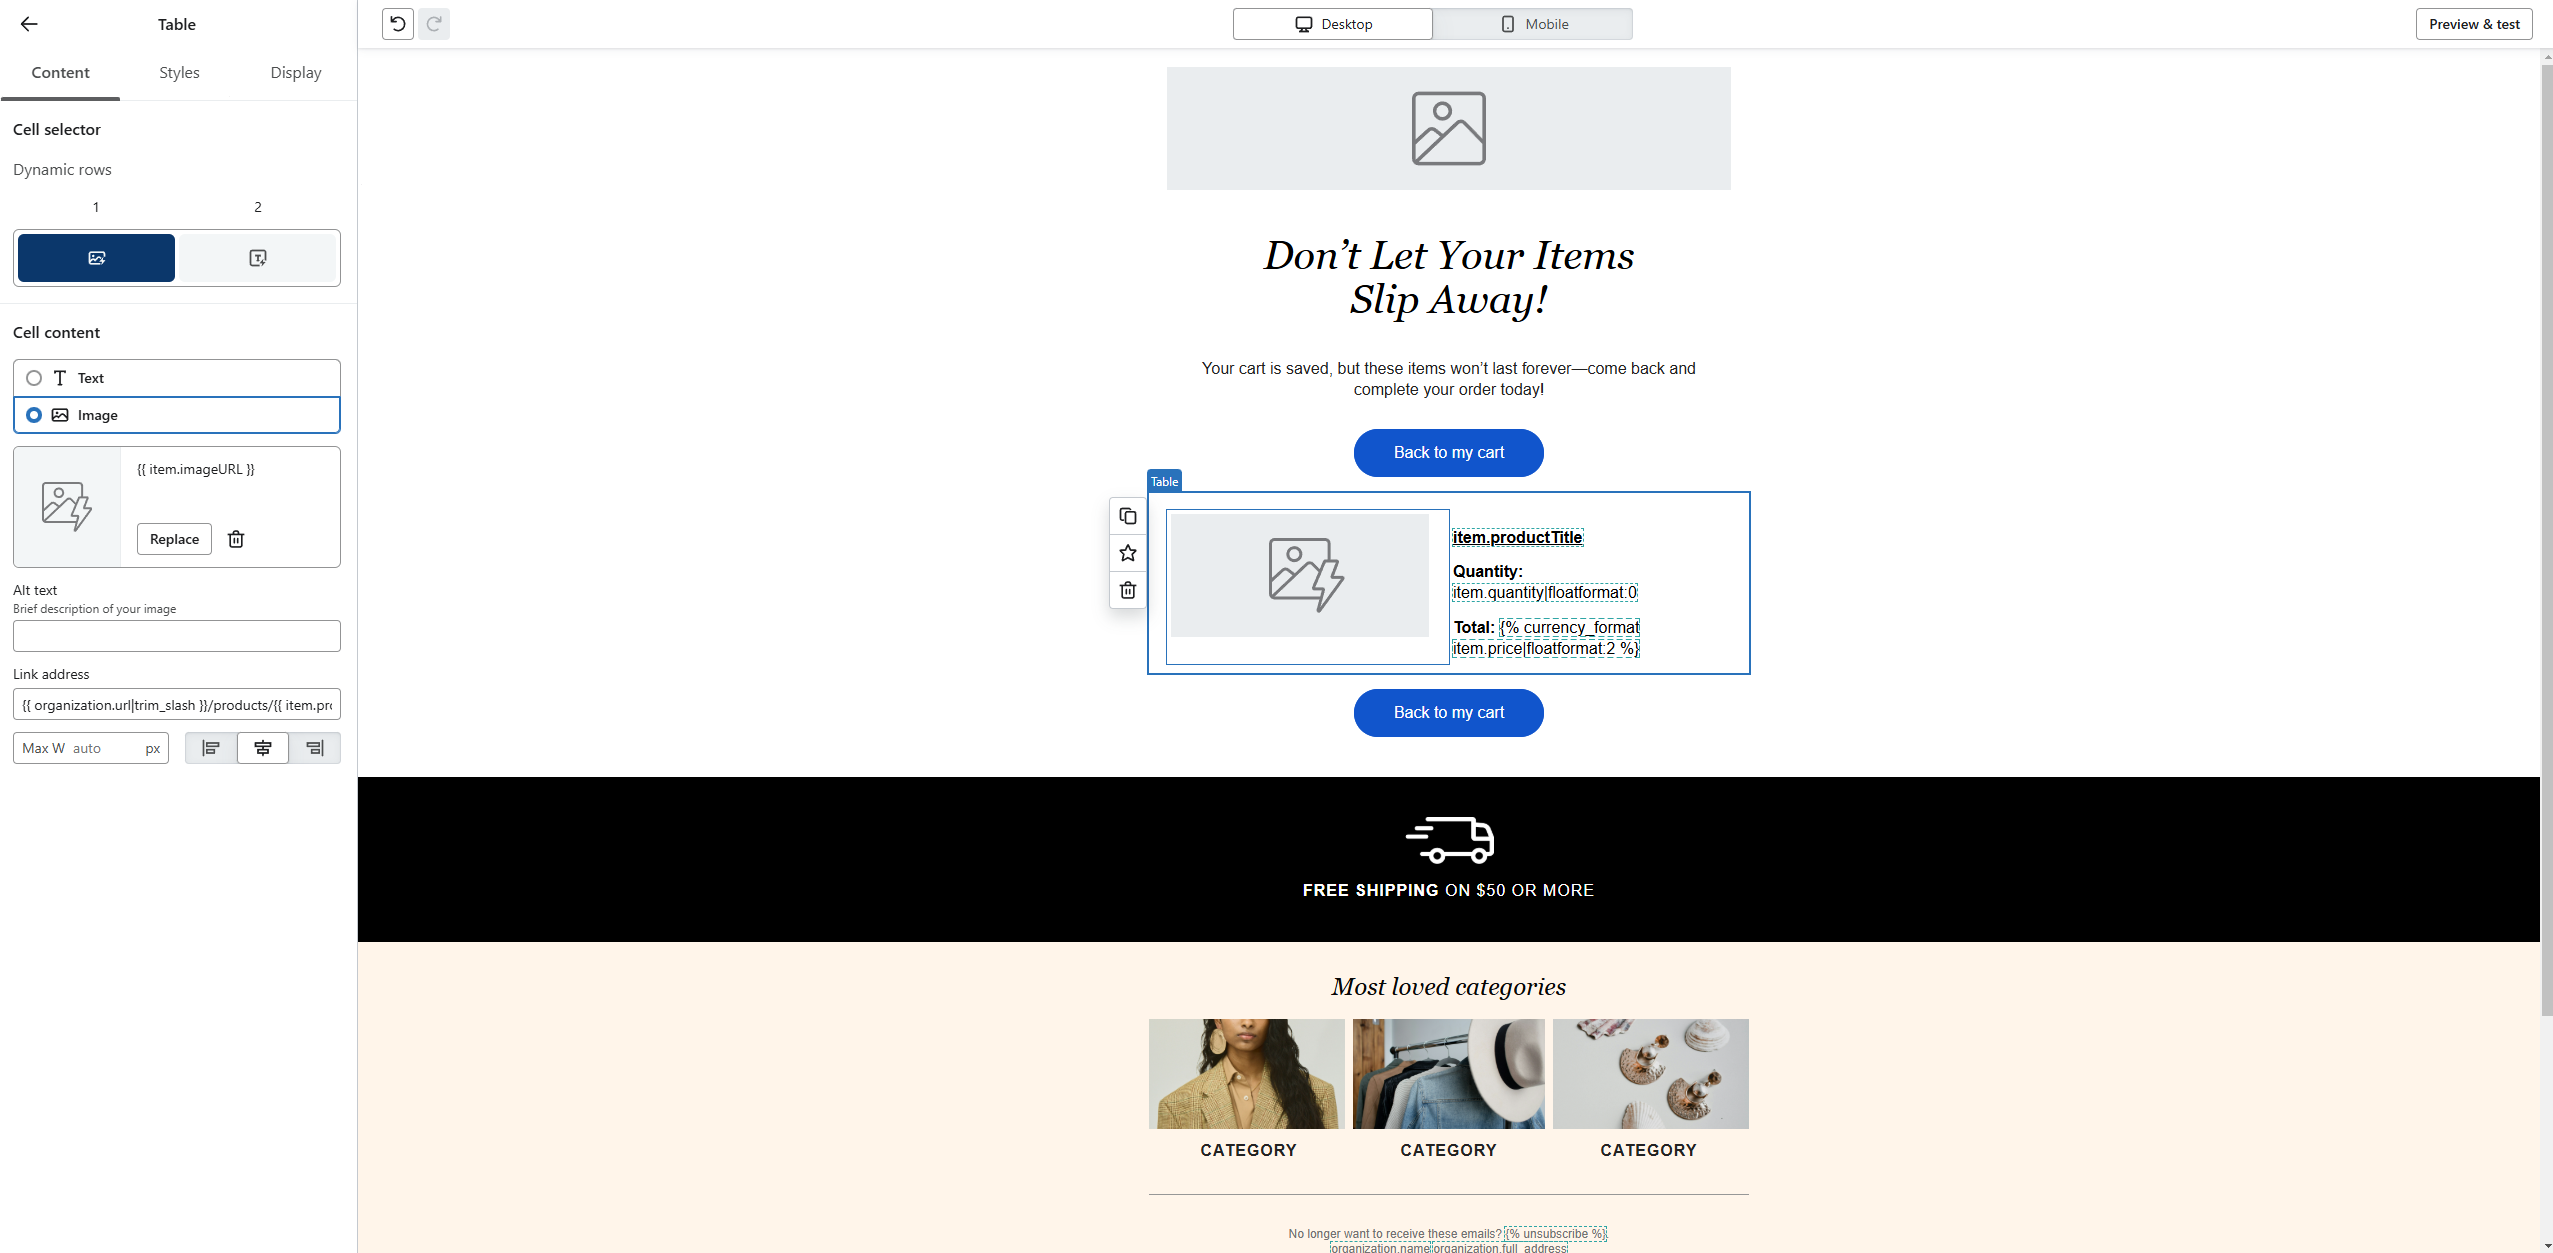
Figure 3
Using Table Block Preview Example: (See Figure 4)
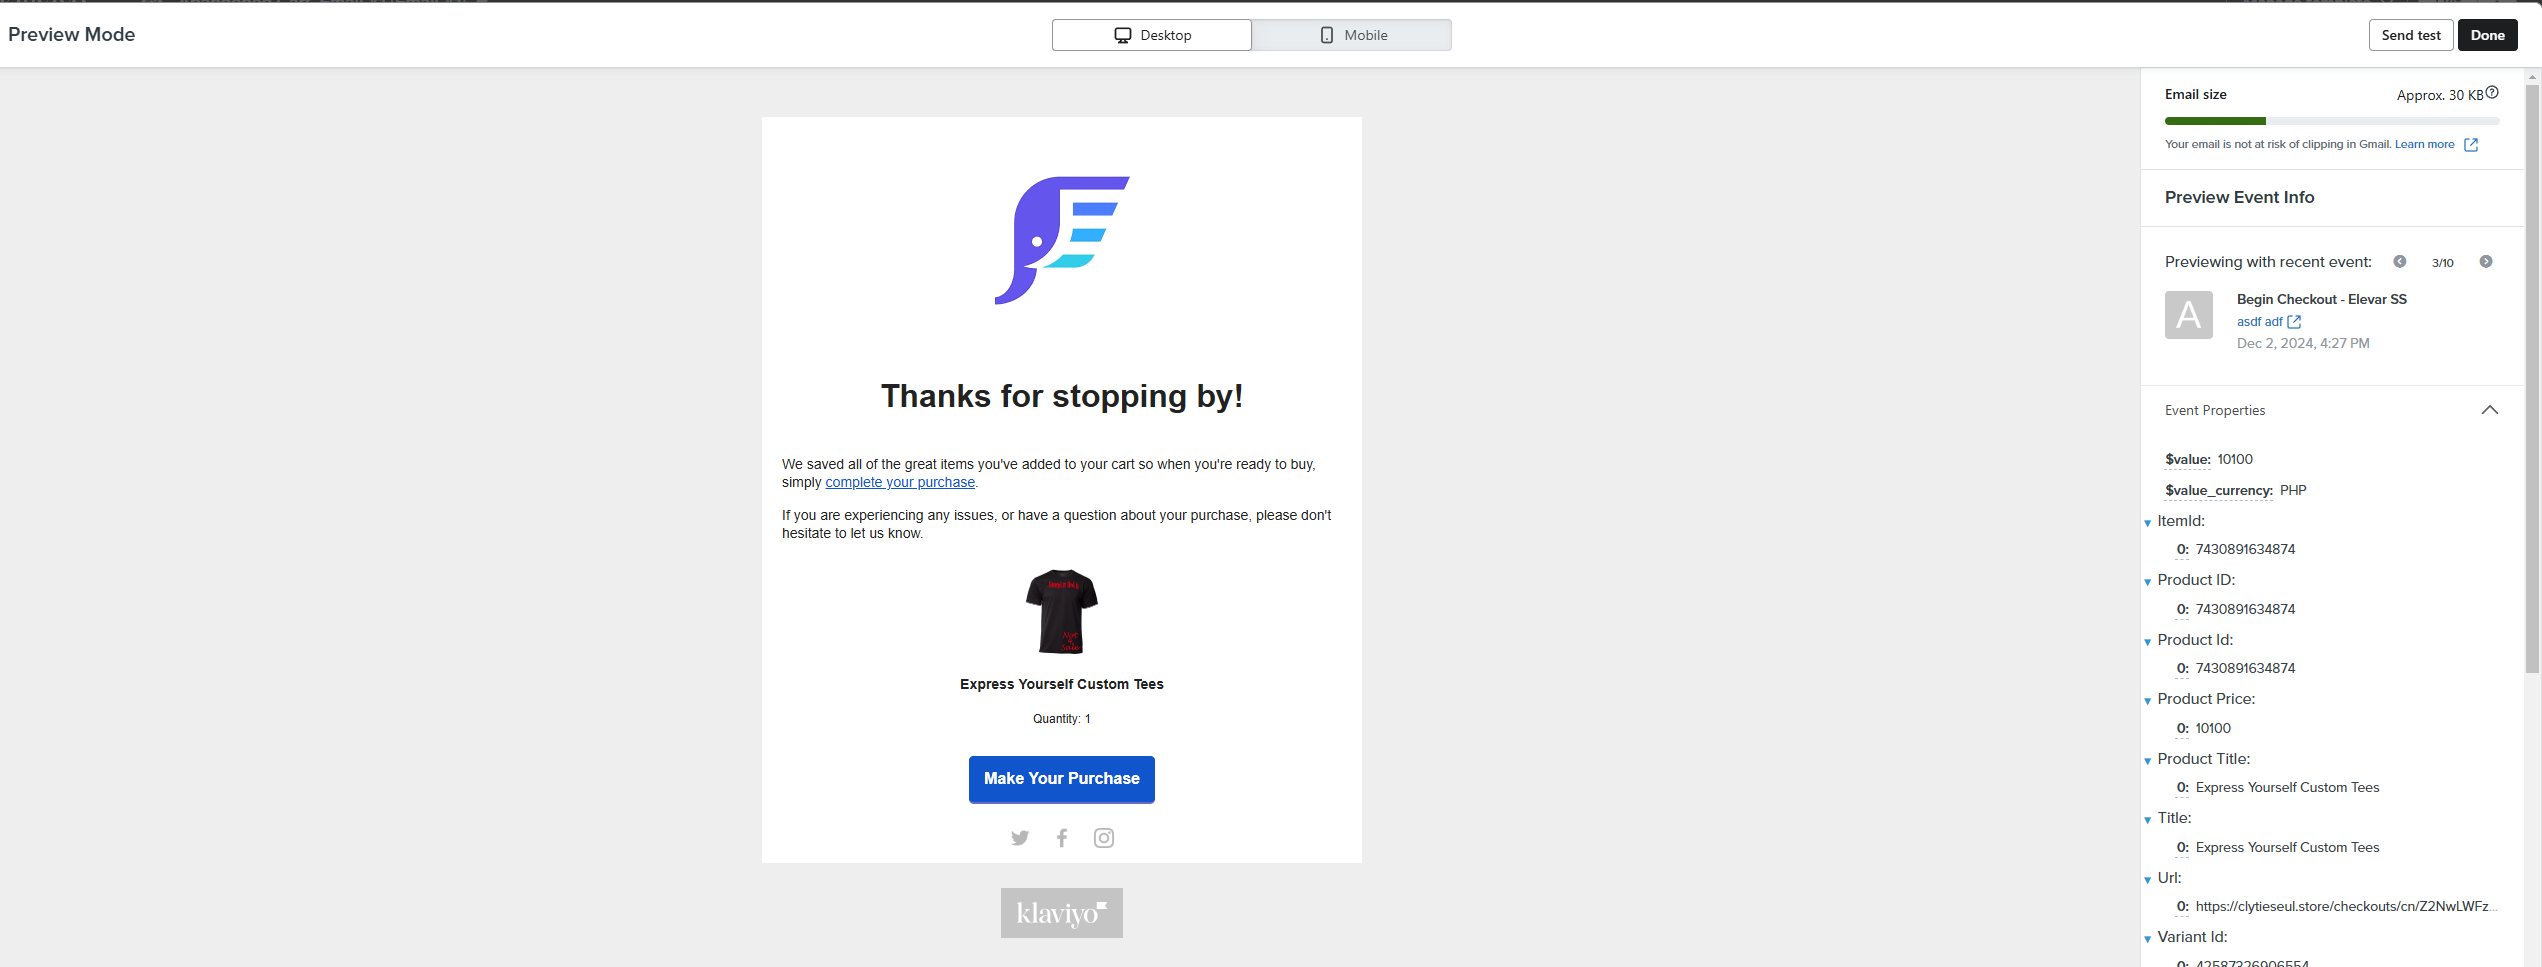
Figure 4
Option 2: Adding an HTML Block
Add an HTML Block:
- While you are editing your email template, use the left-hand navigation menu and navigate to the section of the menu titled "Blocks".
- Select the "HTML" block and add it to your template.
- (See Figure 5)

Figure 5
Enter HTML Code:
- An additional side navigation menu will appear. Use the text box to enter the following code:
-
{% if event.items|length == 1 %}
  <!-- Center layout for 1 product -->
  <div style="text-align: center; margin-bottom: 20px;">
    {% for item in event.items %}
      <img src="{{ item.imageURL }}" alt="{{ item.productTitle }}" style="width: 150px; margin: 10px;" />
      <p style="margin: 5px 0; font-size: 14px; font-weight: bold;">{{ item.productTitle }}</p>
      <p style="margin: 0; font-size: 12px;">Quantity: {{ item.quantity }}</p>
    {% endfor %}
  </div>
{% else %}
  <!-- Two-column layout for 2 or more products -->
  <div style="display: flex; flex-wrap: wrap; justify-content: space-between;">
    {% for item in event.items %}
      <div style="width: 48%; text-align: center; margin-bottom: 20px;">
        <img src="{{ item.imageURL }}" alt="{{ item.productTitle }}" style="width: 150px; margin: 10px;" />
        <p style="margin: 5px 0; font-size: 14px; font-weight: bold;">{{ item.productTitle }}</p>
        <p style="margin: 0; font-size: 12px;">Quantity: {{ item.quantity }}</p>
      </div>
    {% endfor %}
  </div>
{% endif %}
-
- Once you have entered the HTML code, you will see this change reflect in your template.
- (See Figure 6)
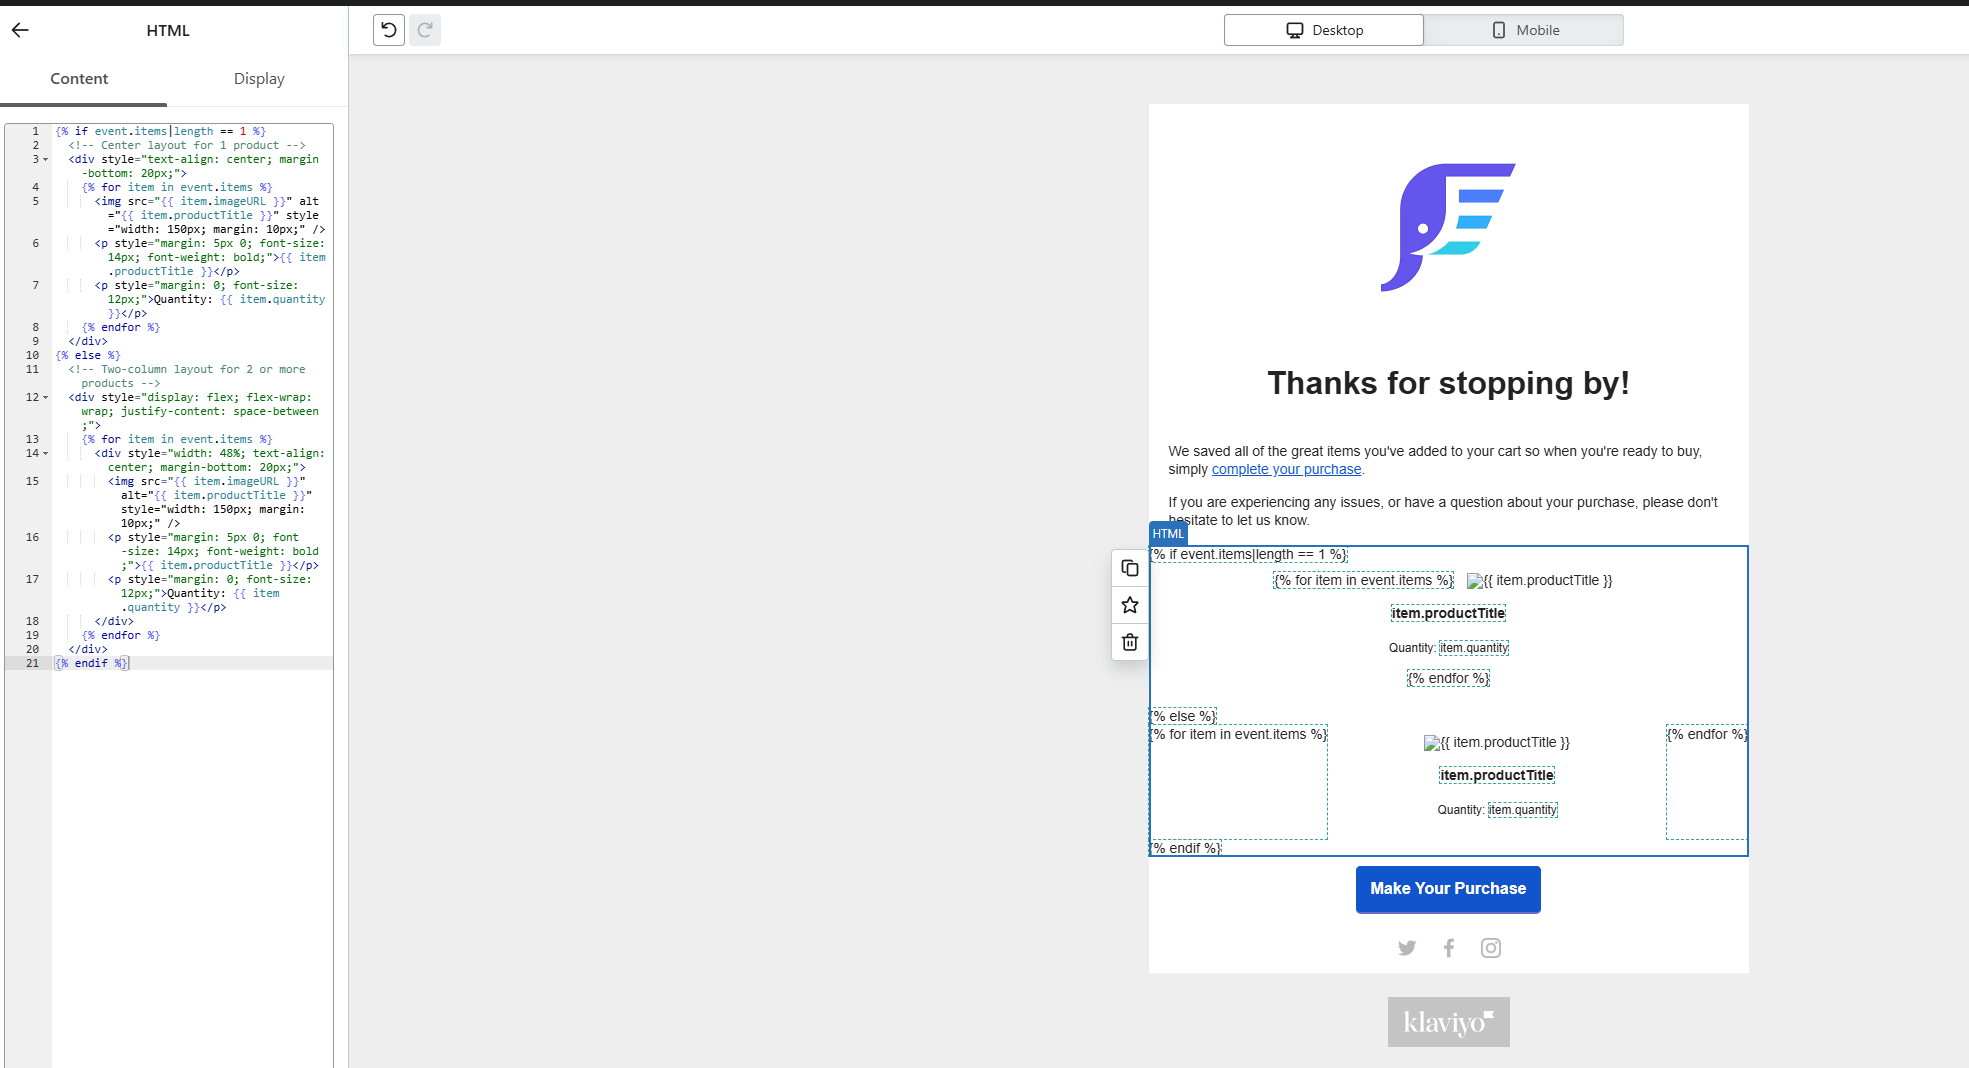
Figure 6
Optional: Customize the TemplateThe HTML code above is fully customizable. You can adjust styles (such as font size, margins, and images) to match your email’s design.
Multiple Products Preview Example:
- When there are multiple items in the cart, the products will be displayed in a two-column layout.
- (See Figure 7)
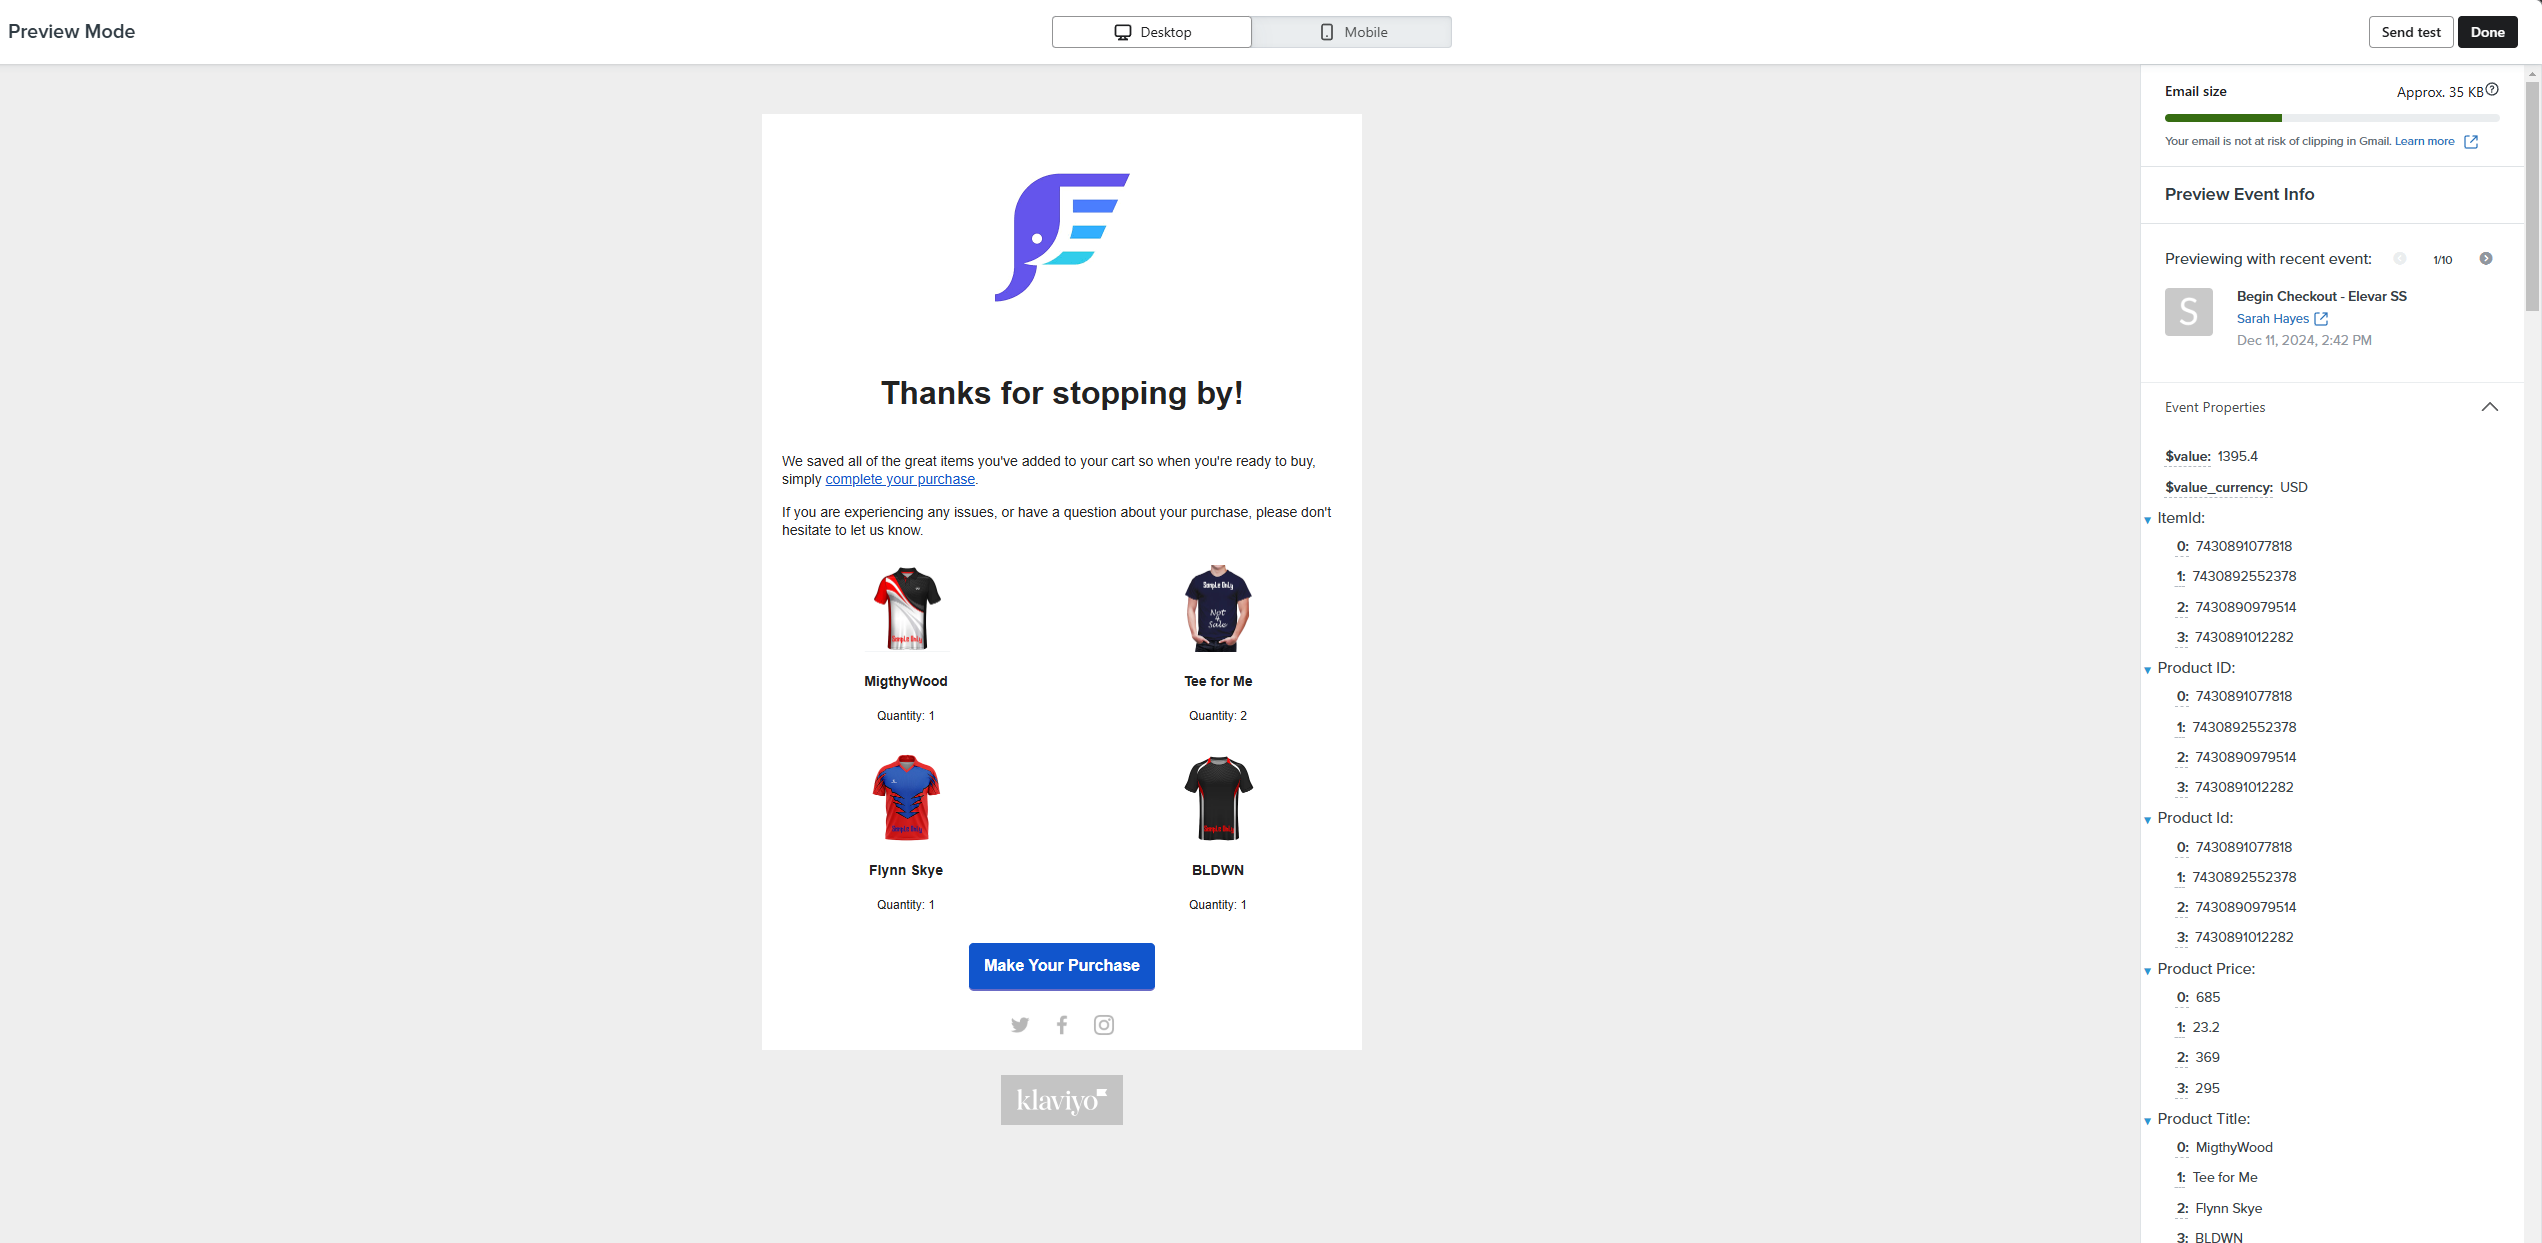
Figure 7
Single Product Preview Example:
- If there is only one product in the cart, the product will be displayed centrally.
- (See Figure 8)
Figure 8
(Optional): Add a Dynamic "Checkout" Button
To enable customers to easily complete their purchase, you can add a dynamic checkout button that links to the checkout page, pre-populated with the products in their cart.
Add an Button Block:
- While you are editing your email template, use the left-hand navigation menu and navigate to the section of the menu titled "Blocks".
- Select the "Button" block and add it to your template.
- (See Figure 9)

Figure 9
Add Dynamic Checkout Button Code:
- An additional side navigation menu will appear. Navigate to the section of the menu titled "Button Text" and use the text box labeled "Link Address" to enter the following code:
-
{{ organization.url }}/cart/{% for item in event.items %}{{ item.variantId }}:{{ item.quantity }}{% if not forloop.last %},{% endif %}{% endfor %} - (See Figure 10)
-

Figure 10
Note: This will work most of the time for cross-device checkout item recovery!
Dynamic "Checkout" Button Preview Example: (See Figure 11)
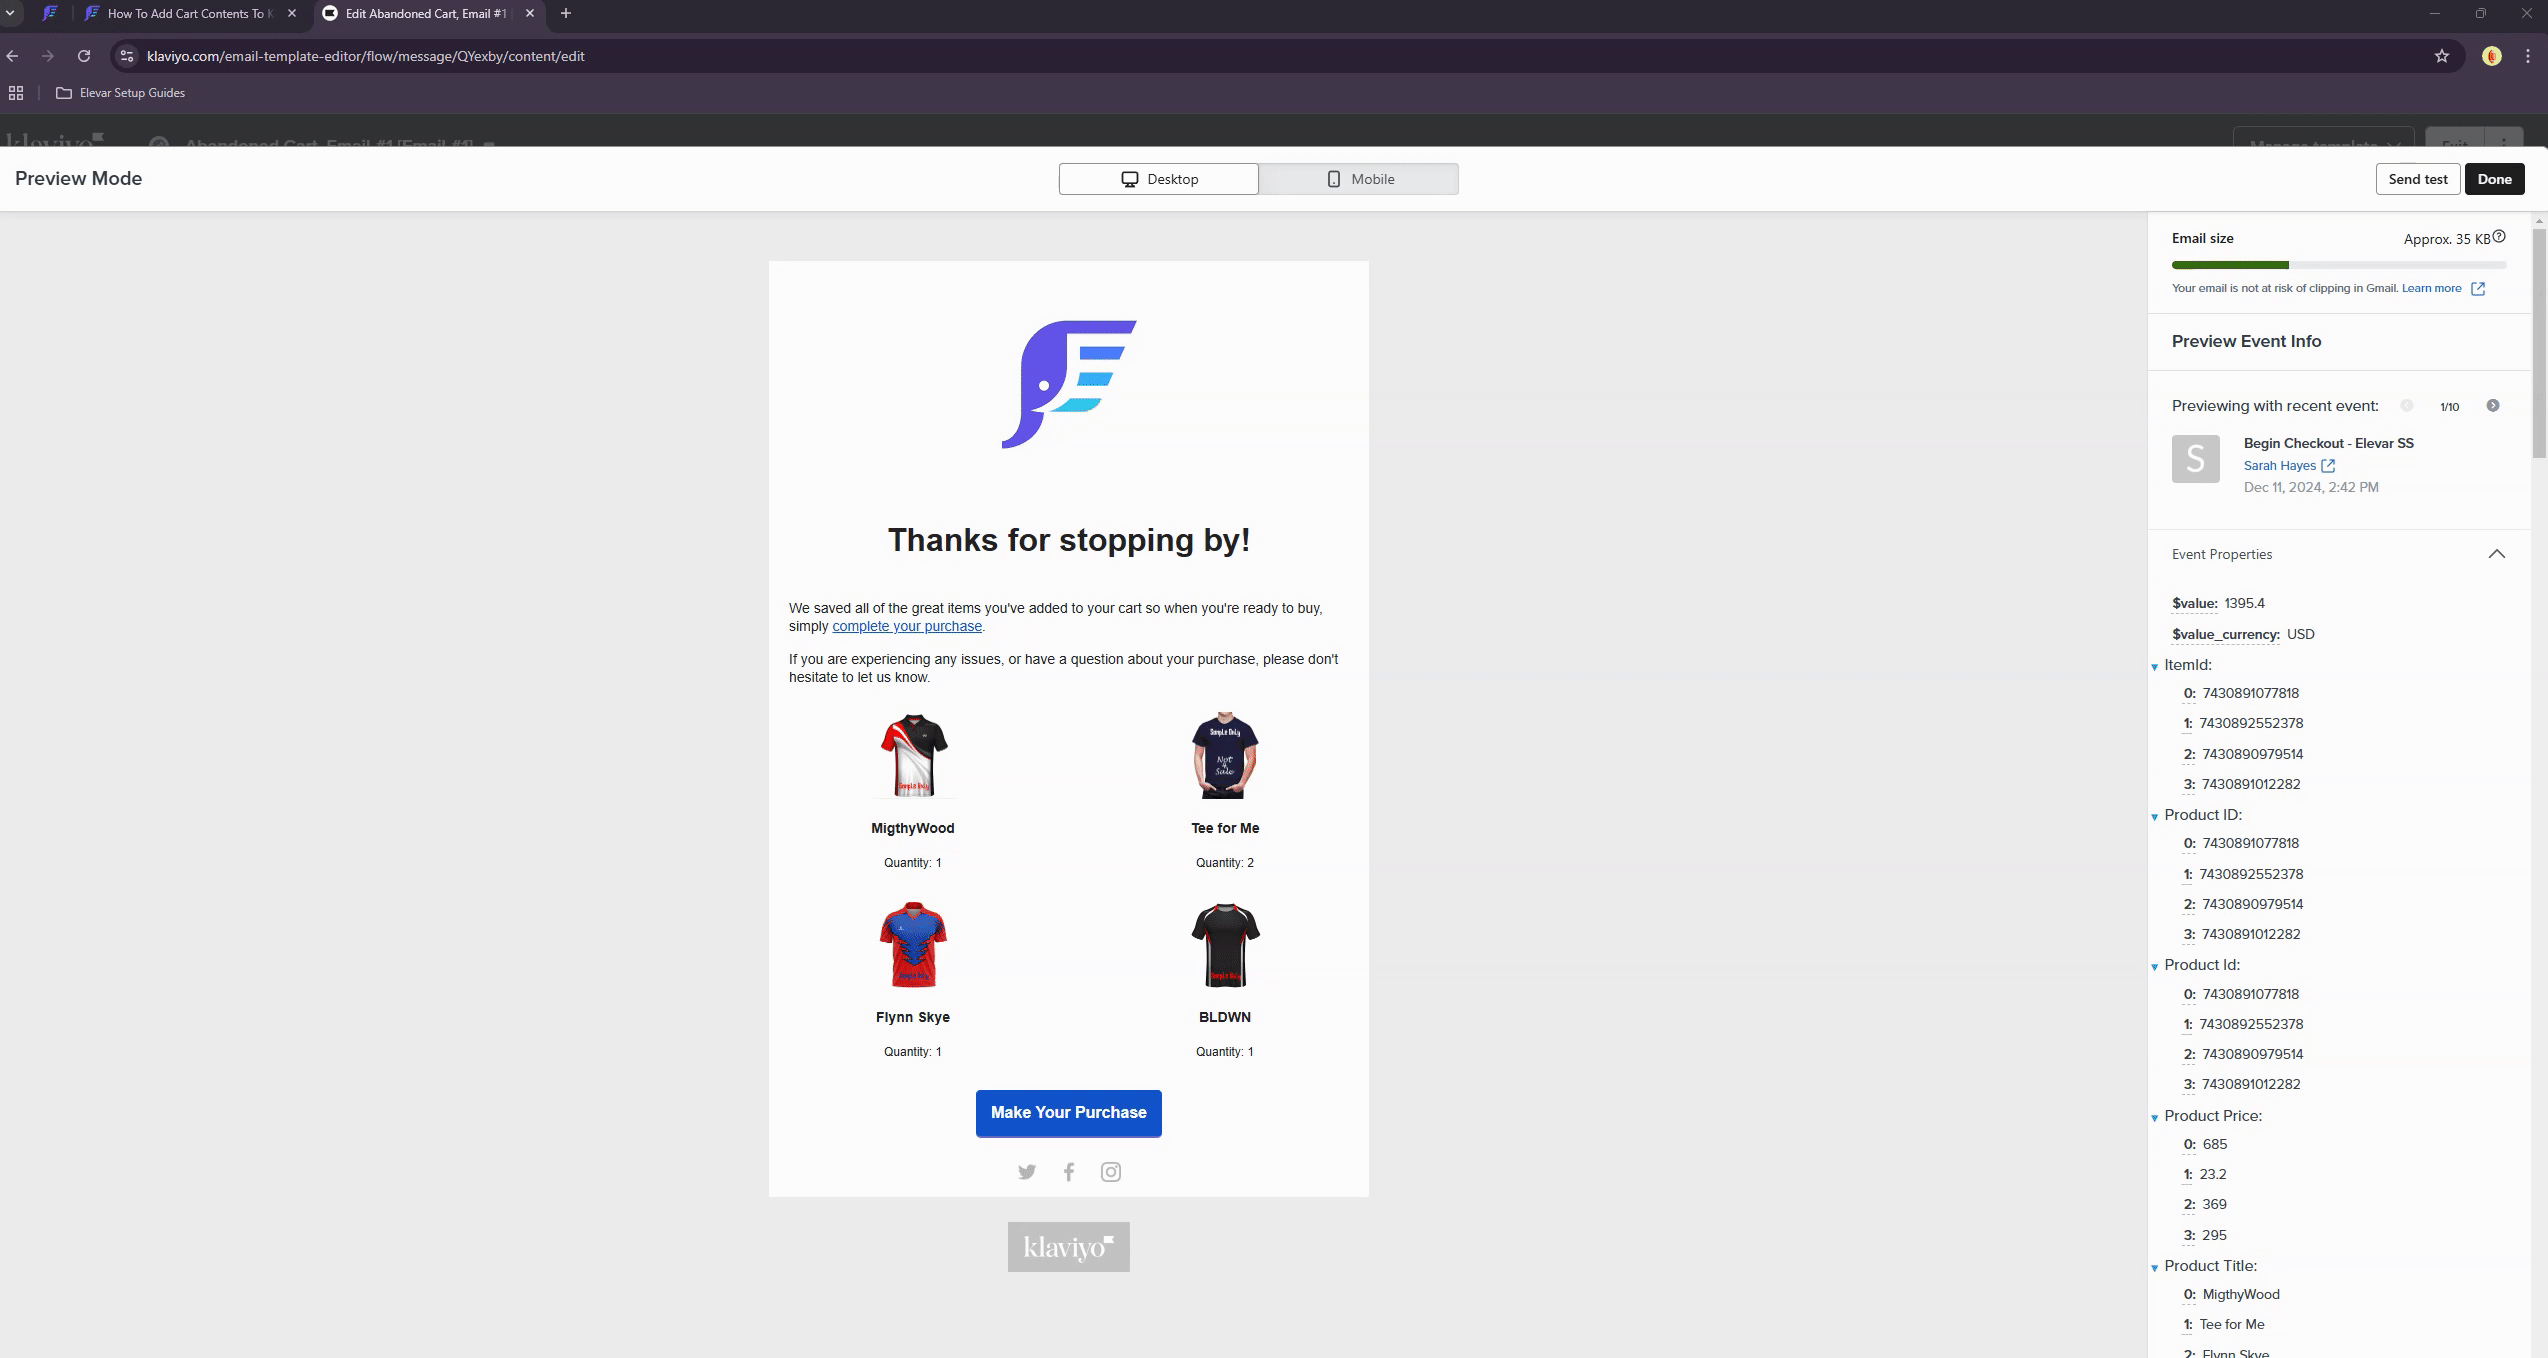
Figure 11
Updated 7 months ago
Did this page help you?