How to Implement X (Twitter) Pixel/Web Tracking via Google Tag Manager
How to Implement X (Twitter) Pixel/Web Tracking via Google Tag Manager
Overview
Follow this guide to learn how to set up X (Twitter) Pixel/Web tracking via Google Tag Manager.
Prerequisites:
- Ensure that you have install Elevar's Data Layer and Shopify Source on your store. Follow this guide to learn how to implement the Shopify Source.
Download the Pre-Built X (Twitter) Tags
Locate X (Twitter) Container:
- Begin on the homepage of your Elevar app. Use the left-hand navigation menu and click on the tab titled "Pre-Build Tags".
- Use the search function to locate and click on the X (Twitter) Pixel Container.
- (See Figure 1)

Figure 1
Download X (Twitter) Container:
- Once in the X (Twitter) Container, navigate to the box titled "Download Container".
- Click on the button labeled "Download Container".
- (See Figure 2)

Figure 2
Import the Pre-Built X (Twitter) Tags into GTM
Import Container:
- Log in to your Google Tag Manager Account.
- Select your GTM Web Container.
- Click on the "Admin" button located in the upper menu bar.
- Use the right-hand menu under the "Container" section and click on the tab labeled "Import Container".
- (See Figure 3)
- Use the right-hand menu under the "Container" section and click on the tab labeled "Import Container".

Figure 3
Import Container Information:
- Under the "Select file to import" section, click on the "Select File" button and choose the X (Twitter) Container that was previously downloaded.
- Under the "Choose workplace" section, either create a new workplace titled "X (Twitter) Tracking" or select your "Default Tracking".
- Next be sure to select the "Merge" option first, then the "Overwrite conflicting tags, triggers, and variables" option second.
- Once you have completed filling out the necessary details for this container, click on the "Confirm" button located at the bottom of the page.
- (See Figure 4)

Figure 4
Configure Your Events
Twitter gives you two options for conversion tracking:
- URL-Based Events
- Single Event Website Tags
URL-Based Events:
- If you are going to use the URL-Based Events, then you only need to have the "Twitter - Base Pixel" tag in Google Tag Manager. You can delete the Purchase and Add To Cart tag.

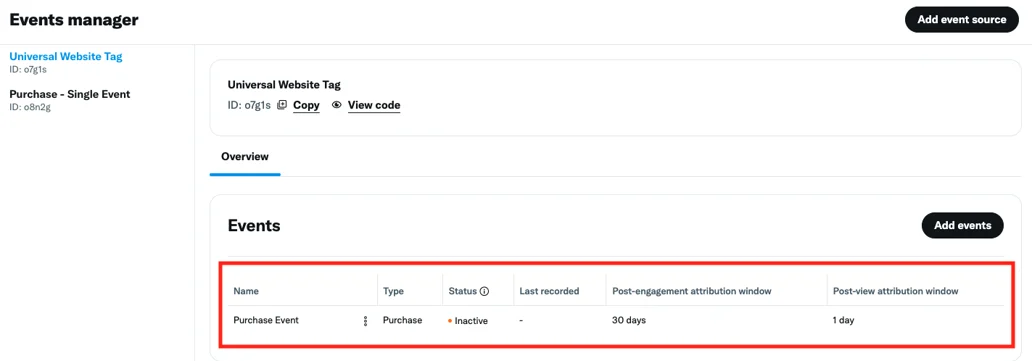
Then, in Twitter's Event Manager, click on the "Add events" button.
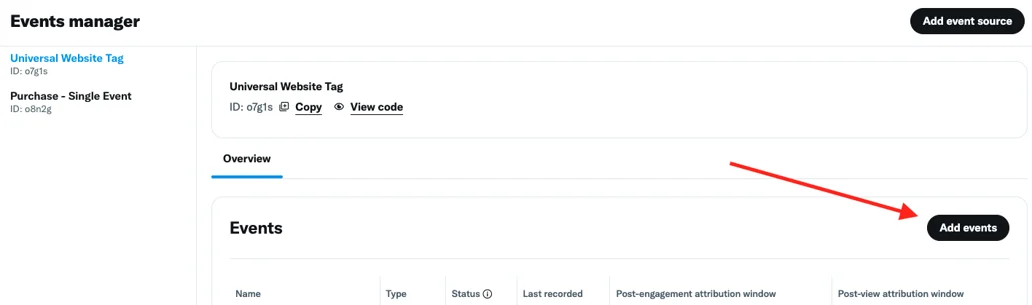
- Configure your event. For example, if you're configuring a purchase event, it may look like the following:

- Once you save your event, it will appear in the Events section of your Universal Website Tag. Add as many URL-based events as you need.
Single Event Website Tags (X (Twitter) Recommended)
- Twitter also gives you the option to use Single Event Website Tags. This can be helpful for events like Add to Cart where a URL rule might not apply.
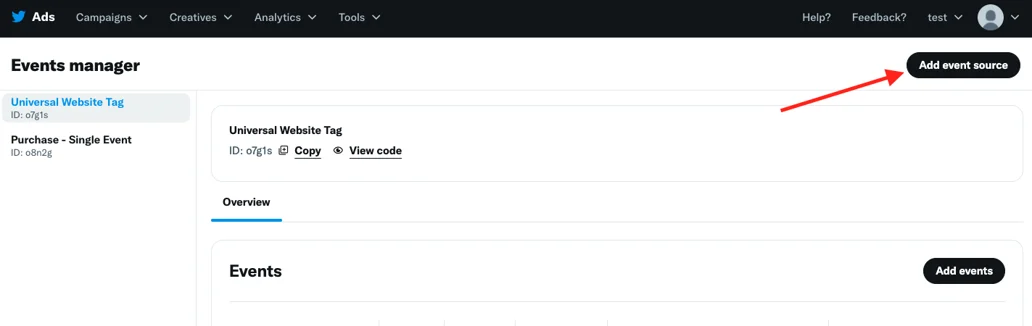
- To create a new Single Event Website Tag, select Add Event Source in Events Manager:
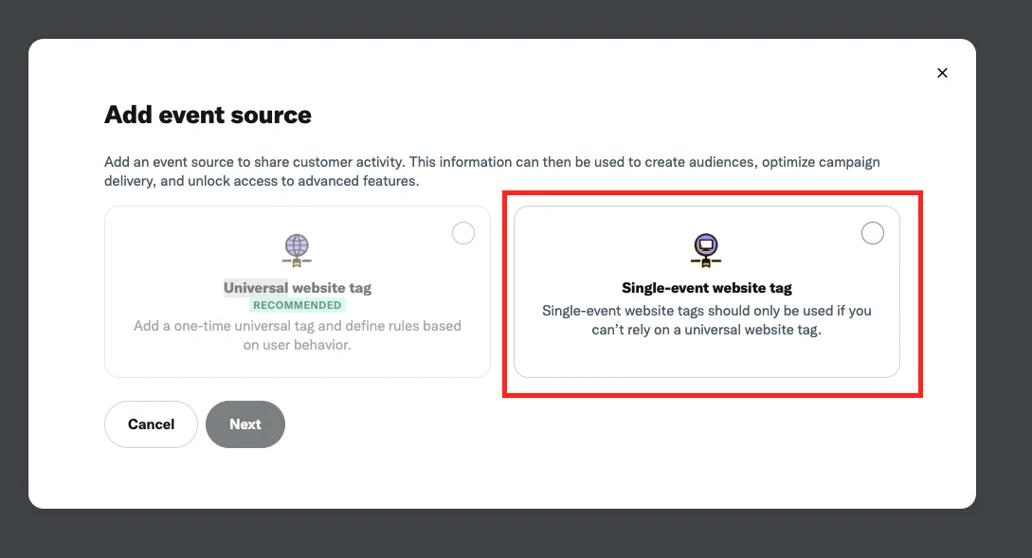
- Choose the "Single Event Website Tag" box.
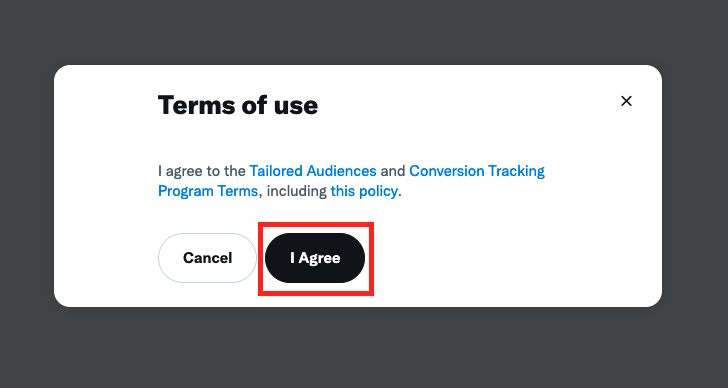
- Agree to Twitter's Terms of Use.
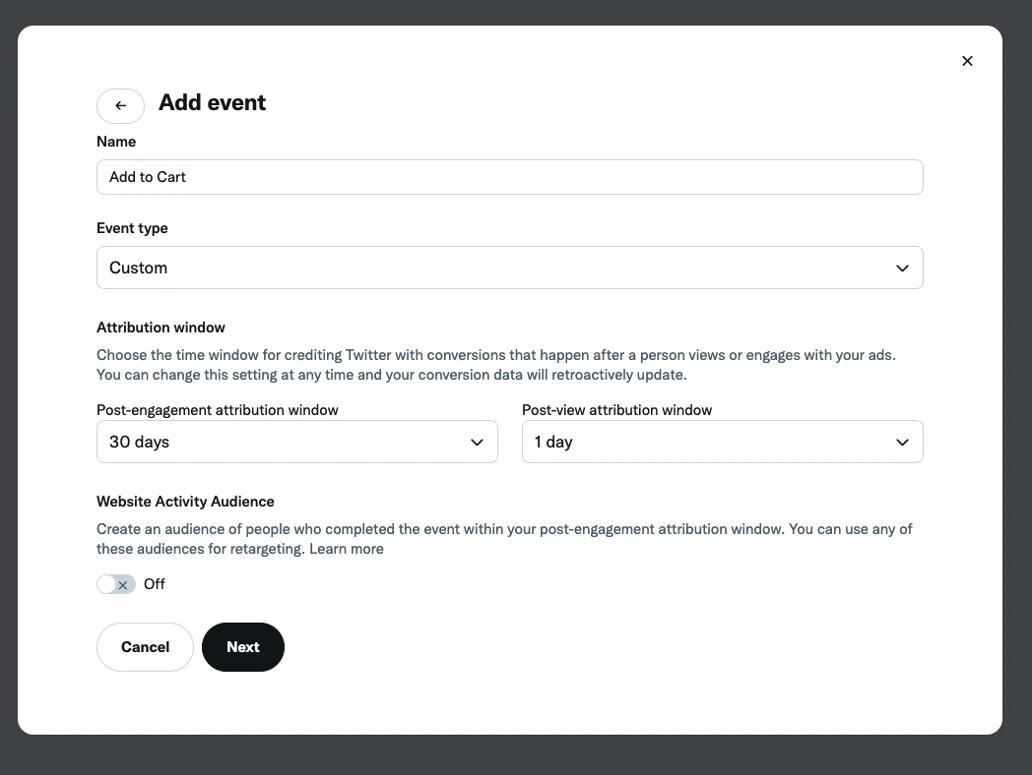
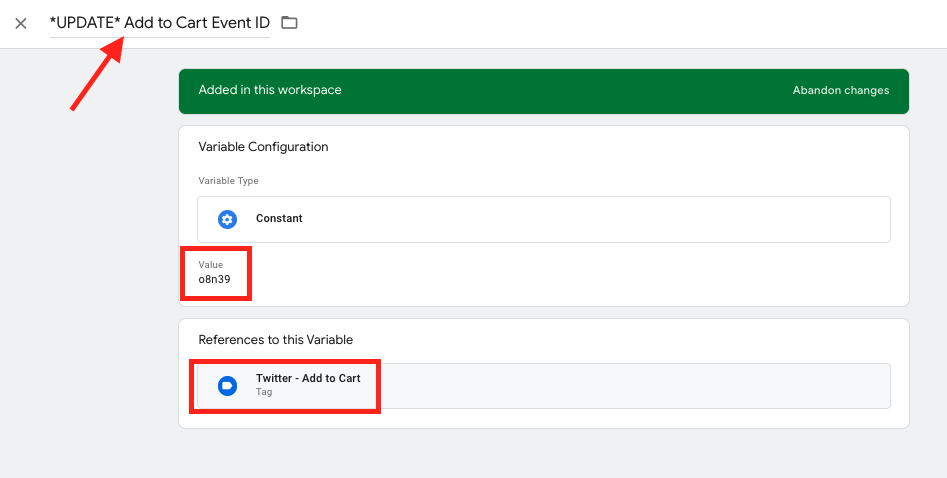
- Configure your event details. For example, if you are creating an Add to Cart event, it may look like the below:
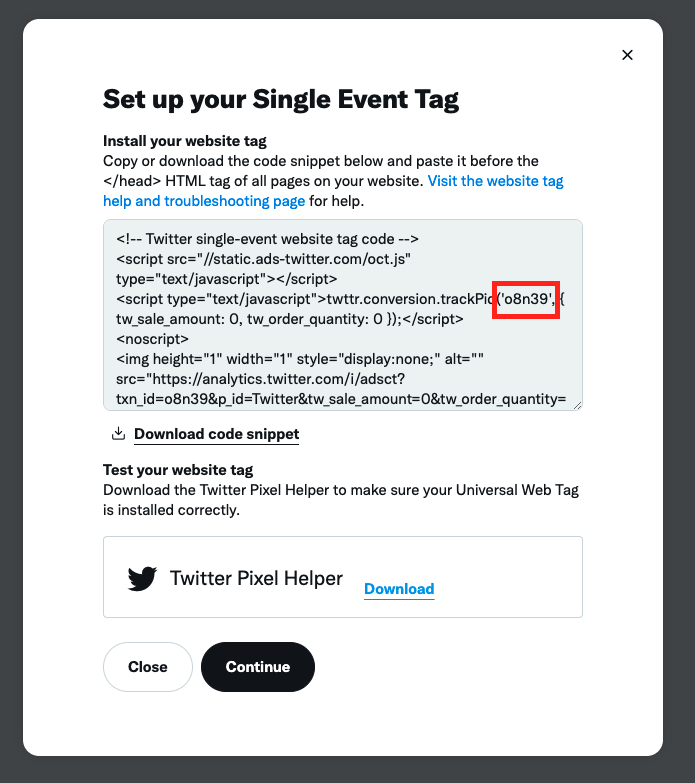
- You will be shown an event code. You can grab your unique event ID in this code:
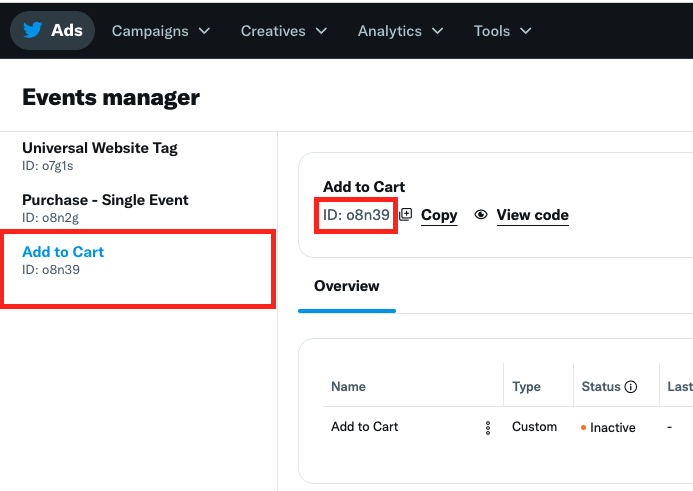
- You will also see this Event appear in your Events Manager with the Tag ID
- Put this Tag ID in your Event Specific GTM Tag. For example, since I made an Add to Cart Event, I'm going to put the Tag ID in the variable UPDATE Add to Cart Event ID.
[Optional] QA the New Tags with Google Tag Manager's Preview Mode
- Follow our guide to QA your tags in Google Tag Manager (GTM) preview mode.
Publish the Pre-Built Tags
- After importing the X (Twitter) tag container, you will be brought back to the Google Tag Manager homepage.
- In your Tracking workspace, click on the "Submit" button in the upper right hand corner of the page.
- An additional confirmation page will appear. Be sure to click on the "Publish" button in the upper right-hand corner of the page.
- (See Figure 5)

Figure 5
Updated 6 months ago
Did this page help you?