How to Change Product IDs from SKU to Shopify IDs to Match Merchant Center Products
This article shows how to update the default product IDs contained in the GTM tags so your tag hits from your website match the IDs for your products in Merchant Center.
Overview
Follow this guide to learn how to change product IDs from SKU to Shopify IDs to match merchant center products. This article shows how to update the default product IDs contained in the GTM tags so your tag hits from your website match the IDs for your products in Merchant Center.
When installing the data layer we make four variables related to product IDs available for your use:
- Variant SKUs
- Product IDs
- Variant IDs
- Shopify_us_IDs
By default, all of our tags in our pre-built container are set to SKU as the Item IDs. So if your merchant center IDs are using SKUs then you don't need to do anything further. But if you need to change the tags from sending SKU to Shopify product IDs then you will need to update a few things in GTM.
Google Merchant Center product IDs need to match the item ID that we are sending with the remarketing tags. When these don't match you'll usually see errors within your AdWords audience sources.
This article if for version 2.0 and higher of our Data Layer
How to Find Your Merchant Center Product ID
Locate Google Merchant Center Product ID:
- Begin on your Google Merchant Center homepage and use the left-hand menu to click on the "Products" tab.
- An additional drop-down menu will appear, locate and click on the "All Products" tab.
- Navigate to the "ID" column and here you will find the Product ID's.
- (See Figure 1)
- Navigate to the "ID" column and here you will find the Product ID's.
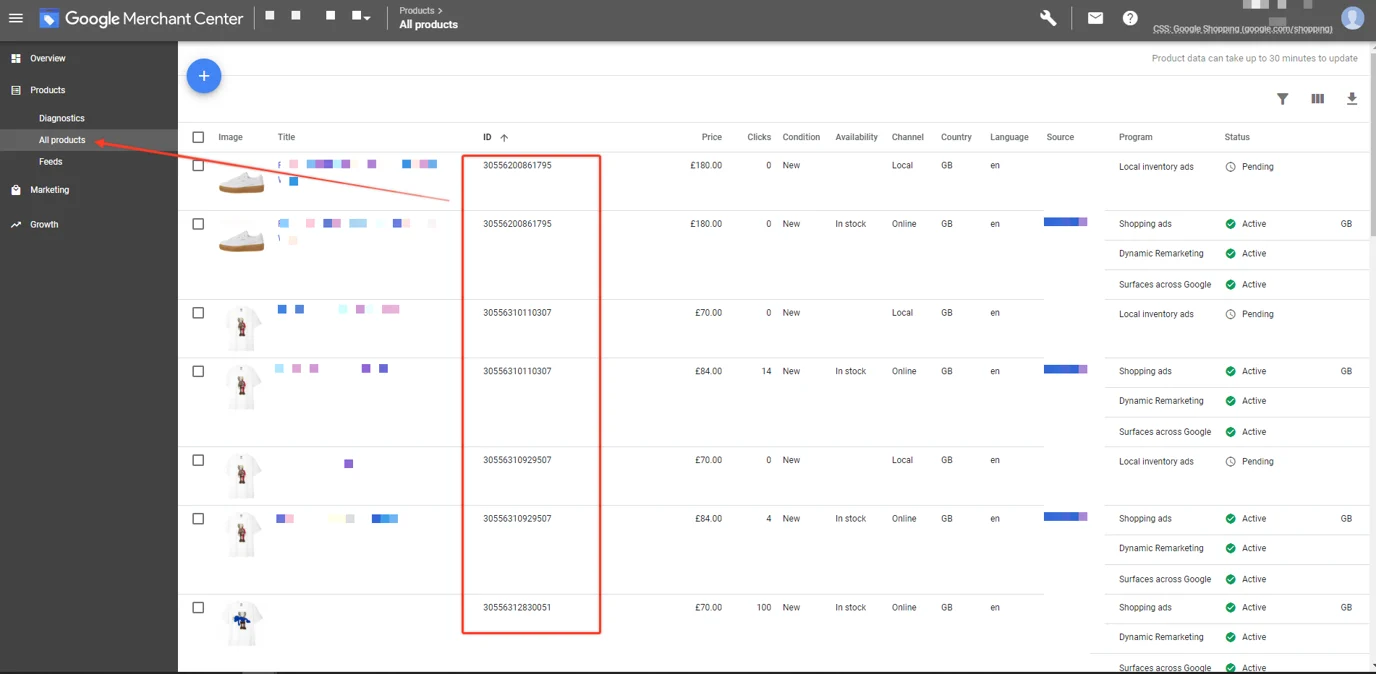 Figure 1
- Here is an example tag that you will need to match the same Item ID up to in GTM.
- (See Figure 2)
- Once you have your ID format then move to the next step..
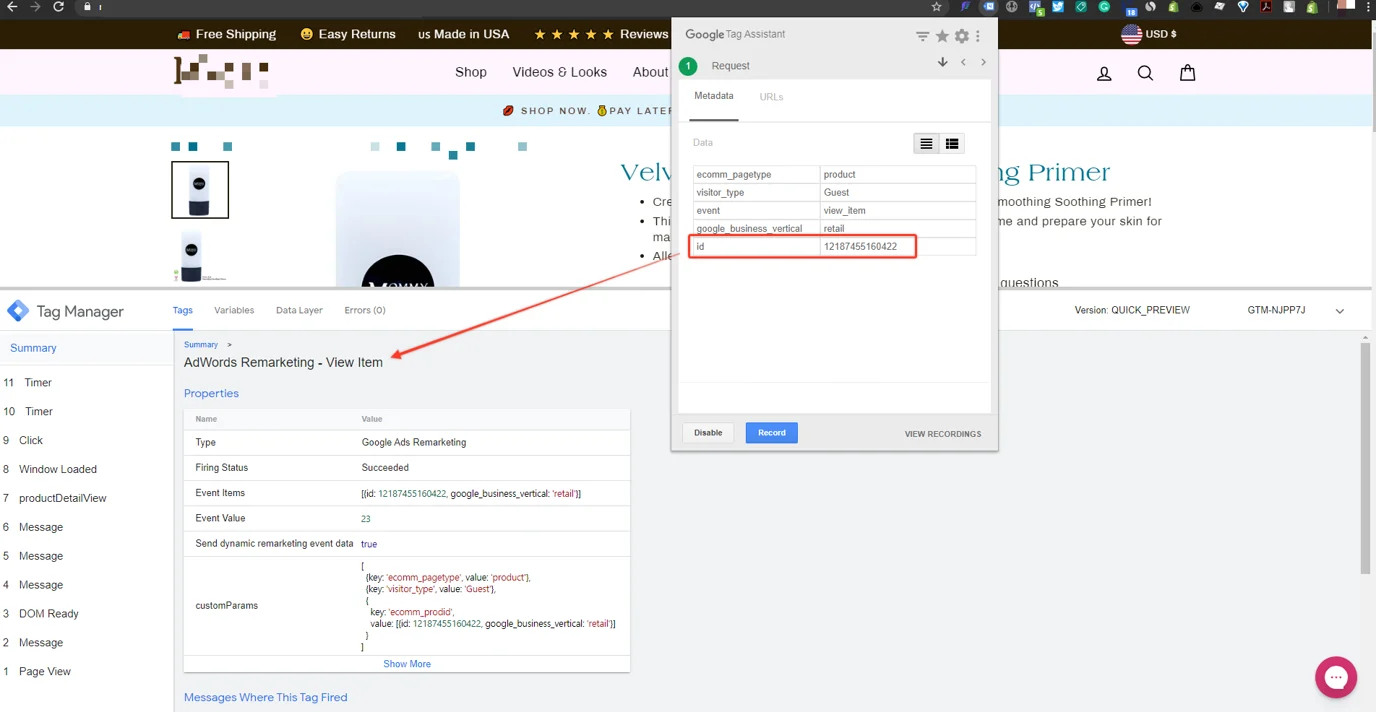 Figure 2
How to Change Item ID (aka ecomm_prodid) From SKU to Product ID in GTM
If your Google Merchant Account is using Shopify product IDs instead of variant SKUs then you will need to update 5 variablesin Google Tag Manager.
What needs to be updated:
- js - Google Ads - Product View - SKU
- js - Google Ads - Collection Page - SKU
- js - Google Ads - Add to Cart - SKU
- js - Google Ads - Cart Page - SKU
- js - Google Ads - Purchase - SKU
From
'id': product.idto this:
'id': product.product_idProduct View:
- Navigate to Variables > js - Google Ads - Product View - SKU and update out the following areas circled in red to match the product ID variables
- (See Figure 3)
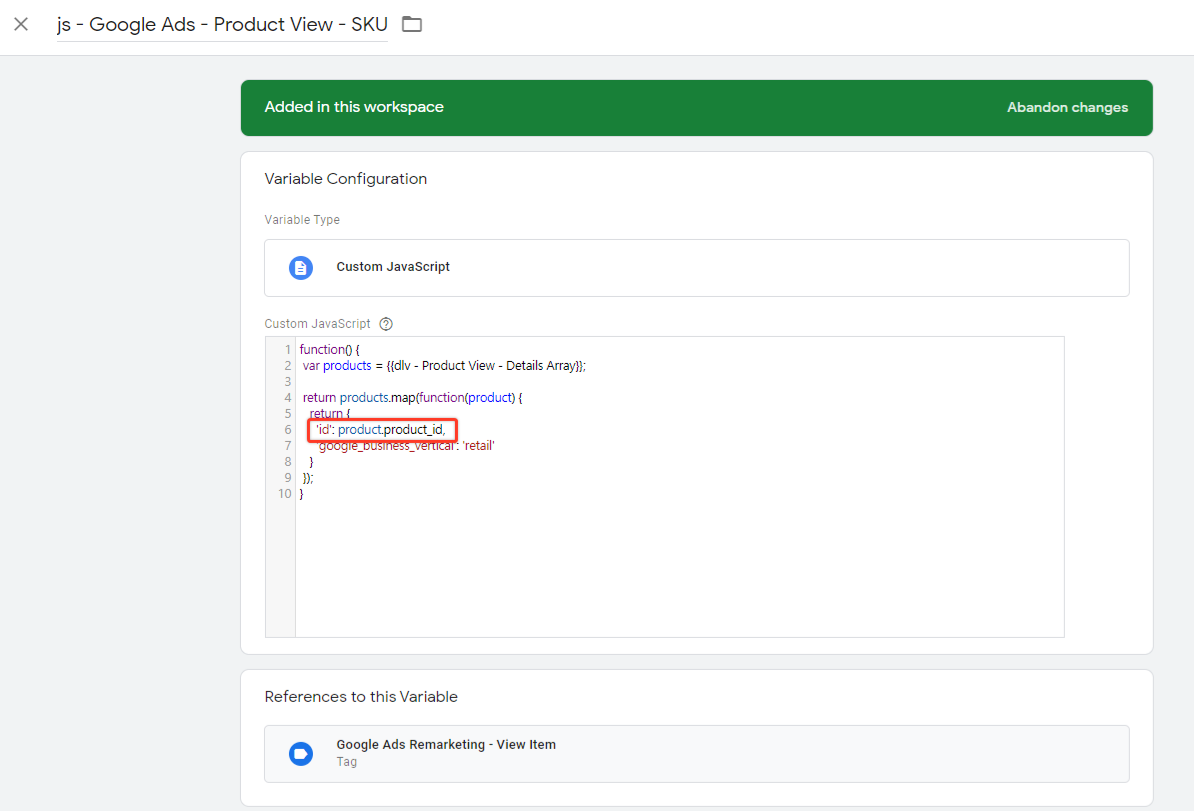 Figure 3
Collection Page:
- Here is what your View Item List tag should look like.
- (See Figure 4)
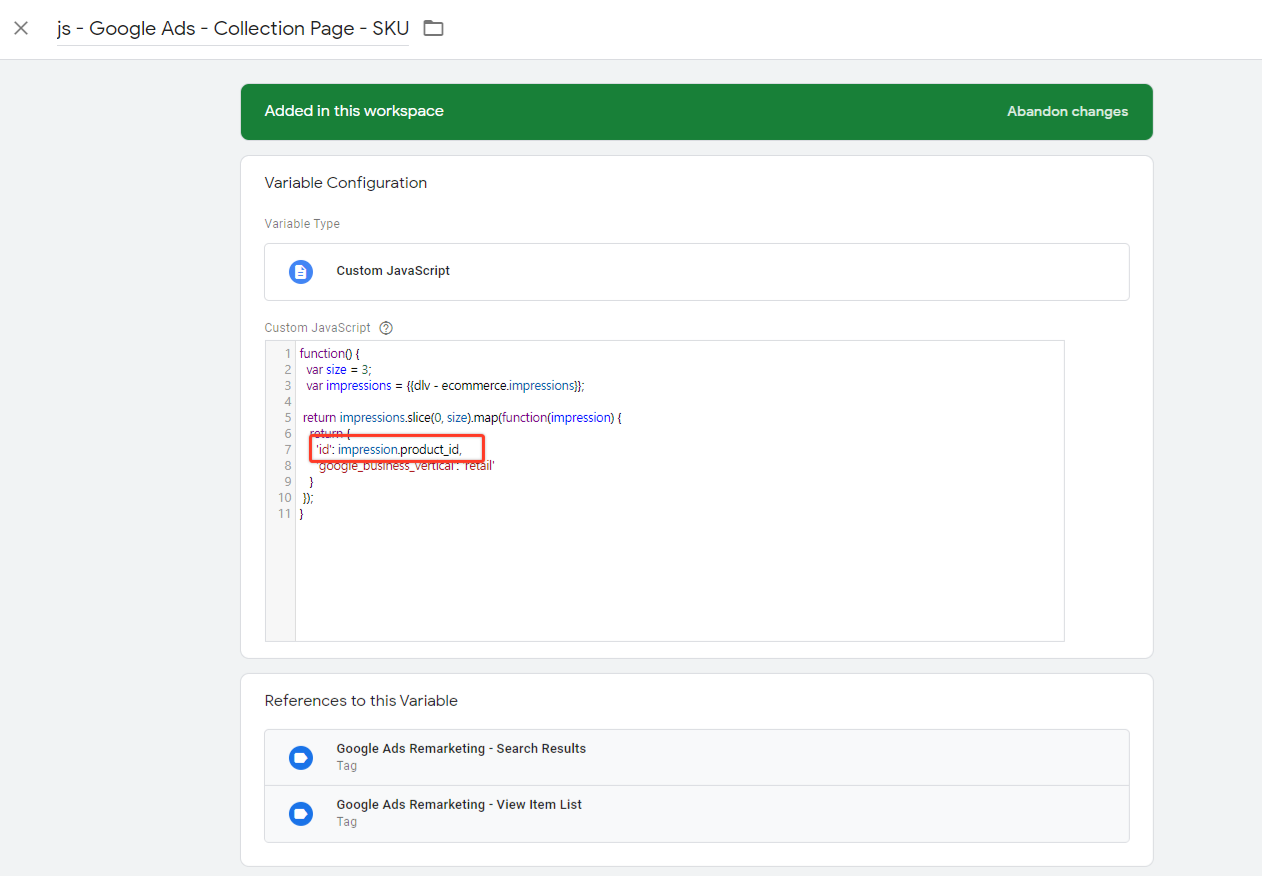 Figure 4
Add to Cart:
- Here is what your Add to Cart tag should look like.
- (See Figure 5)
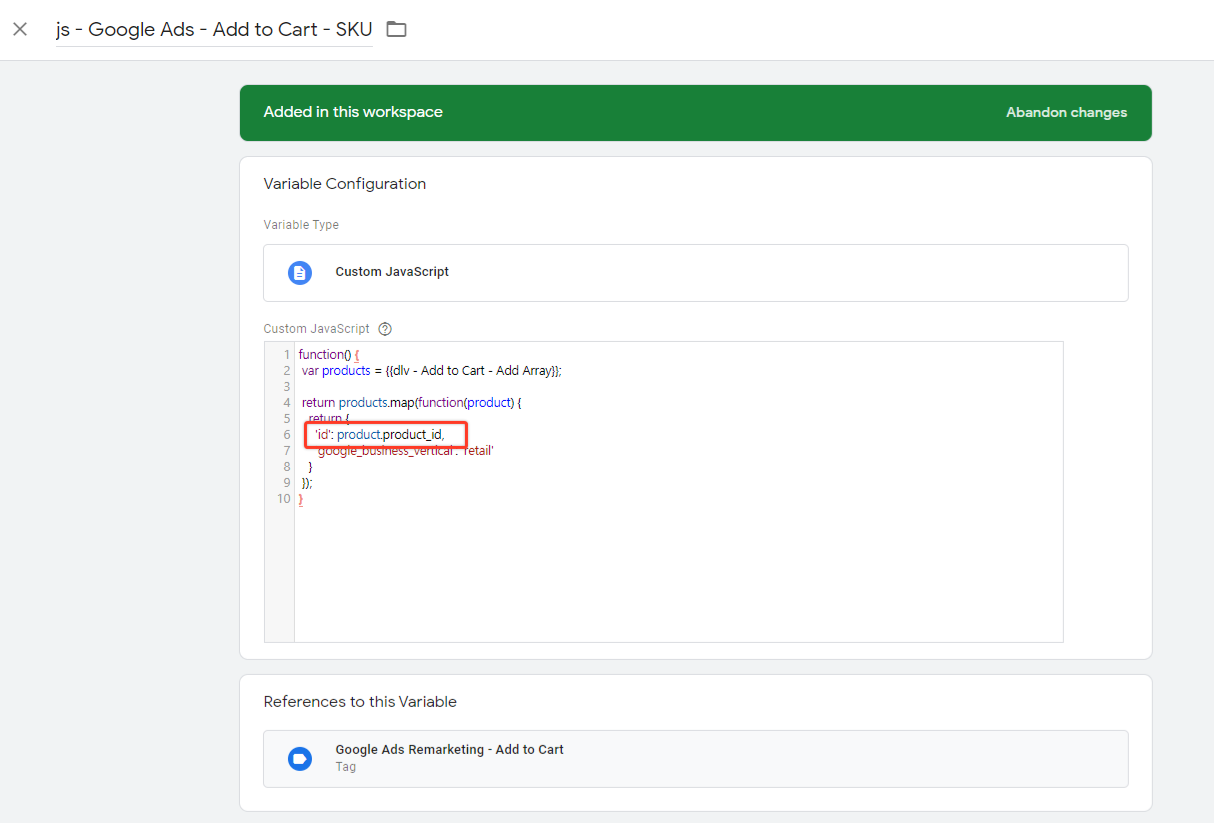 Figure 5
Cart Page:
- Here is what your Cart Tag should look like.
- (See Figure 6)
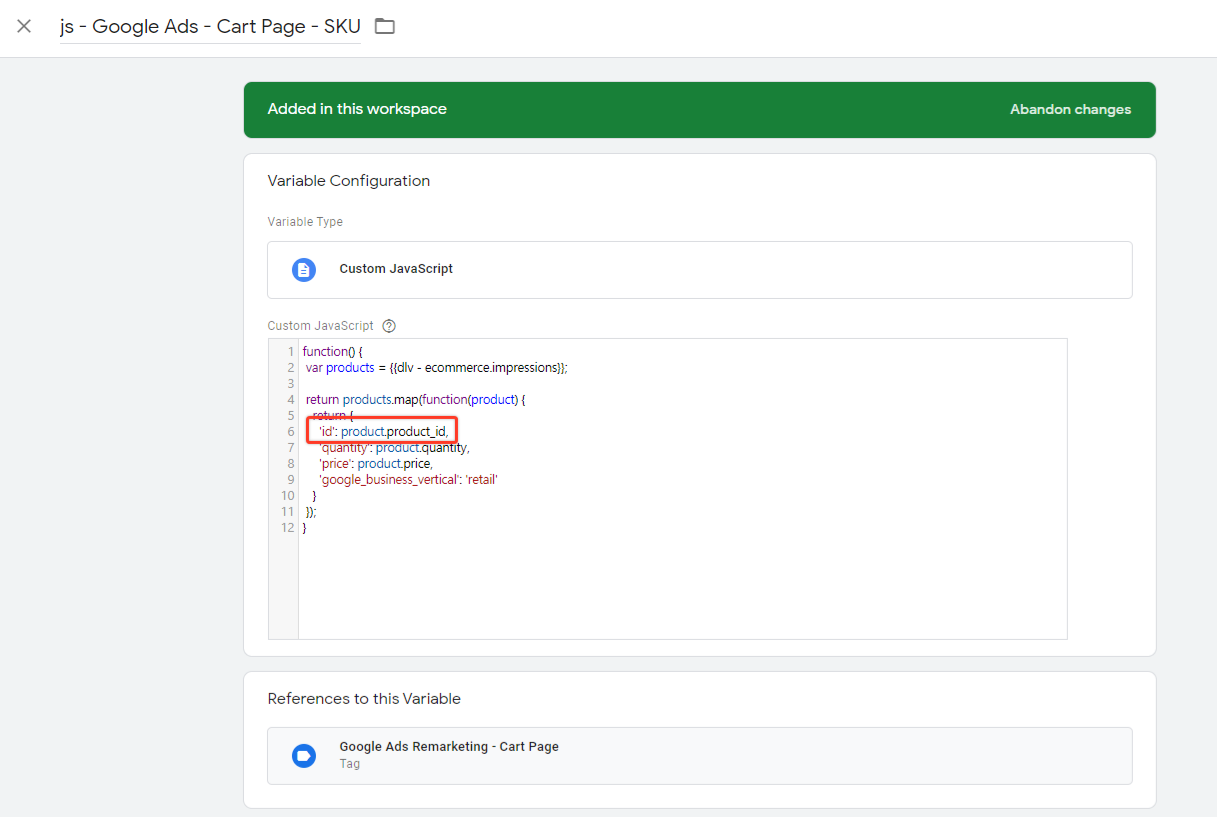 Figure 6
Purchase:
- Finally here is what your purchase tag should look like.
- (See Figure 7)
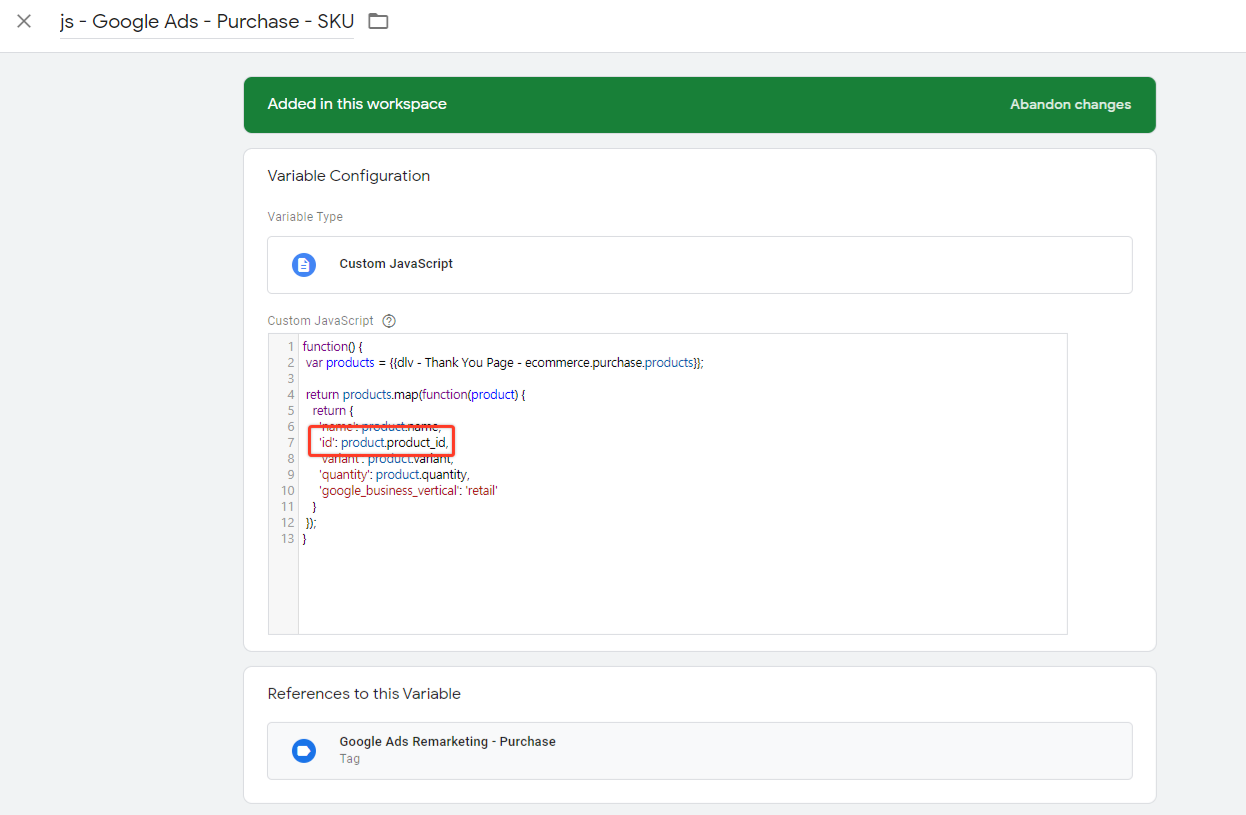 Figure 7
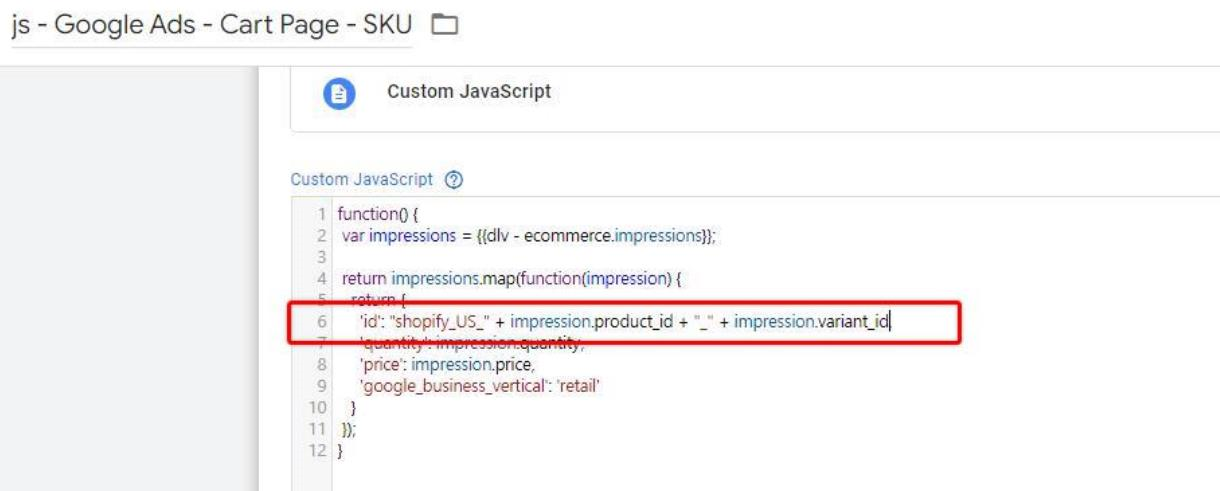
Note: If you'd like to adjust from variant SKU to variant id, or shopifyus type of id then use the examples below to update the row for IDs shown above (you can also see these instructions in the note section)
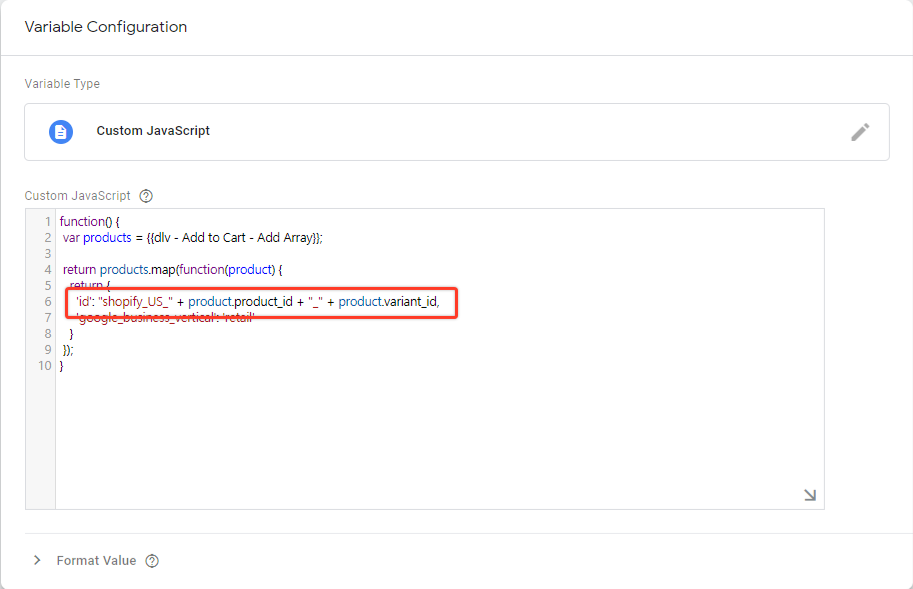
Variant Ids:
From this:
'id': product.variant_id,To this:
'id': "shopify_US_" + product.product_id + "_" + product.variant_id,Shopify_us_IDs:
Here's an example of how to use the Shopify_US_IDs:
'id': "shopify_US_" + product.product_id + "_" + product.variant_id,For the following variables:
- js - Google Ads - Add to Cart - SKU
- js - Google Ads - Product View - SKU
- js - Google Ads - Purchase - SKU
For the following variables:
- js - Google Ads - Cart Page - SKU
- js - Google Ads - Collection Page - SKU
Note:
- When using other geolocation (e.g., NI, IT, CA, PH, etc,) just replace the "US" in the line.
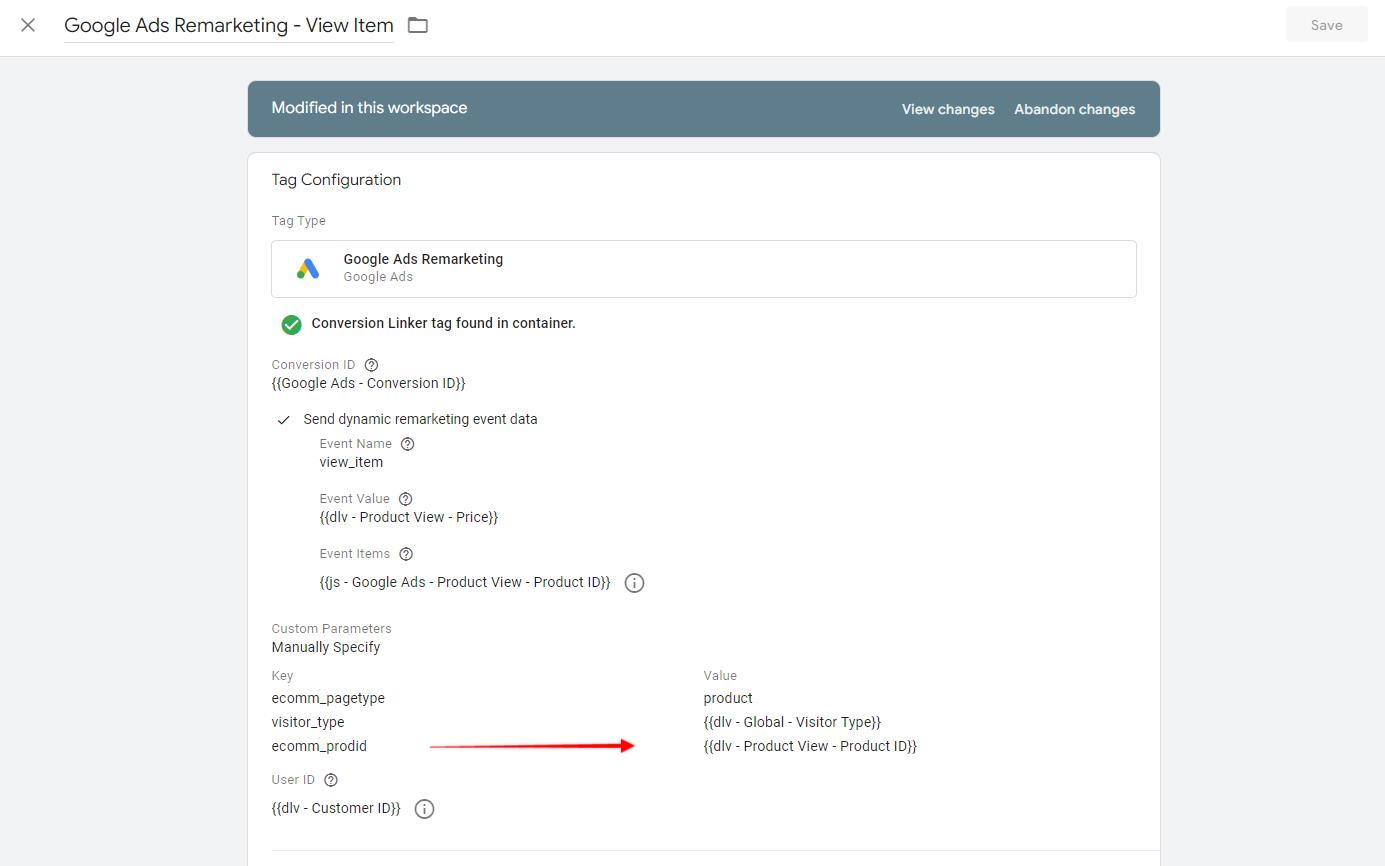
Ecomm_prodid:
For View Item and AddToCart tags, we are sending the ecomm_prodid parameter. Thus, you'll have to update this as well if you are not using the default SKU ID
Example: Product ID
View Item
AddToCart

So the variables are:
- Product ID:
- View Item: dlv - Product View - Product ID
- AddToCart: dlv - Add to Cart - Product ID
- Variant ID:
- View Item: dlv - Product View - Variant ID
- AddToCart: dlv - Add to Cart - Variant ID
- Shopify_US_IDs:
You'll need to make a copy of the custom javascript variable shown above for each tag and update the script to the one shown below.
View Item:
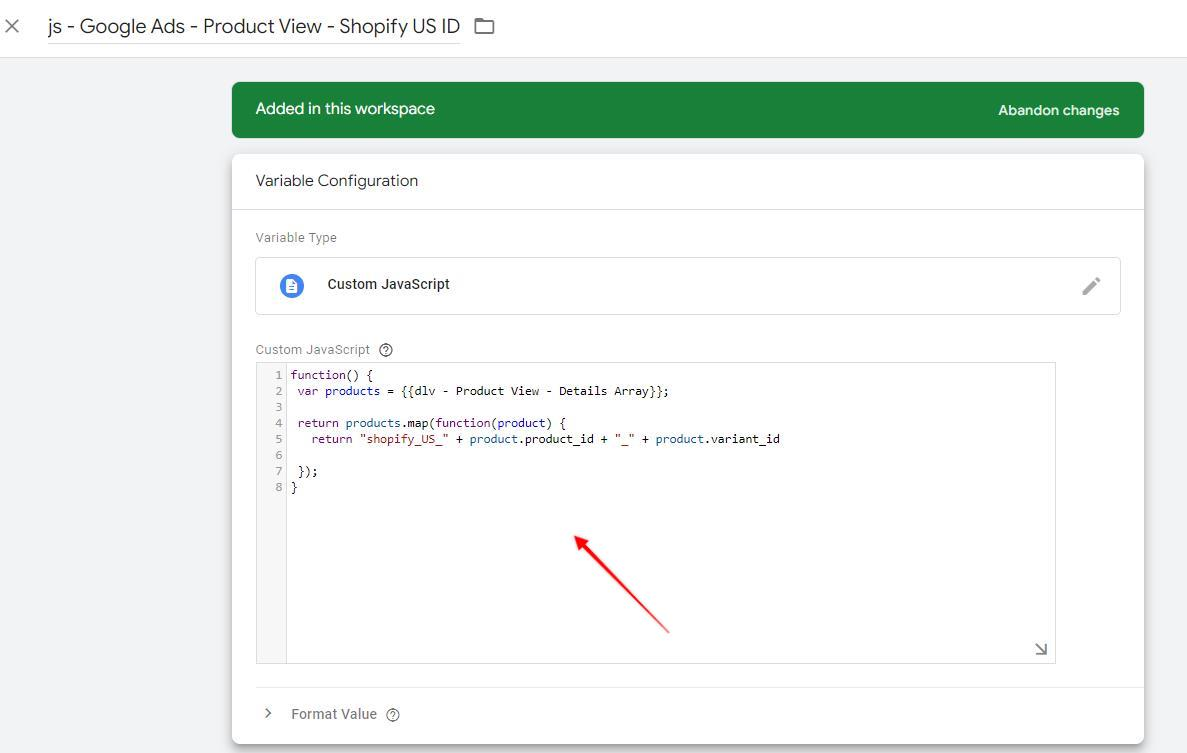
function() {
 var products = ;

 return products.map(function(product) {
   return "shopify_US_" + product.product_id + "_" + product.variant_id

 });
}
AddToCart:
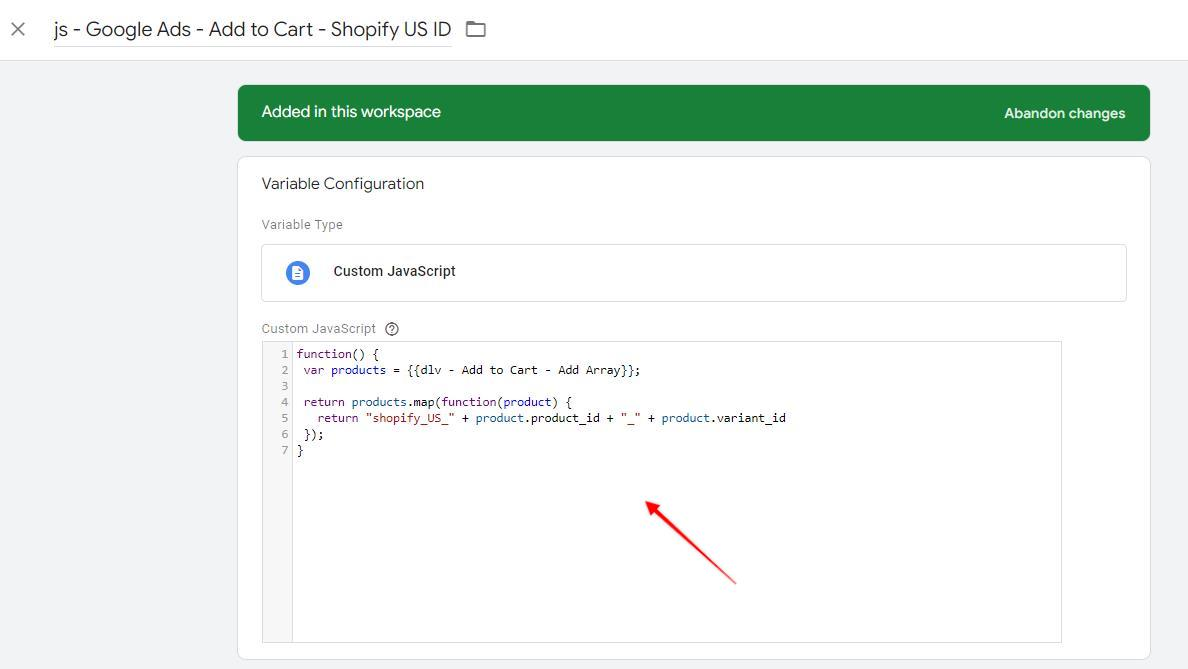
function() {
 var products = ;

 return products.map(function(product) {
   return "shopify_US_" + product.product_id + "_" + product.variant_id
 });
}
That's it!
Please feel free to contact us if you have any questions or concerns
Updated 6 months ago