How To Setup Tracking And Maintain Attribution When Using A Landing Page on a Subdomain
Learn how to keep your attribution and session intact - even on non-Shopify landing pages! ###
Overview
Cross Domain vs Subdomain Tracking:
Let's distinguish between cross-domain and subdomain tracking.
- Cross Domain Tracking: This deals with measurement between different domains. E.g. You have a store on mystore.com or a blog on myblog.com and you want to view them as if they are one property in Google Analytics. In this scenario, you need cross-domaincross-domain tracking.
- Subdomain Tracking: This is needed if you have a website with pages on a subdomain (e.g. mystore.com and landingpage.mystore.com).
This article will walk through subdomain tracking, not cross domain tracking.
Subdomain Tracking Challenges:
There are two primary concerns when tracking on a subdomain
- Keeping the Session Intact: What we don't want to happen is for a session to get fractured when the shopper moves from the subdomain to the main domain. A fractured session means you'll get multiple sessions in Google Analytics when you should only have one.
- Keeping the Attribution Intact: Additionally, we'll want to make sure that the associated marketing channel or website that drove your shopper to your website is given recognition for the actions the shopper then takes on your website (e.g. a purchase). We don't want the attribution details to be lost when the shopper moves from the subdomain to the main domain.
You can solve both these challenges by walking through the below steps.
How to Setup Subdomain Tracking:
Set the Cookie Domain to Auto in your Google Analytics Settings Variable:
- In your Google Tag Manager Account, use the left-hand menu to click on the "Variables" tab.
- Locate your "Google Analytics Setting" Variable.
- (See Figure 1)
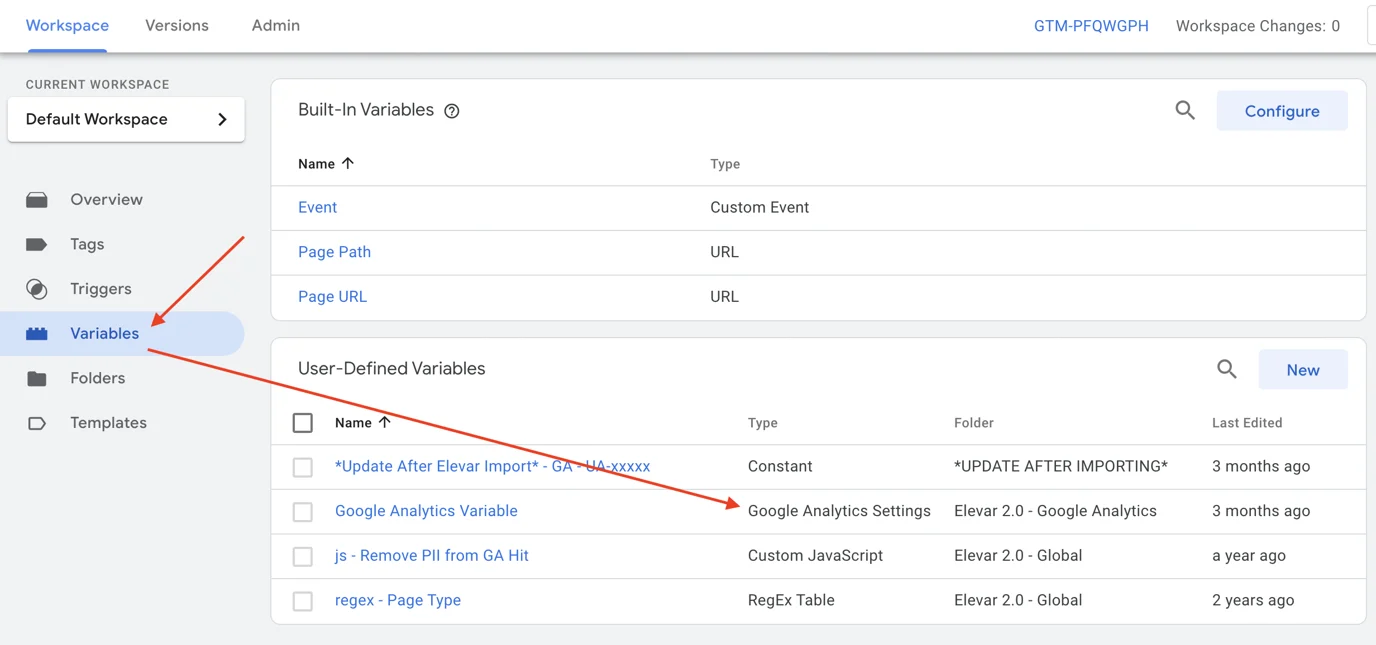 Figure 1
Variable Configuration:
- Within the "Google Analytics Settings" variable, make sure that the Cookie Domain is set to "auto".
- (See Figure 2)
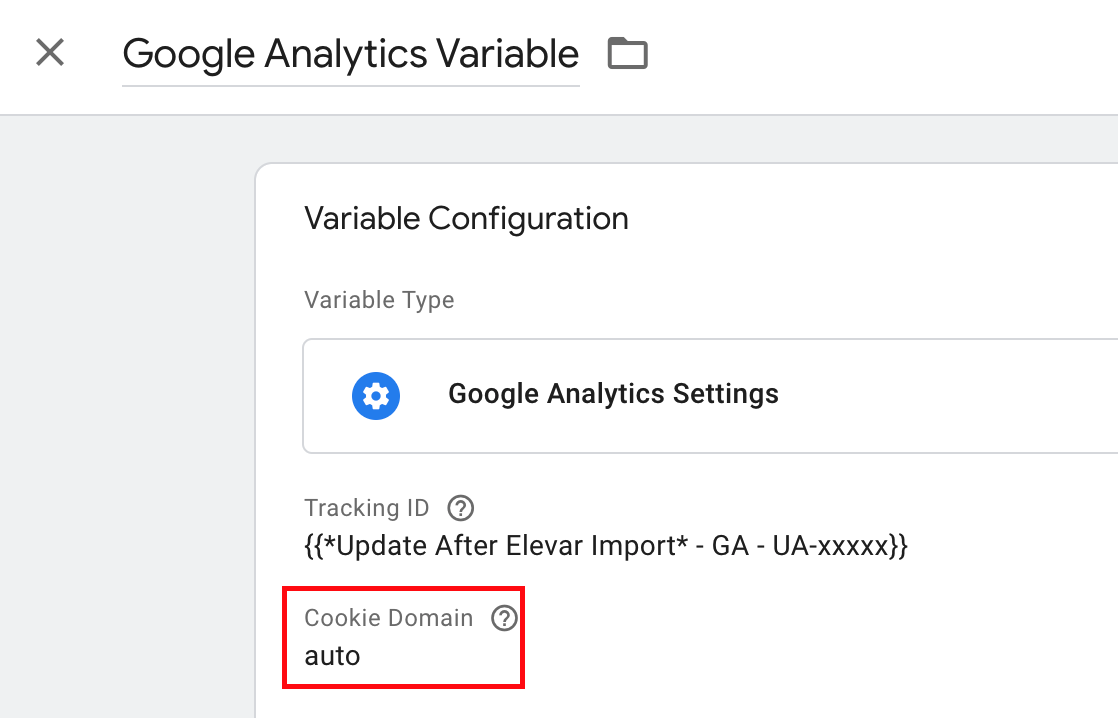 Figure 2
What does this do? By doing this we set the ga cookie at the highest level available on the domain (making it available to both the subdomain and the main domain). This helps GA to understand the events as a single session.
Add your Subdomain as a Referral Exclusion in Google Analytics:
- In Google Analytics, use the left-hand menu to click on the "Settings" button or the gear icon.
- Once you have accessed the settings, click on the "Referral Exclusion List" button.
- (See Figure 3)
- Once you have accessed the settings, click on the "Referral Exclusion List" button.
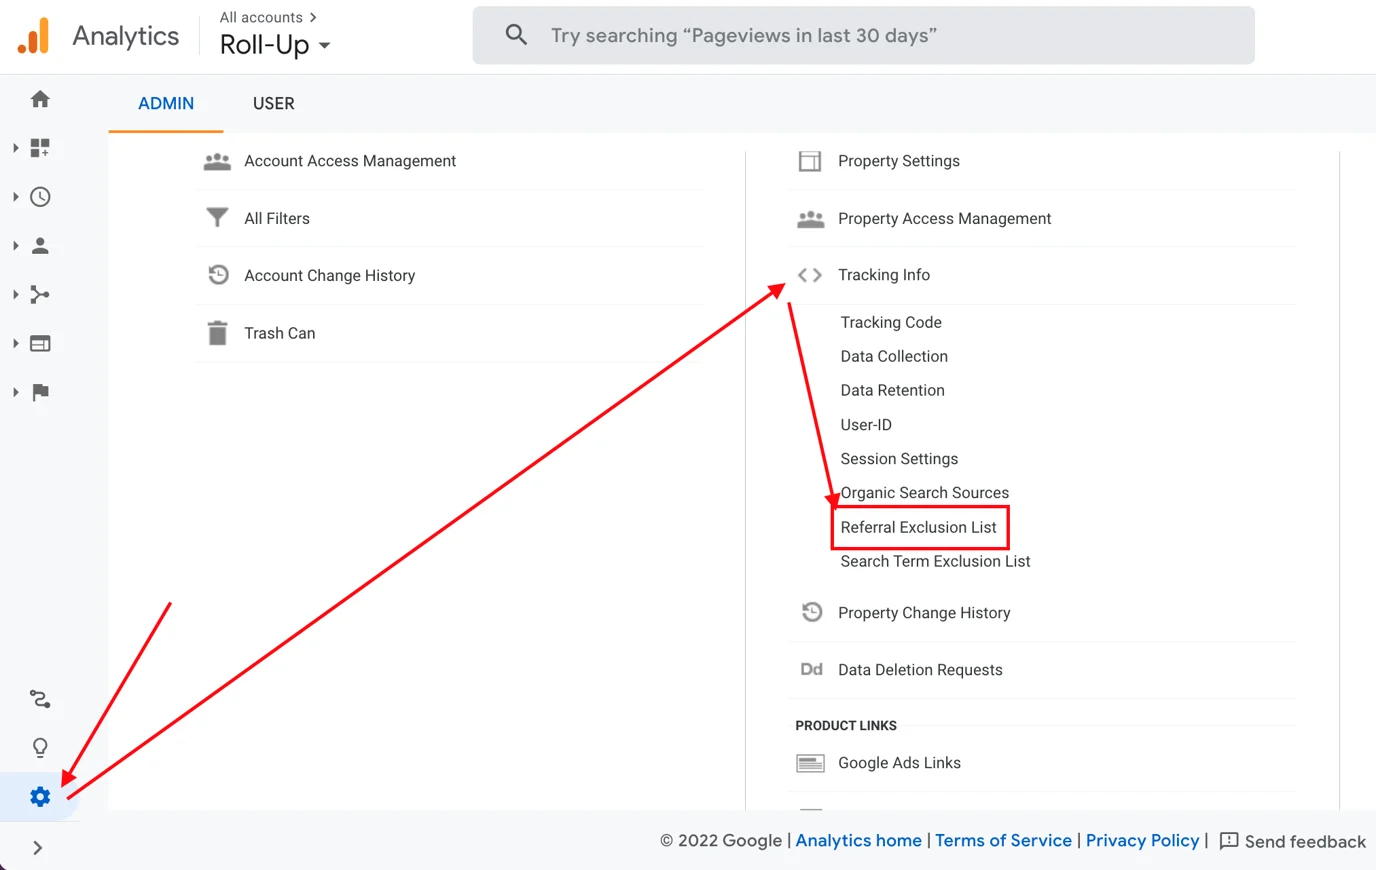 Figure 3
- Add your subdomain as a referral exclusion.
- (See Figure 4)
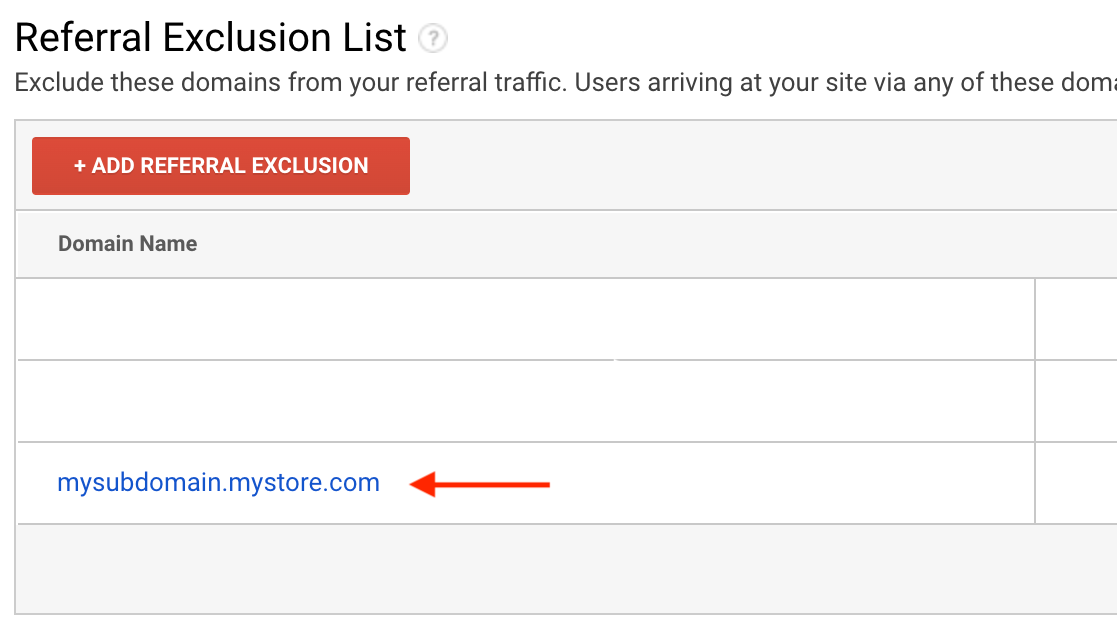 Figure 4
What does this do? This prevents your subdomain showing up as a referral source in your GA reports.
Import the Pre-Built Subdomain Linker Tag:
- Begin on your Elevar homepage and use the left-hand menu to click on the "Pre-Built Tags" button.
- Use the search function to locate the Subdomain Link Decorator Pre-Built Tag in your Elevar App.
- (See Figure 5)
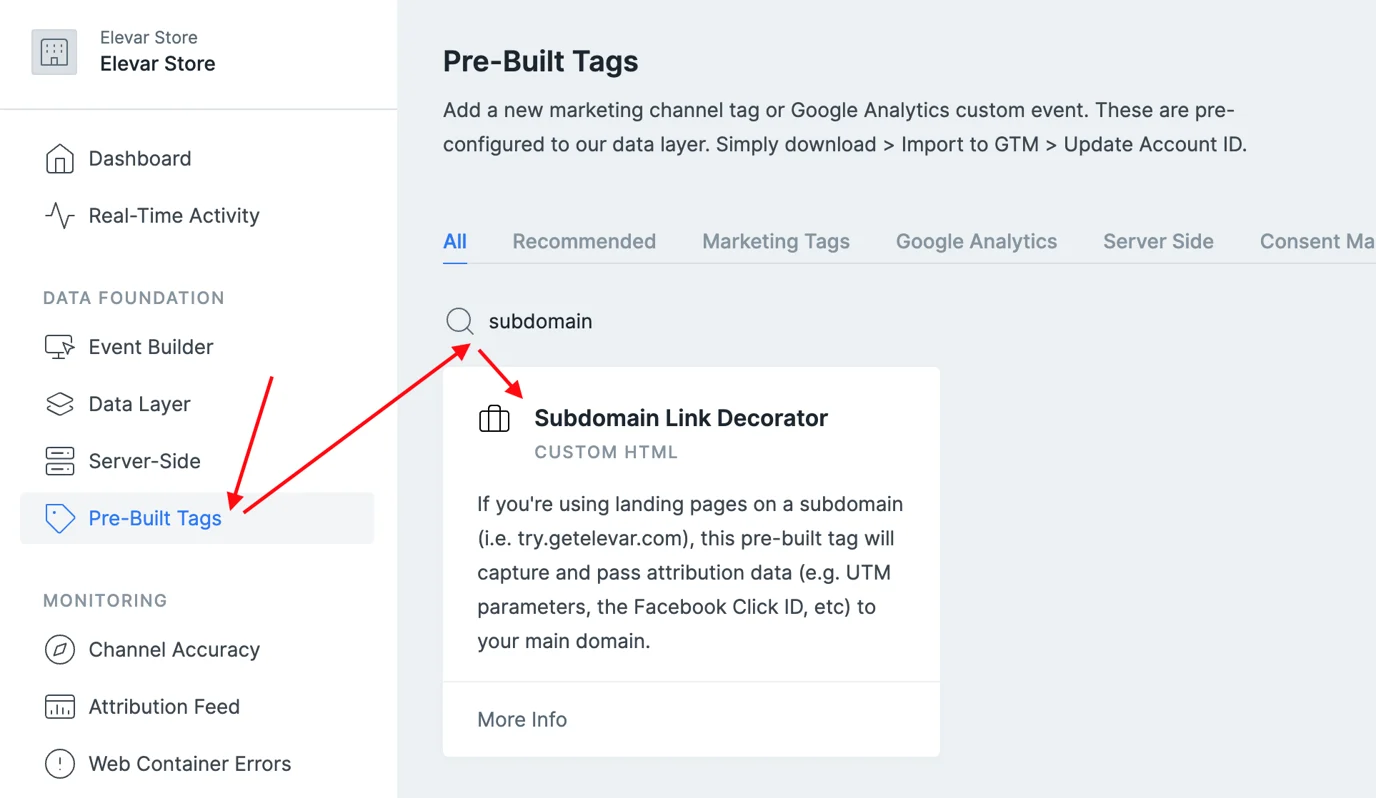 Figure 5
Download Subdomain Link Decorator Container:
- Once in the Subdomain Link Decorator Container, navigate to the box titled "Download Container".
- Click on the button labeled "Download Container".
- (See Figure 6)
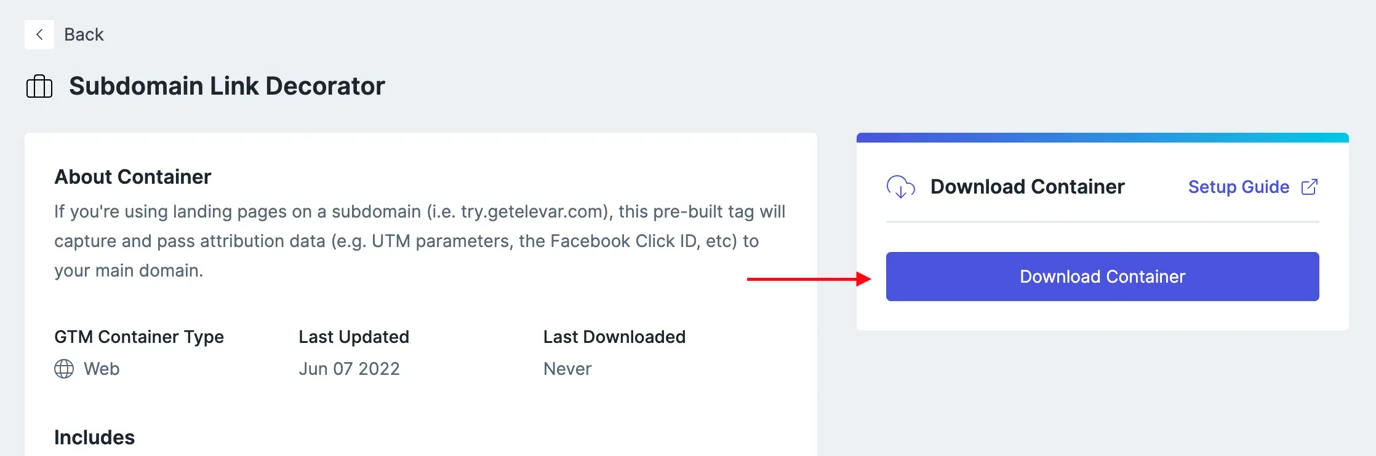 Figure 6### Import Container:- Log in to your Google Tag Manager Account.
- Select your GTM Web Container.
- Click on the "Admin" button located in the upper menu bar.
- Use the right-hand menu under the "Container" section and click on the tab labeled "Import Container".
- (See Figure 7)
- Use the right-hand menu under the "Container" section and click on the tab labeled "Import Container".
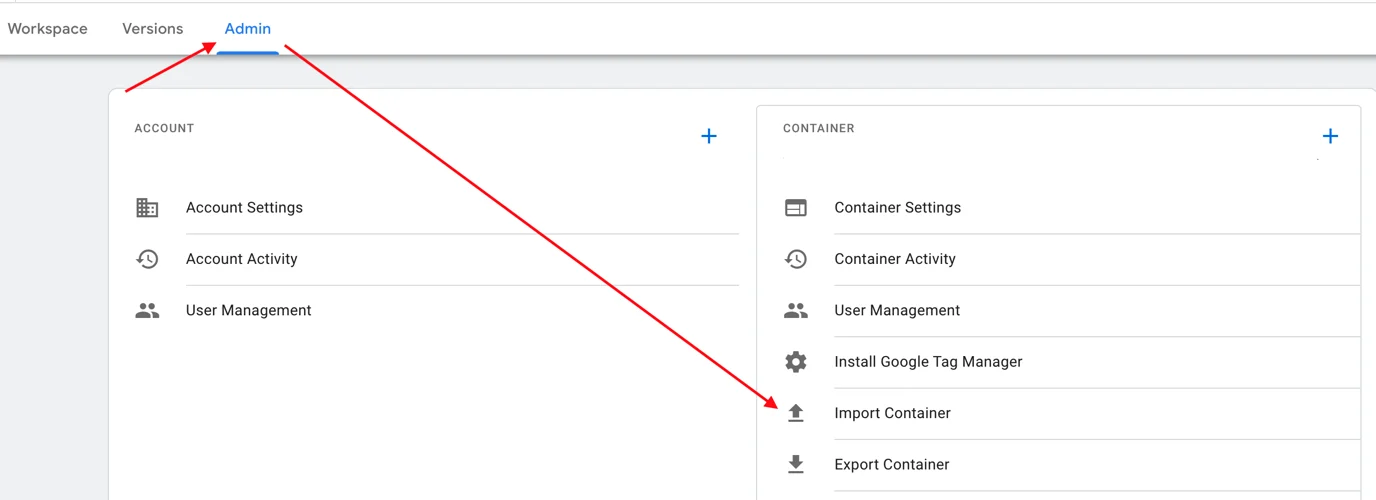 Figure 7### Import Container Information:- Under the "Select file to import" section, click on the "Select File" button and choose the Subdomain Link Decorator Container that was previously downloaded.
- Under the "Choose workplace" section, either create a new workplace titled "Subdomain Link Decorator Tracking" or select your "Default Tracking".
- Next be sure to select the "Merge" option first, then the "Overwrite conflicting tags, triggers, and variables" option second.
- Once you have completed filling out the necessary details for this container, click on the "Confirm" button located at the bottom of the page.
- (See Figure 8)
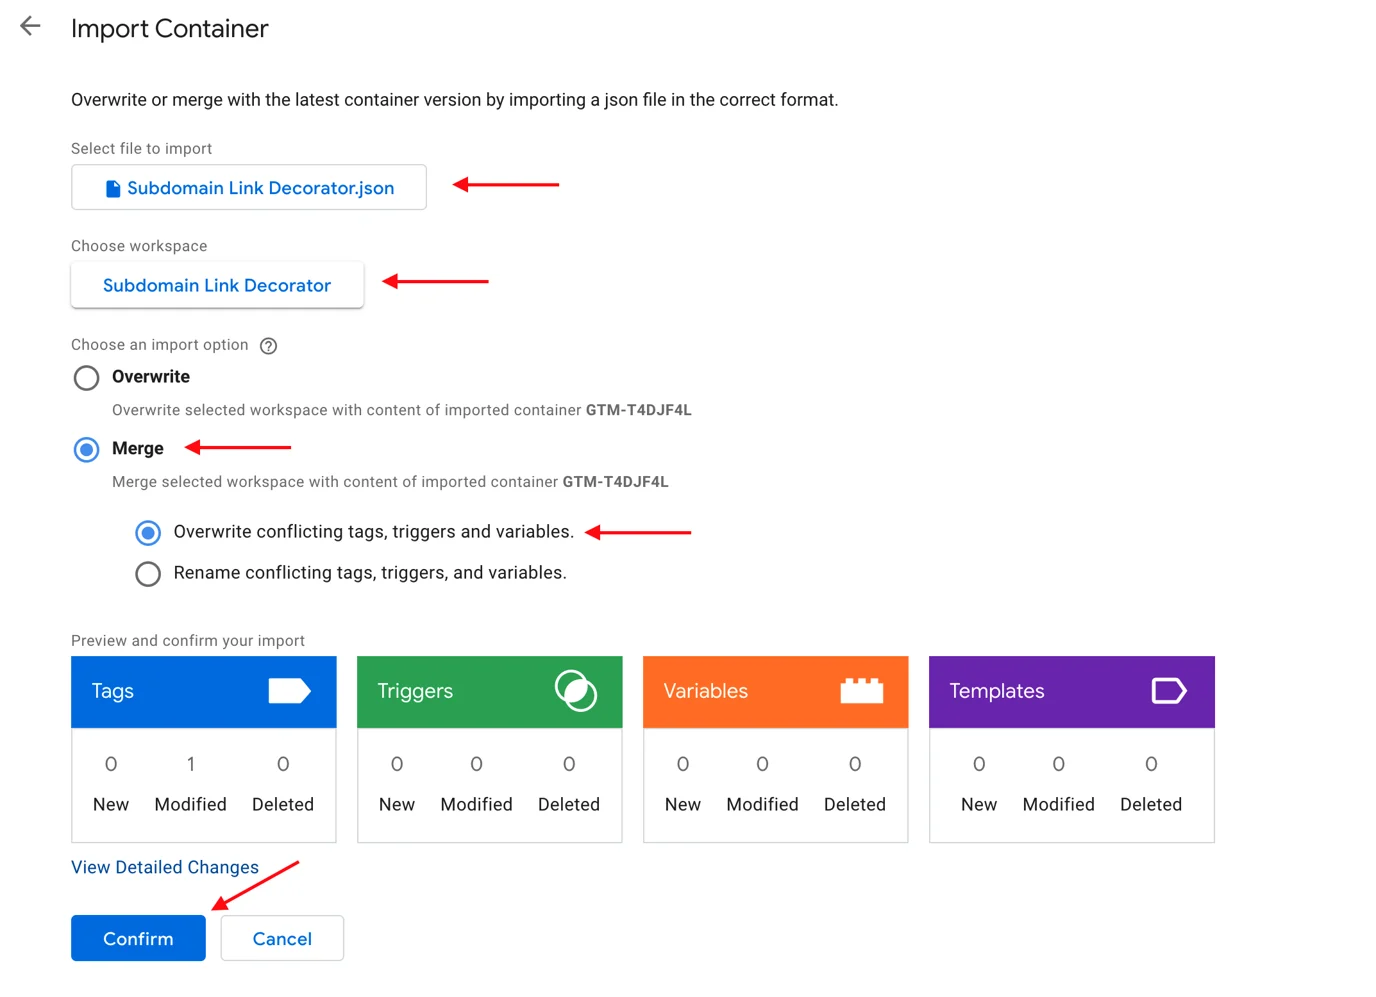
Figure 8
Customize the Subdomain Linker Tag (Domain & additional UTM parameters):
- In the tag titled "Update After Import" Subdomain Link Decorator, update line 4 with your main domain URL.
- (See Figure 9)
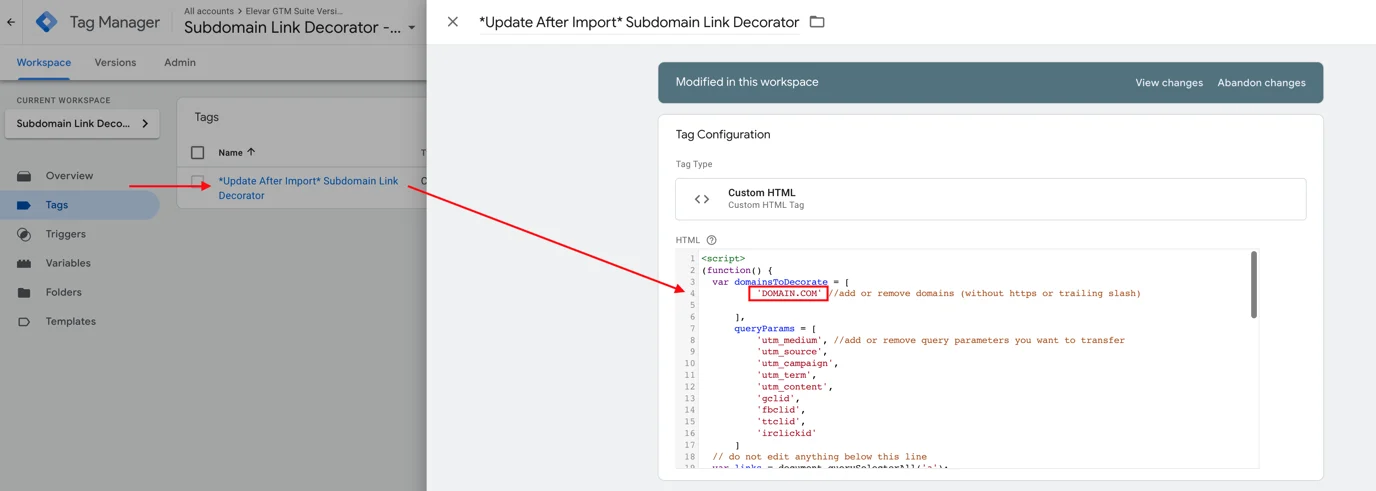 Figure 9
Warning: Please include the ending ".com", ".ca", etc. Please do not include the beginning https/http or a trailing slash.
- In the trigger titled "Update After Import" All Subdomain Pages, update the first Page URL rule with your own subdomain and main domain.
- (See Figure 10)
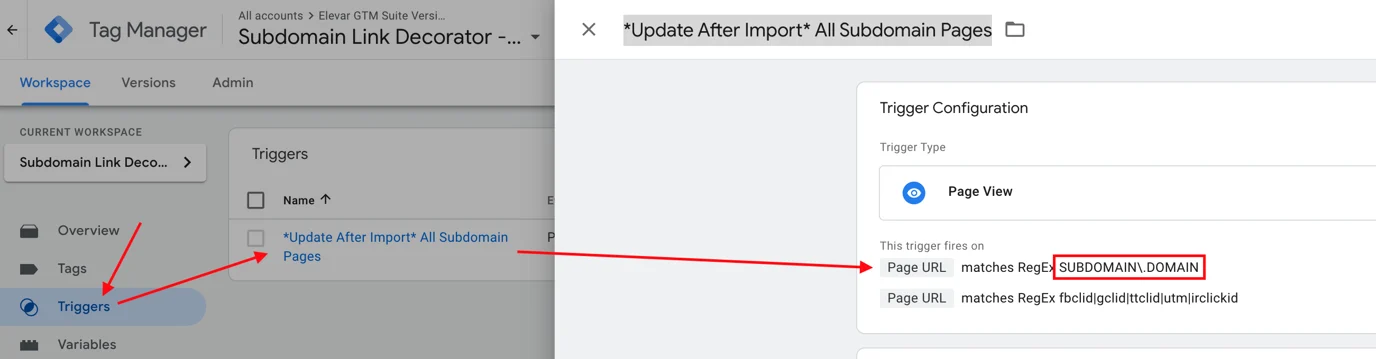 Figure 10
What if I have multiple subdomains?If this is the case, use the following format: SUBDOMAIN.DOMAIN|SUBDOMAIN.DOMAIN
Correctly Formatted Examples:
try.getelevar
try.getelevar|learn.getelevar
try.getelevar|learn.getelevar|blog.getelevar
Publish the Pre-Built Tags
- After importing the Subdomain Link Decorator tag container, you will be brought back to the Google Tag Manager homepage.
- In your Tracking workspace, click on the "Submit" button in the upper right hand corner of the page.
- An additional confirmation page will appear. Be sure to click on the "Publish" button in the upper right-hand corner of the page.
- (See Figure 11)
When ready, press Submit > Publish in Google Tag Manager to make these changes go live.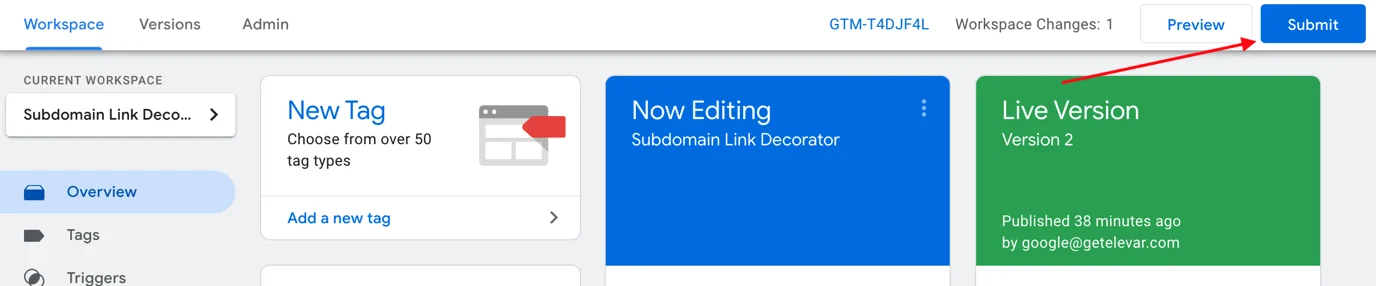
Figure 11
How Do I Know If It's Working?
There's two items you'll want to QA to know if your subdomain tracking is working:
1. Is your Google Analytics' session stays intact?
Use Chrome's Developer Network Tab to see if the CID property in your Google Analytics hits remains consistent as you navigate from your subdomain to your main domain.
- On your Subdomain, look at the Google Analytics hit in your Chrome Developer Network Tab for the CID property. Note the value.
- Click a link that leads to your main domain.
- On your main domain, look at the Google Analytics hit in your Chrome Developer Network Tab for the CID property. Note the value.
- If the value is the same on your subdomain & main domain, then your session stayed intact!
- (See Figure 12)
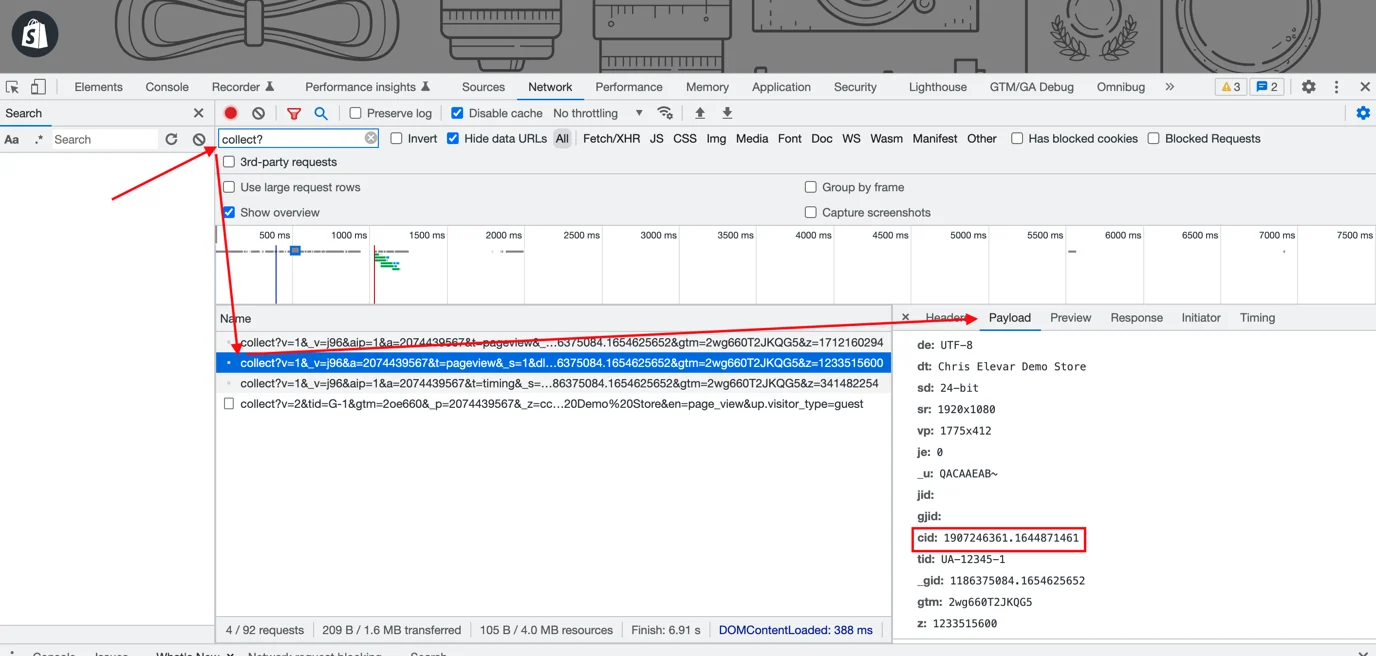 Figure 12
2. Are your UTMs and click ids are being passed to your main Shopify site?
- Add test URL parameters to your subdomain URL
- Example: try.getelevar.com/?utm_source=testsource&utm_medium=testmedium
- Click a link that leads to your main domain
- Check to see if the URL parameters are now present in the URL of your main domain
- It should look similar to: getelevar.com/collections/products?utm_medium=testmedium&utm_source=testsource
- If you are seeing the parameters appearing in your main domain URLs, it's working!
Updated 6 months ago