How to Boost Performance of Attentive’s Abandonment Journey’s With Elevar’s Server Side Tracking
Learn how to set up Attentive Journeys and measure the net new revenue generated from Attentive server-side tracking
Overview
Let's walk through how to set up new Cart Abandonment Journeys in Attentive that just send messages to the net new cart abandoners identified by your server side tracking. This will allow you to calculate the additional revenue generated by your Elevar integration.
We'll focus just on cart abandonments (a.k.a. Add to Cart events) in this guide, but you can apply the same logic for your browse abandonment campaigns (via Product View events) & post purchase campaigns (via Purchase events).
Events Elevar Sends
Once you've followed this guide on setting up your Attentive Server Side Tracking in Test Mode as called out in Step 7, you'll be sending the following server-side events to Attentive:
Add To Cart - Elevar SS- The equivalent Attentive event to compare against is
Added to cart
- The equivalent Attentive event to compare against is
Purchase - Elevar SS- The equivalent Attentive event to compare against is
Made a purchase
- The equivalent Attentive event to compare against is
Product View - Elevar SS- The equivalent Attentive event to compare against is
Viewed a product
- The equivalent Attentive event to compare against is
How to Set Up Cart Abandonment Split Test
To calculate the ROI of the net new identified cart abandoners, we'll need to set up a Journey in Attentive that sends messages to just that group of shoppers.
Pause Journeys using Server Events as Triggers
If you've followed this guide on calculating the number of net new Add to Cart events identified by your server-side tracking, pause your current Journeys that are triggering off of the new Server events.
Why? Attentive shared that running two Journeys that use the same trigger can cause conflicts.
Create a new Journey
Create a new Journey in Attentive.
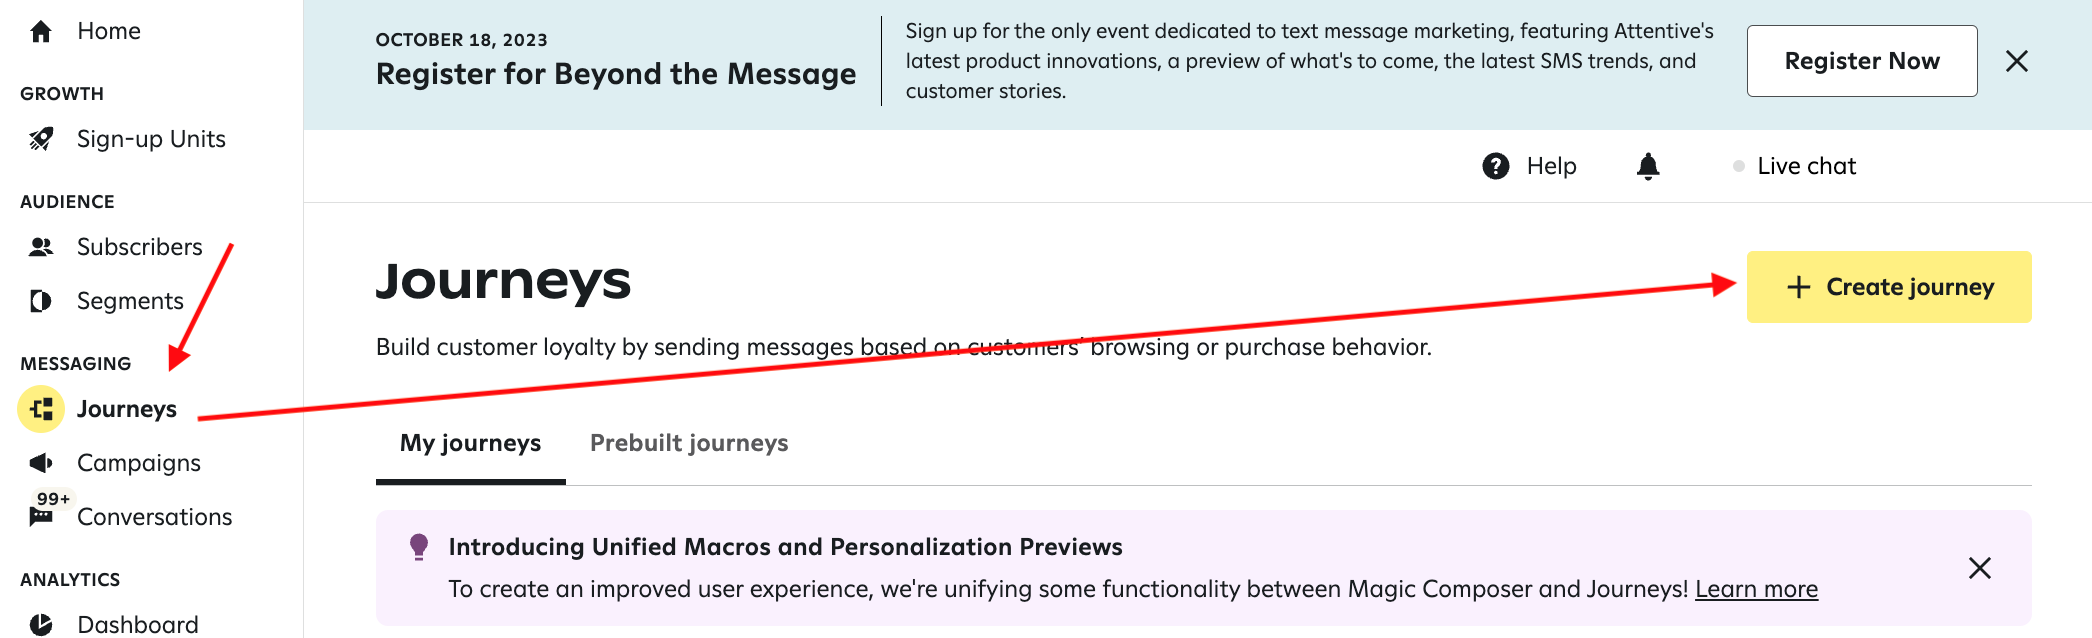
Select Start from scratch.
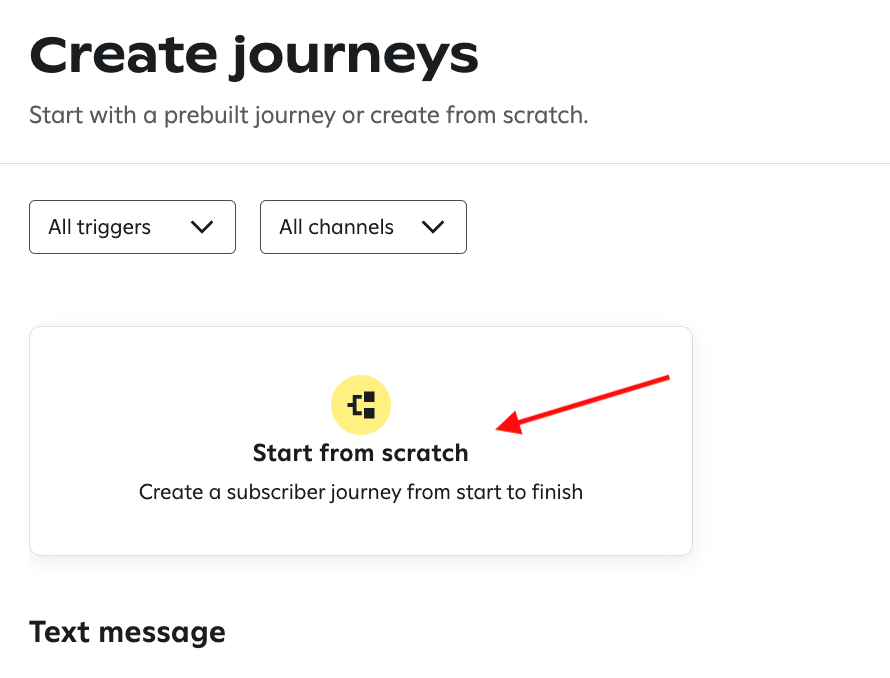
Choose the Add to Cart - Elevar SS event as your trigger.
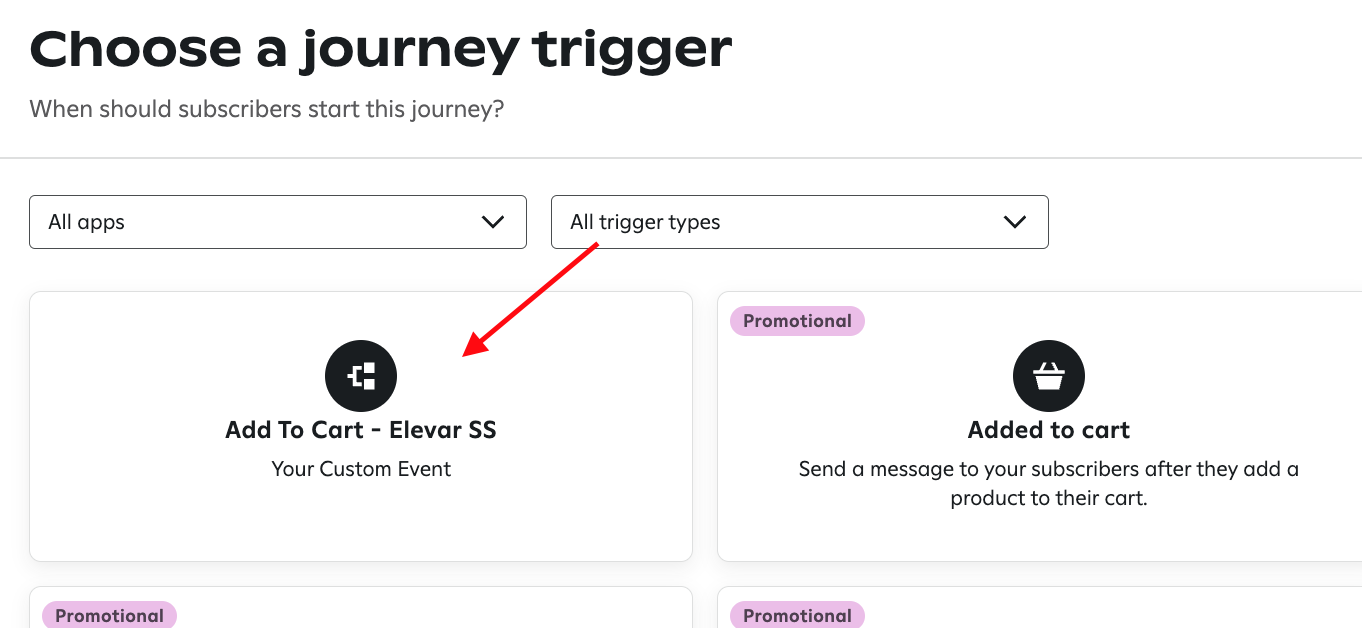
Select Send a message about something else.
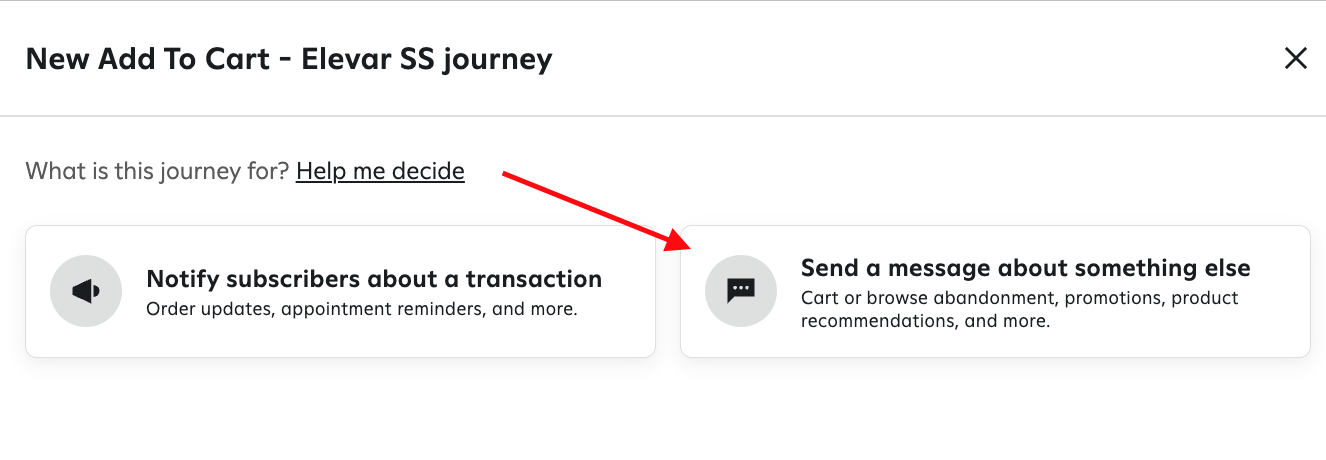
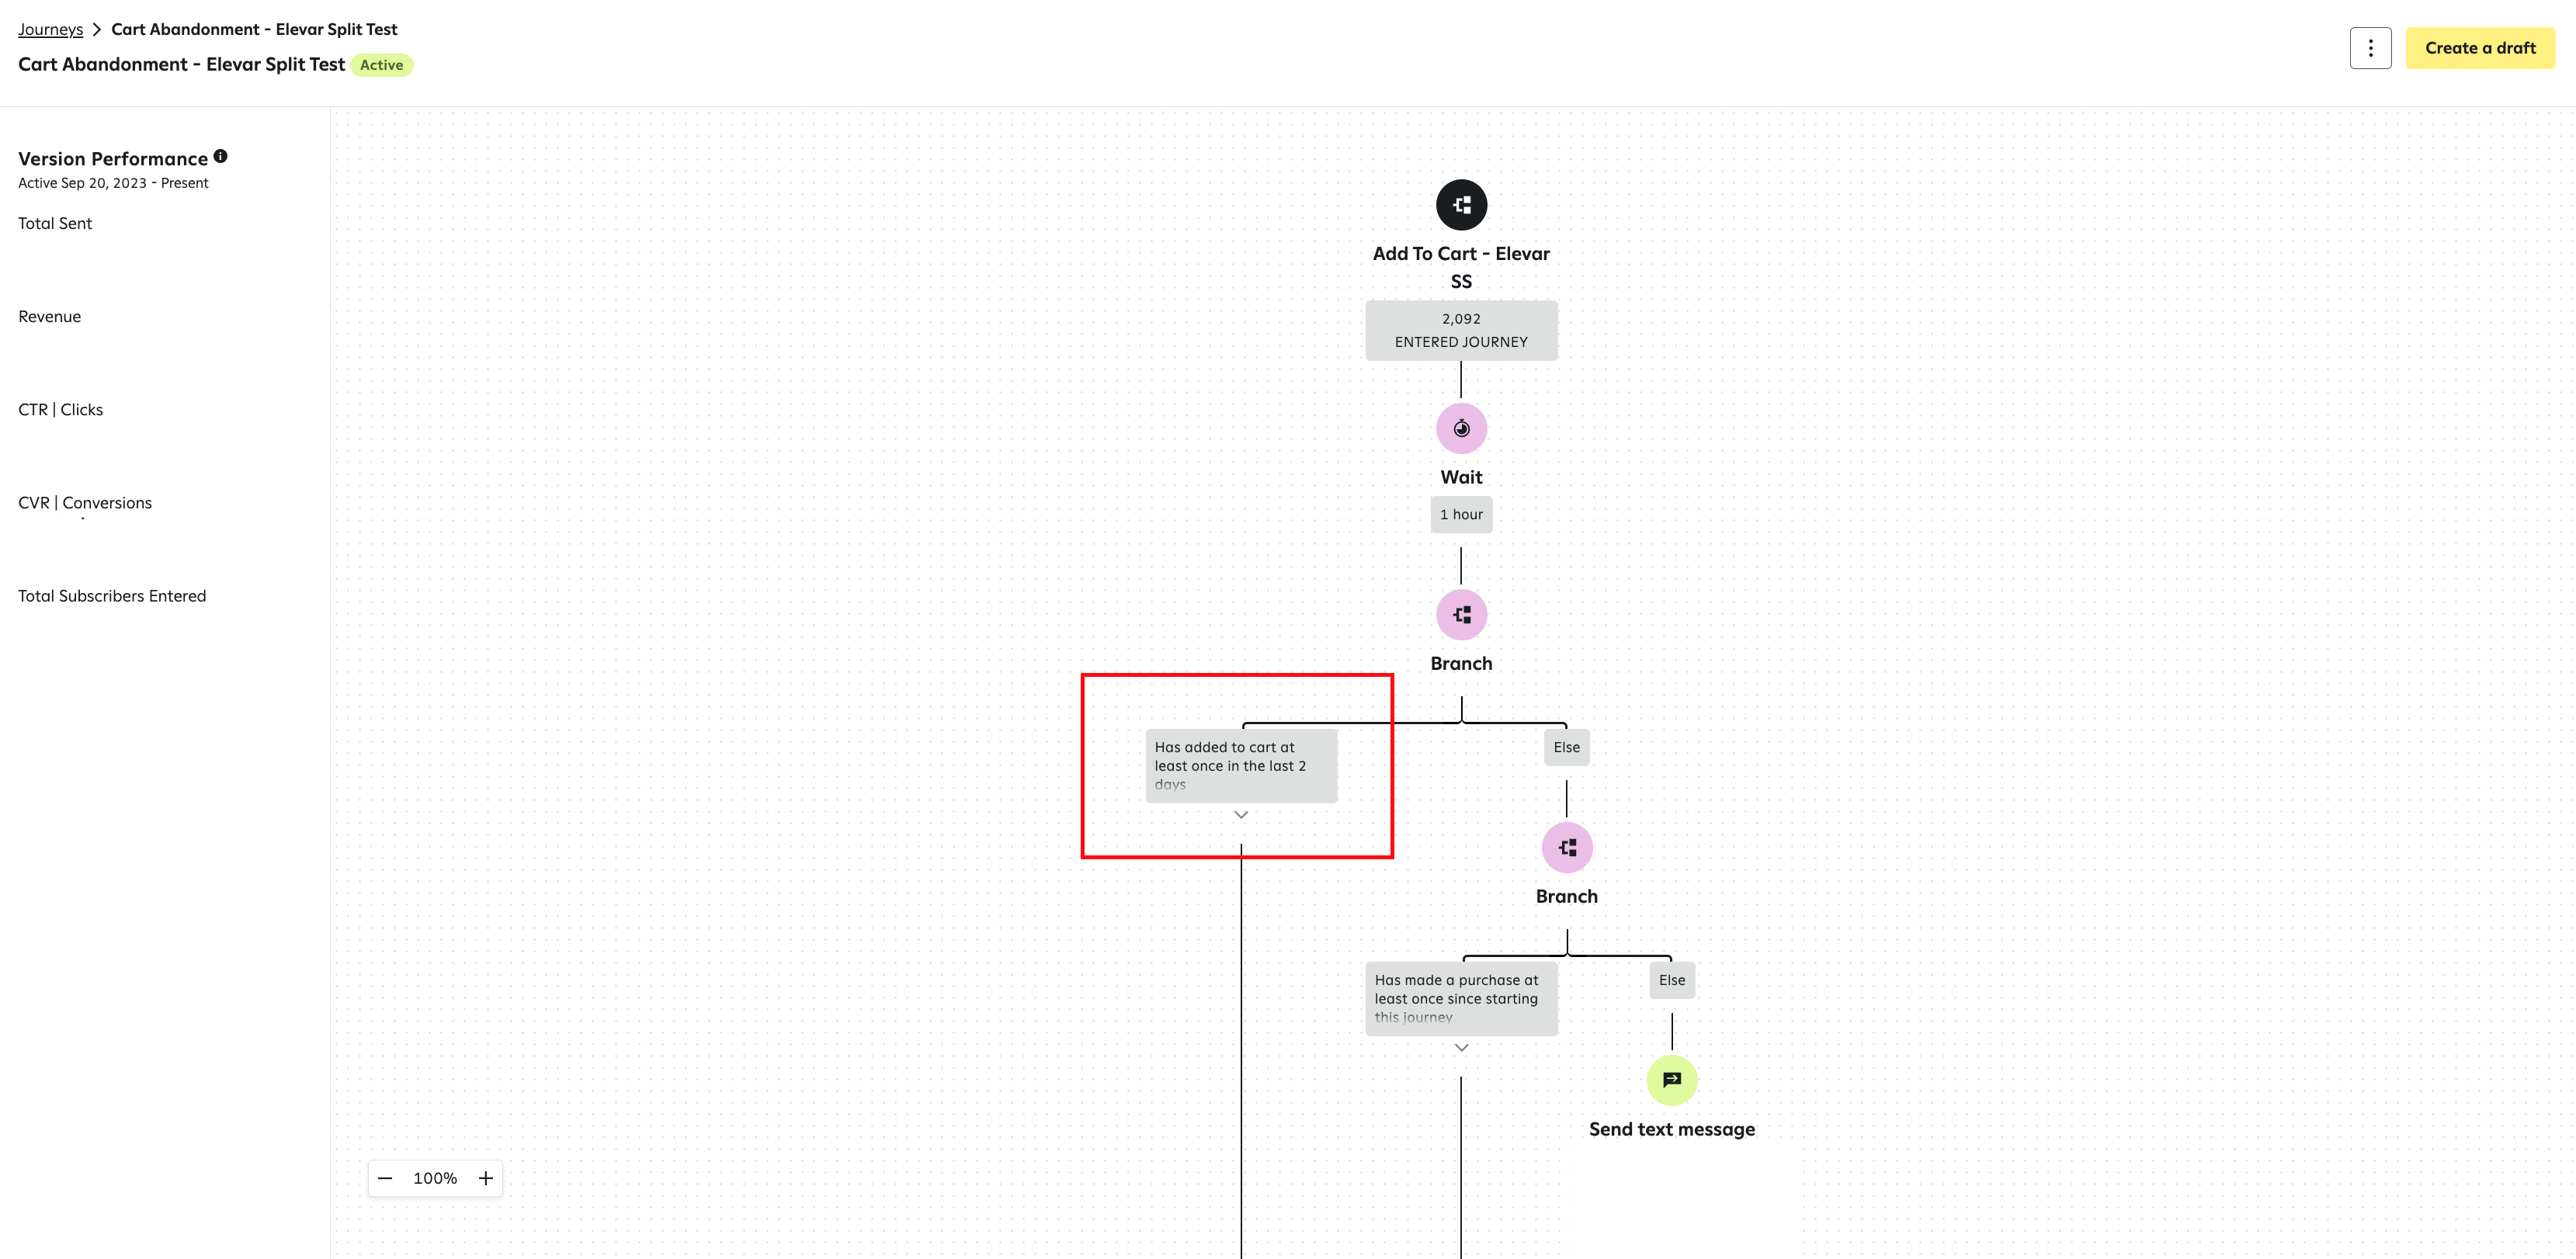
Mirror the Journey after your main Cart Abandonment Flow. Include a branch in the beginning of your new Journey that filters out shoppers who have also triggered the Attentive Add to Cart event at least once in the last 2 days.
Known LimitationsIn order to run a split test comparison, we send our "Add to Cart - Elevar SS" events as Custom Events to Attentive. Custom Events have limitations that eCommerce Events do not.
Attentive does not allow you to send media urls (e.g. links directly to a product page, images) in your messages when using Custom Events. Nor do they allow you to use product data logic (e.g. having a branch in your Journey that says "if product is available" or "if product tag is excluded") in your journey if it's triggered by a Custom Event.
If your main Cart Abandonment Journey includes a link to the product page of the abandoned product, we recommend sending shoppers to their cart instead.
If your main Cart Abandonment Journey uses product data logic, we recommend excluding that logic from the Elevar Split Test Journey.
Publish your changes by selecting "Turn On".
Analyze the Results
Let the new Journey run for at least 2 weeks. Ideally, 1 month.
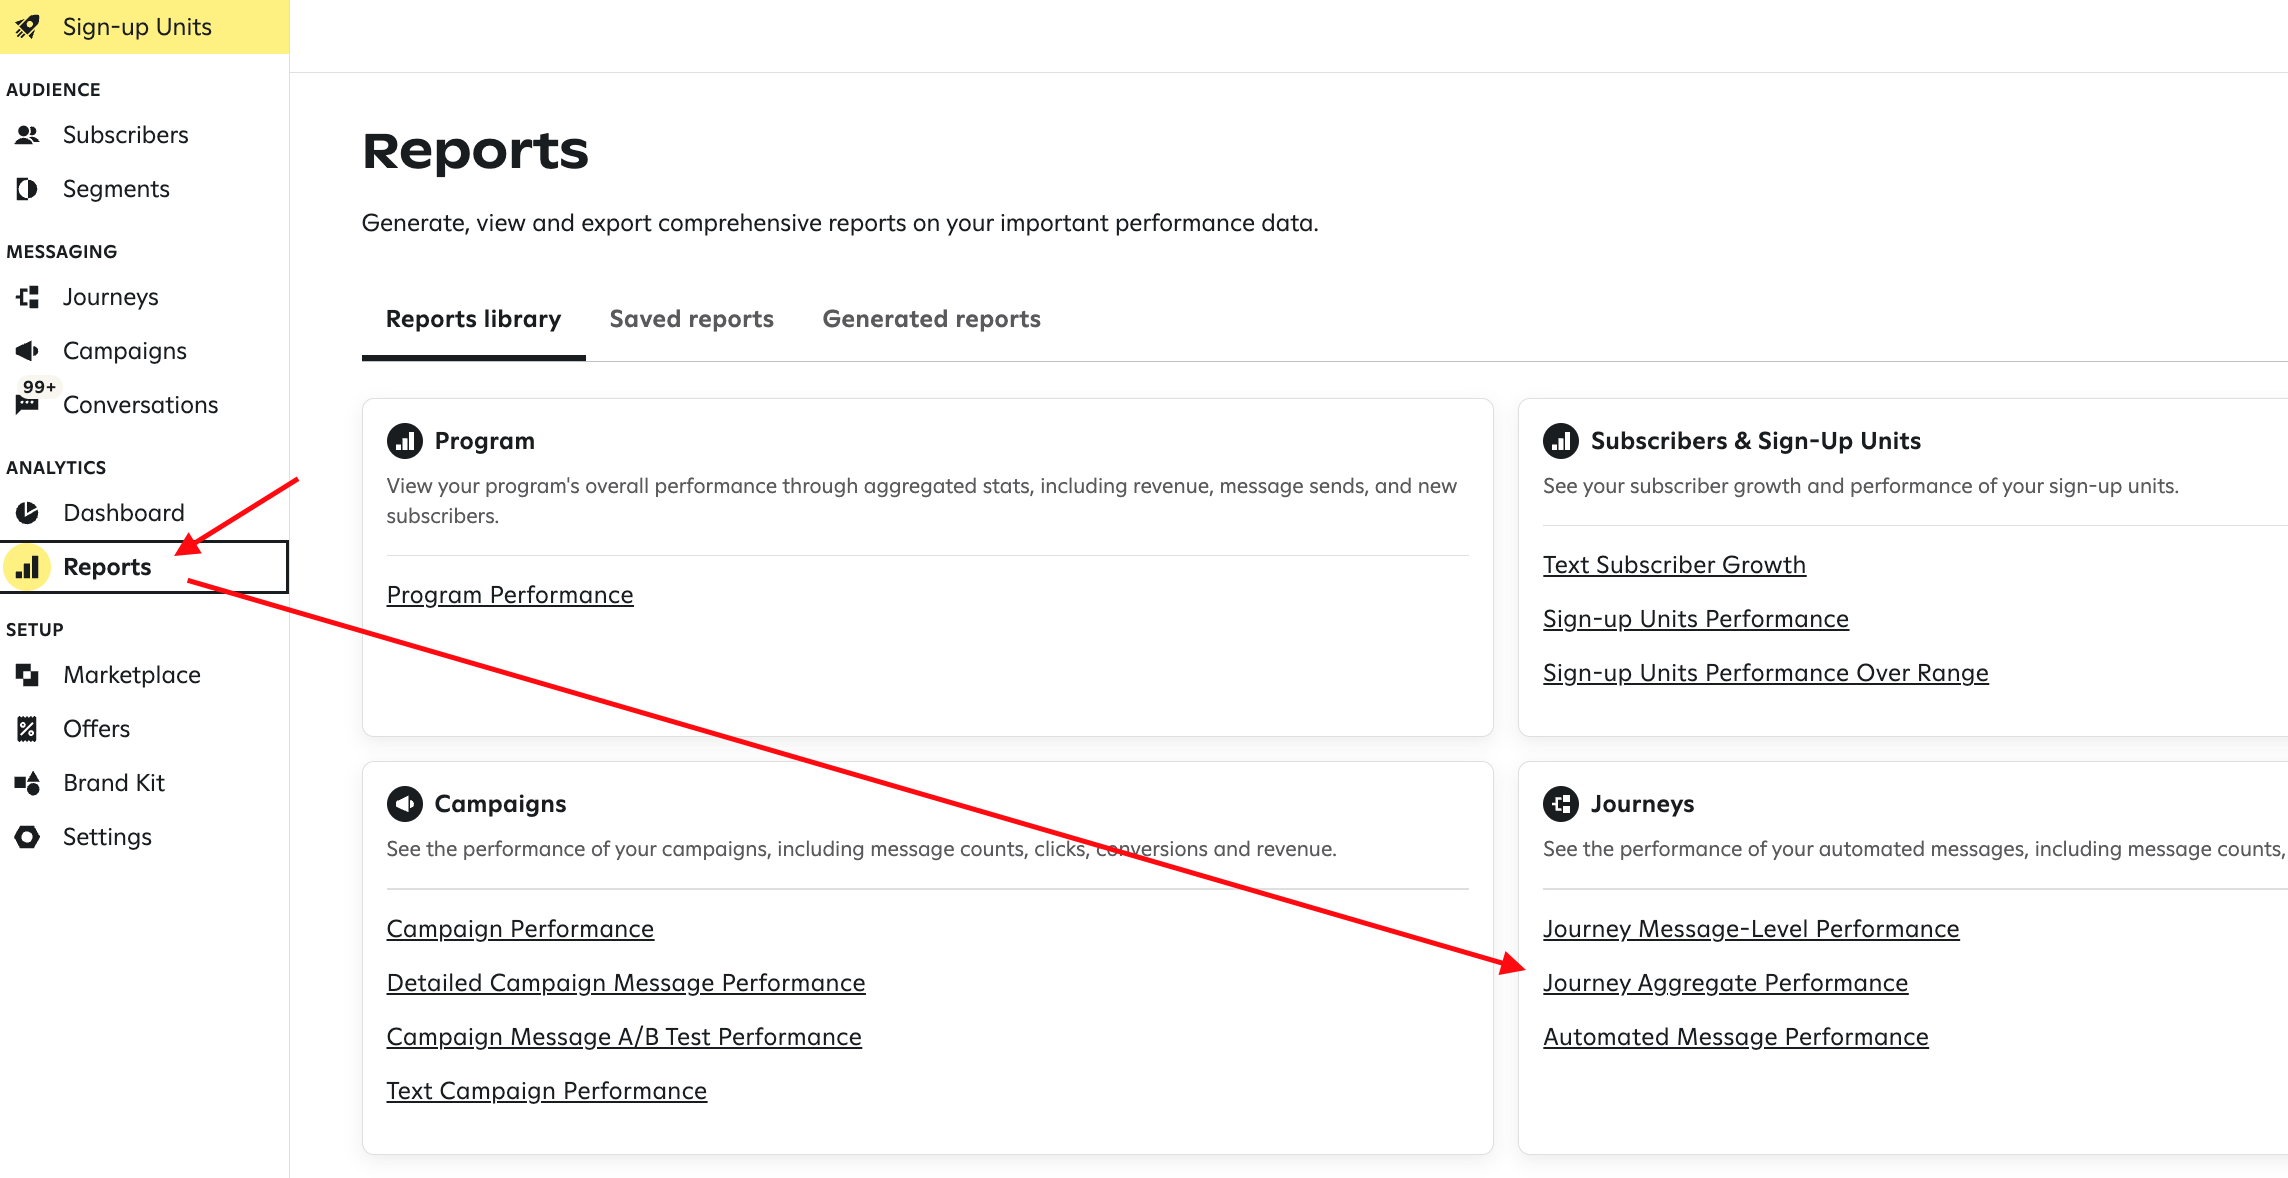
Then you can analyze the results in your Attentive Reports section > Journey Aggregate Performance report.
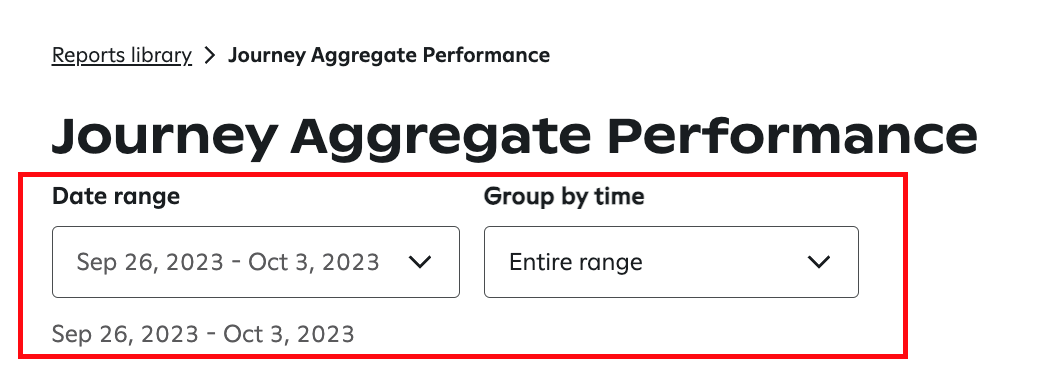
Set the date range to start the day after you published your new Elevar Split Journey & group the time by Entire Range.
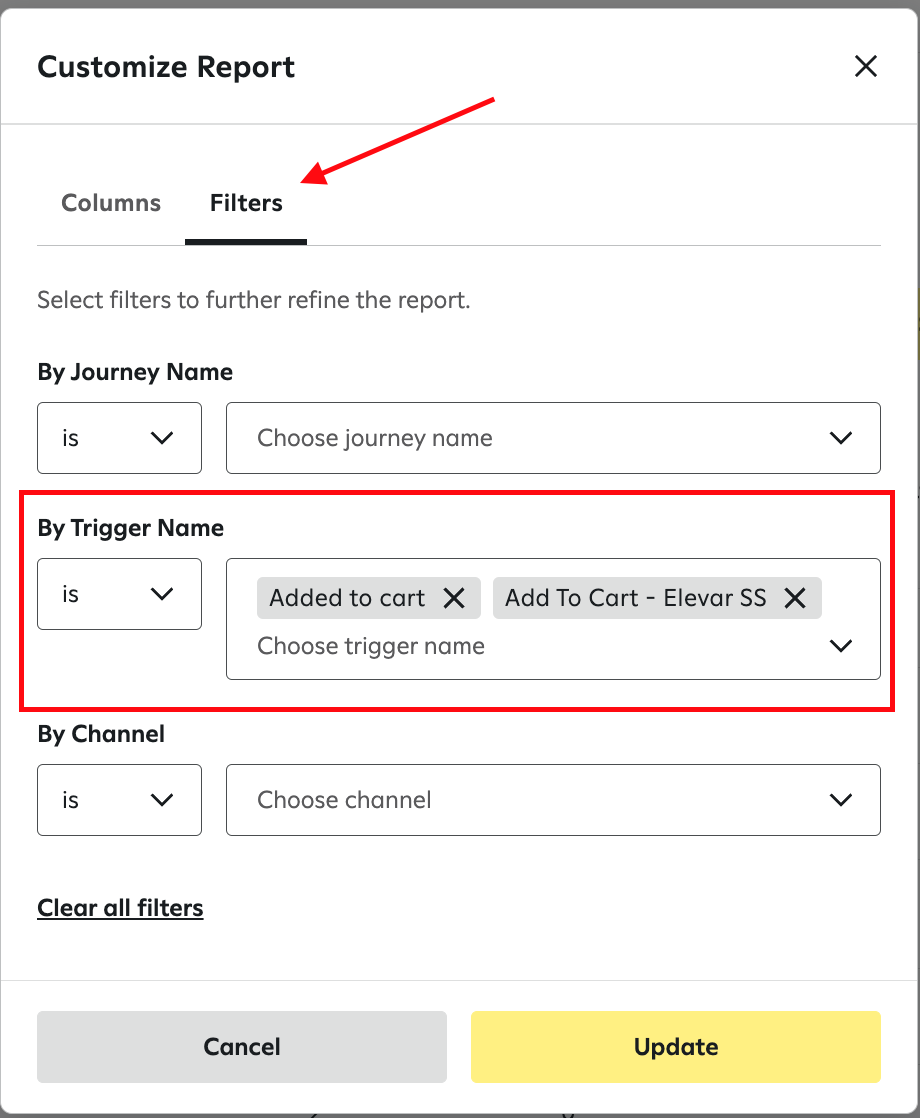
Select Customize.

Create a filter so that the report only includes Journeys where the trigger is Added to Cart or Add to Cart - Elevar SS.
Then you can see the net new revenue generated by the Elevar server-side tracking & calculate the percentage increase:
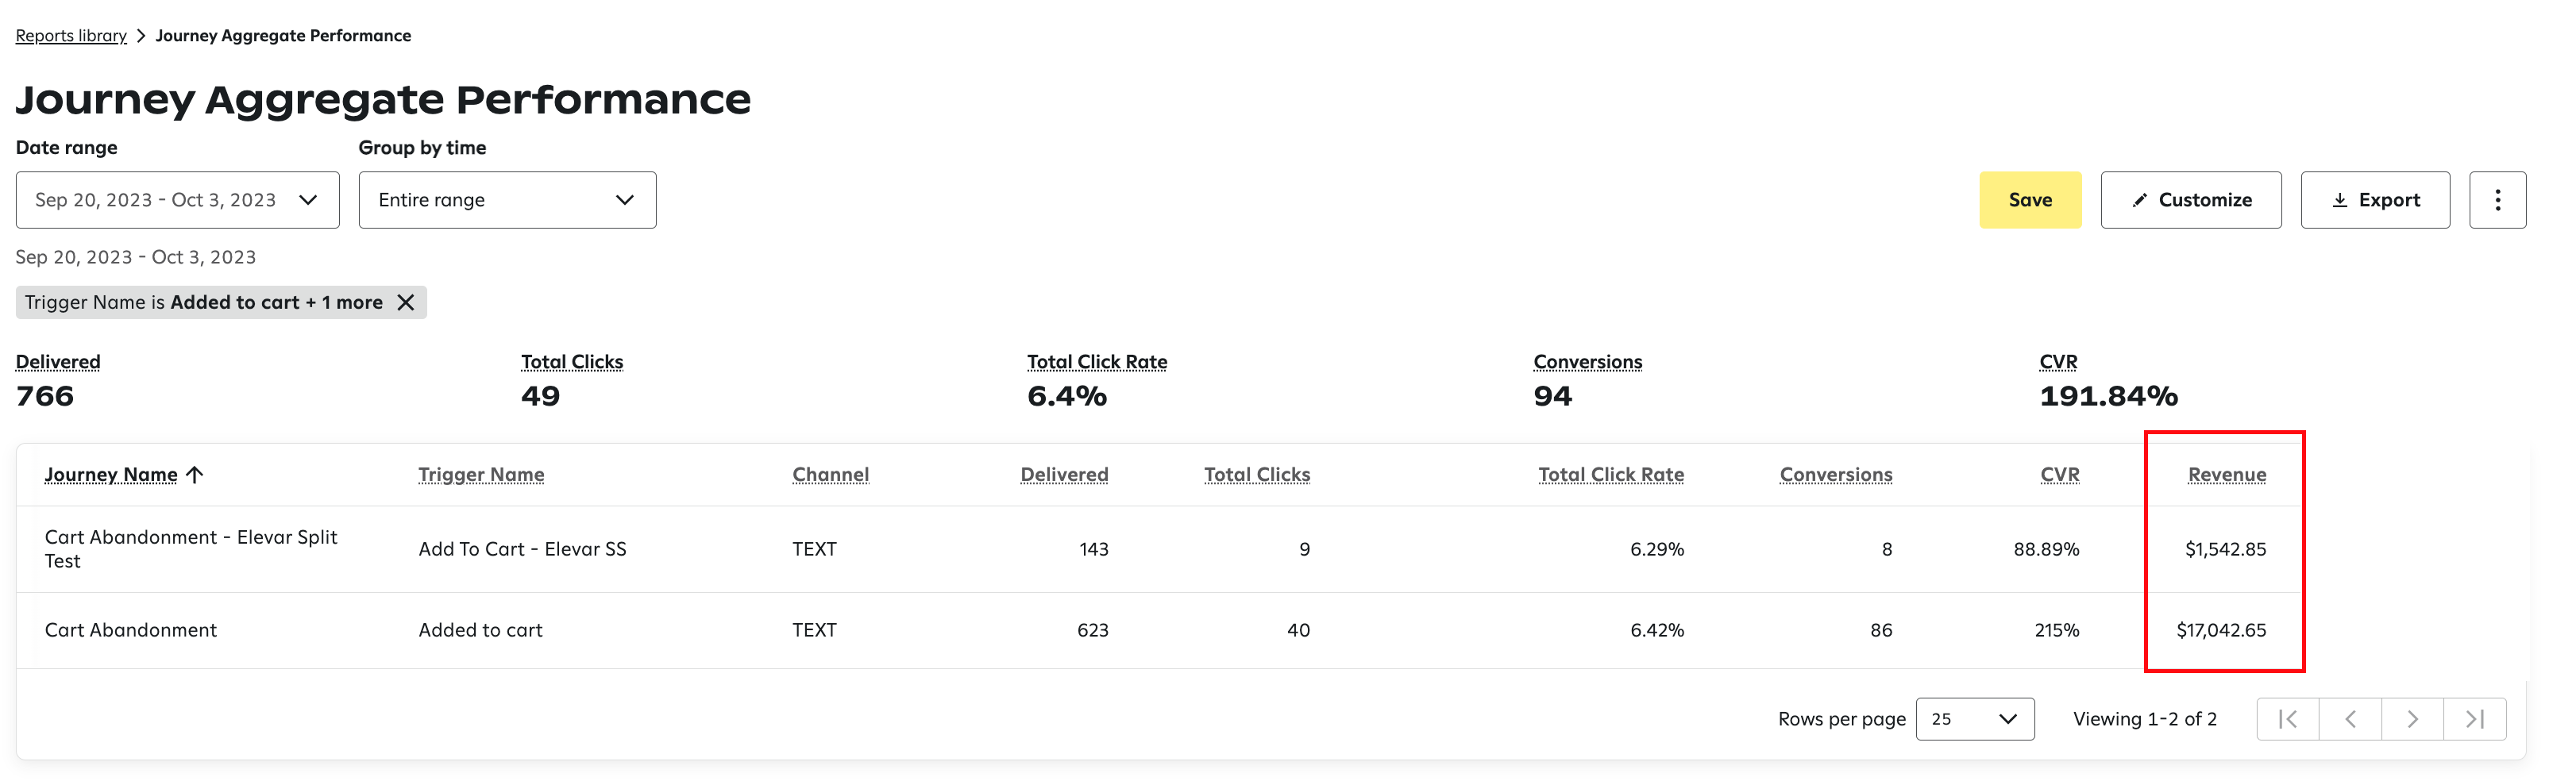
In the example above, we can see that the net new cart abandoners identified by Elevar's server-side tracking generated an extra $1,500 in revenue - a 9% increase!
But won't subscribers be sent duplicate messages if they trigger both Elevar event & Attentive event?Attentive has shared with Elevar that subscribers would not be sent duplicate messages for the same abandoned product because users can only enter an abandonment journey once every so often, depending on the entry frequency set on the abandonment journey. If Attentive gets two different Add to Cart events for the same product at the same time, it depends on which event happens first, and from there Attentive uses that first triggered event’s information for their journey flow. There wouldn’t be two abandonment messages for a Cart Abandonment journey..
Updated 6 months ago