How to Set Up the BigQuery Integration
Learn how to set up the BigQuery integration and run a Query.
Overview
Follow this guide to learn how to connect Google Pub/Sub to BigQuery.
Prerequisites:
Before completing the steps below, ensure that you have:
- Installed the Shopify Source on your store. Follow this guide to learn how install the Shopify Source.
- Created a GCP project. Follow this guide to learn how to create a Google Cloud Project.
- Elevar service account email address (Available to active Elevar customers).
Important Note: BigQuery CostsIt is important that you understand that BigQuery is a great tool for the insights that it can provide, but it is not free. Querying, storing, and streaming data into BigQuery can cause significant costs, especially as your data volume grows.
Elevar is not responsible for any costs associated with your Google Cloud usage, including BigQuery storage, streaming, or queries.
We highly recommend that you review Google's BigQuery pricing documentation to understand how costs are calculated.
Recommended Best Practices:
- Partition your Data: Without partitioning, all of your event data is stored in a single and massive table. This leads to higher query costs and slower performance, especially as your dataset grows. Partitioning your BigQuery tables (e.g., by date) significantly improves query efficiency and can help dramatically reduce costs over time.
Create a Google Pub/Sub Topic
Access Pub/Sub:
- Begin on the Google Cloud homepage and use the left-hand menu to located in the upper left-hand corner to click on the "Pub/Sub" tab.
- (See Figure 1)
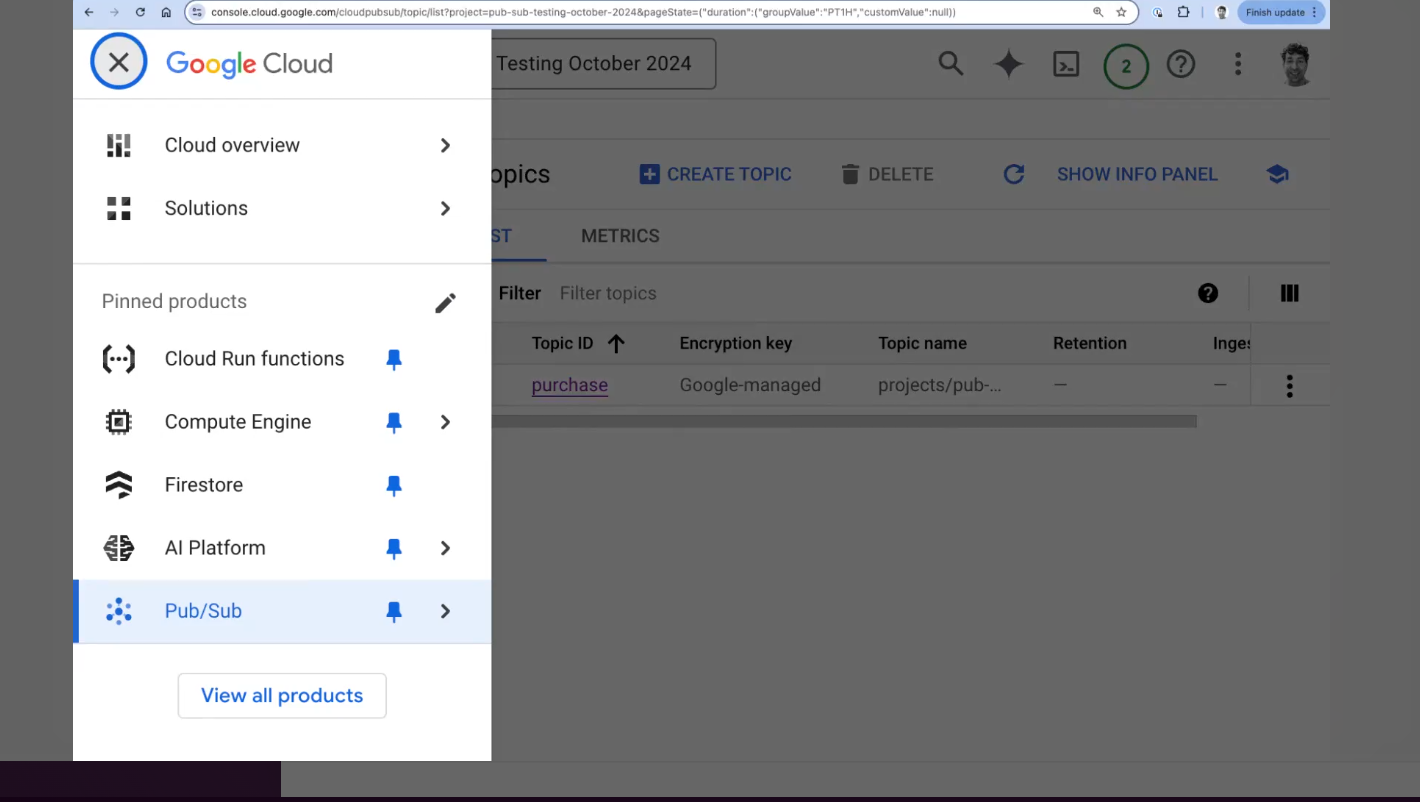
Figure 1
Create a Topic:
- Use the top navigation menu to locate and click on the "Create Topic" button.
- Navigate to the section of the page labeled "Topic ID" and use the text box to name your topic. As a best practice, the topic name should be clear and easy to recognize. For example, you might use "Elevar_pub_sub_topic".
- Locate the “Add a default subscription” option and ensure that it is unchecked.
- Once you have entered the required information, click on the "Create" button located at the bottom of the page.
- (See Figure 2)

Figure 2
Set Up Elevar Permissions in Pub/Sub
Access IAM & Admin:
- Begin on the Google Cloud homepage and use the left-hand menu to located in the upper left-hand corner to click on the "Solutions" tab. An additional menu will appear, click on the "All Products" tab.
- Navigate to the section of the page labeled "Management" and click on the "IAM & Admin" tab.
- (See Figure 3)

Figure 3
Grant Access:
- Locate and click on the “Grant Access” button.
- Enter the Elevar-provided email in the “New Principals” field.
- Under the “Assign roles” field, search for and select the role "Pub/Sub Publisher."
- Once you have entered the required details, click on the "Save" button located at the bottom of the page to confirm these permissions.
- (See Figure 4)

Figure 4
Project Name and Topic Name:Take note of your Project Name and Topic Name in Google Cloud Pub/Sub. You will need them for the next phase of setup.
- You can find your Project Name at the end of your project URL after “?project=”
- Use the navigational menu in the upper left-hand corner of the page to open Pub/Sub and find your Topic Name listed under "Topic ID".
How to Set Up and Utilize the BigQuery Integration
Create a Dataset Within BigQuery:
- Open the Google Cloud Console. Use the upper left-hand to locate and click on the "BigQuery" tab.
- Navigate to the list of your projects and click on the three dots located next to your project's name. An additional menu will appear, click on the "Create Dataset" tab.
- An additional right-hand side window will appear. Navigate to the section titled "Dataset ID" and use the text box to name your dataset (e.g., Elevar_Events_DataSet). Copy this name for later use.
- Once you have entered the required information, click on the "Create Dataset" button located at the bottom of the window.
- (See Figure 5)

Figure 5
Create a Table Within the Dataset:
- Once you have created a new dataset, you will now need to create a table within the dataset.
- Locate and click on the "Activate Cloud Shell" icon located at the top of the screen. An additional pop-up window will appear, click “Authorize” button. You will likely be prompted to provide a Google OAuth login.
- Copy and paste the following statement into the Cloud Shell terminal. Be sure to enter the name of your project and dataset:
bq mk --table --schema "subscription_name:STRING,message_id:STRING,publish_time:TIMESTAMP,data:JSON,attributes:JSON" elevar-prototyping:elevar_dataset.elevar_data- Note: The last part of the statement, starting with Elevar, should be your "gcp_project_name:dataset_name:table_name"
- Once you have entered the required information into the Cloud Shell, copy your chosen table name for later use. and then press enter. The terminal should display a message that a table was successfully created. You can also double-check that your table was successfully created by closing the terminal, refreshing the page, and checking for your dataset and table name in the left-hand navigation.
- (See Figure 6)

Figure 6
Create a Pub/sub Subscription:
- Begin on the Google Cloud homepage and use the upper left-hand menu to click on the "Pub/Sub" tab. An additional navigation menu will appear, click on the "Subscriptions" tab.
- Locate and click on the "Create Subscription" button.
- Navigate to the section of the page titled "Subscription ID' and use the text box to name your subscription.
- Use the drop down menu titled "Select a Cloud Pub/Sub topic" to choose the topic you previously created.
- (See Figure 7)
- Navigate to the section of the page titled "Delivery type" and select the "Write to BigQuery" option.
- Use the textbox to enter the name of the dataset you previously created.
- Use the textbox to enter the name of the table you previously created.
- (See Figure 8)
- Navigate to the section of the page titled "Schema Configuration" and use the check box to enable "Write metadata”.
- Once you have entered all of the required information, click on the "Create" button located at the bottom of the page. Your Pub/sub subscription should now be connected to the BigQuery table.

_Figure 7_

Figure 8
Validate the Connection and Making a Query
Query Table Events:
- Begin on the Google Cloud homepage and use the upper left-hand to locate and click on the 'BigQuery" tab.
- Navigate to the list of your projects and access the dataset and table you created. Click on the three dots located next to your table name and click on the "Query" tab.
- (See Figure 9)

_Figure 9_
Run Query:
- Within the box, enter simple query like “SELECT * FROM [your table path]”.
- Click on the "Run" button located in the top menu.
- (See Figure 10)

Figure 10
Viewing Query:
- Once you run your query, navigate to the section of the page titled "Query results" to see the events that are coming directly from the Elevar system. These will now be in your database for you to access at any time.
- (See Figure 11)

Figure 11
What's Next: Formatting Table ViewOnce your Elevar events are successfully streaming into your BigQuery table, you can create a cleaned-up view of your table that formats the event data into simple, user-friendly rows and columns.
Read this guide to learn how to format and save a view of Elevar event data in BigQuery.
Updated 6 months ago