How to Create Google Ads Non-Purchase Conversion
Learn more about Google Ads Non-Purchase Conversions and how to configure them.
Overview
Follow this guide to learn how to create Google Ads Non-Purchase Conversion and locate the conversion labels.
How to Create Google Ads Non-Purchase Conversion
Create New Conversion Action:
- Begin on your Google Ads homepage and use the left-hand menu to click on the "Goals" tab.
- Then, click on the "Conversions" tab. An additional drop-down menu will appear, click on the "Summary" tab.
- Locate and click on the "+ New Conversion action" button.
- (See Figure 1)
- Locate and click on the "+ New Conversion action" button.
 Figure 1
Edit Conversion Action Details:
- After clicking on the "+ New conversion action" button, you will be brought to a seperate window titled "Conversion action details".
- Navigate through the different categories (e.g. Conversion name, Value, Count, Click-though conversion window, etc). These settings will be unique to your requirements. For example, a last-click or a position-based attribution model.
- Once you have entered the desired settings, click on the "Done" button located at the bottom of the window.
- (See Figure 2)
 Figure 2### Complete New Conversion Action Creation:
- After creating a new conversion action, navigate to the section of the page regarding enhanced conversions.
- If you want to turn on enhanced conversions, click on the box to enable it.
- Once you have completed the required steps for creating a new conversion action, locate and click on the "Agree and continue" button located at the bottom of the screen.
- (See Figure 3)
 Figure 3### Install using Google Tag Manager:
- After clicking on the "Agree and Continue" button, you will be brought to a new page where you will access your Conversion ID and Conversion labels.
- Using the top menu, click on the "Use Google Tag Manager" tab.
- Navigate to the "Conversion ID" section of the page to locate your Conversion ID.
- Navigate to the "Conversion labels" section of the page to locate your Conversion labels.
- After accessing these details, locate and click on the "Done" button at the bottom of the page.
- (See Figure 4)
- Using the top menu, click on the "Use Google Tag Manager" tab.
 Figure 4
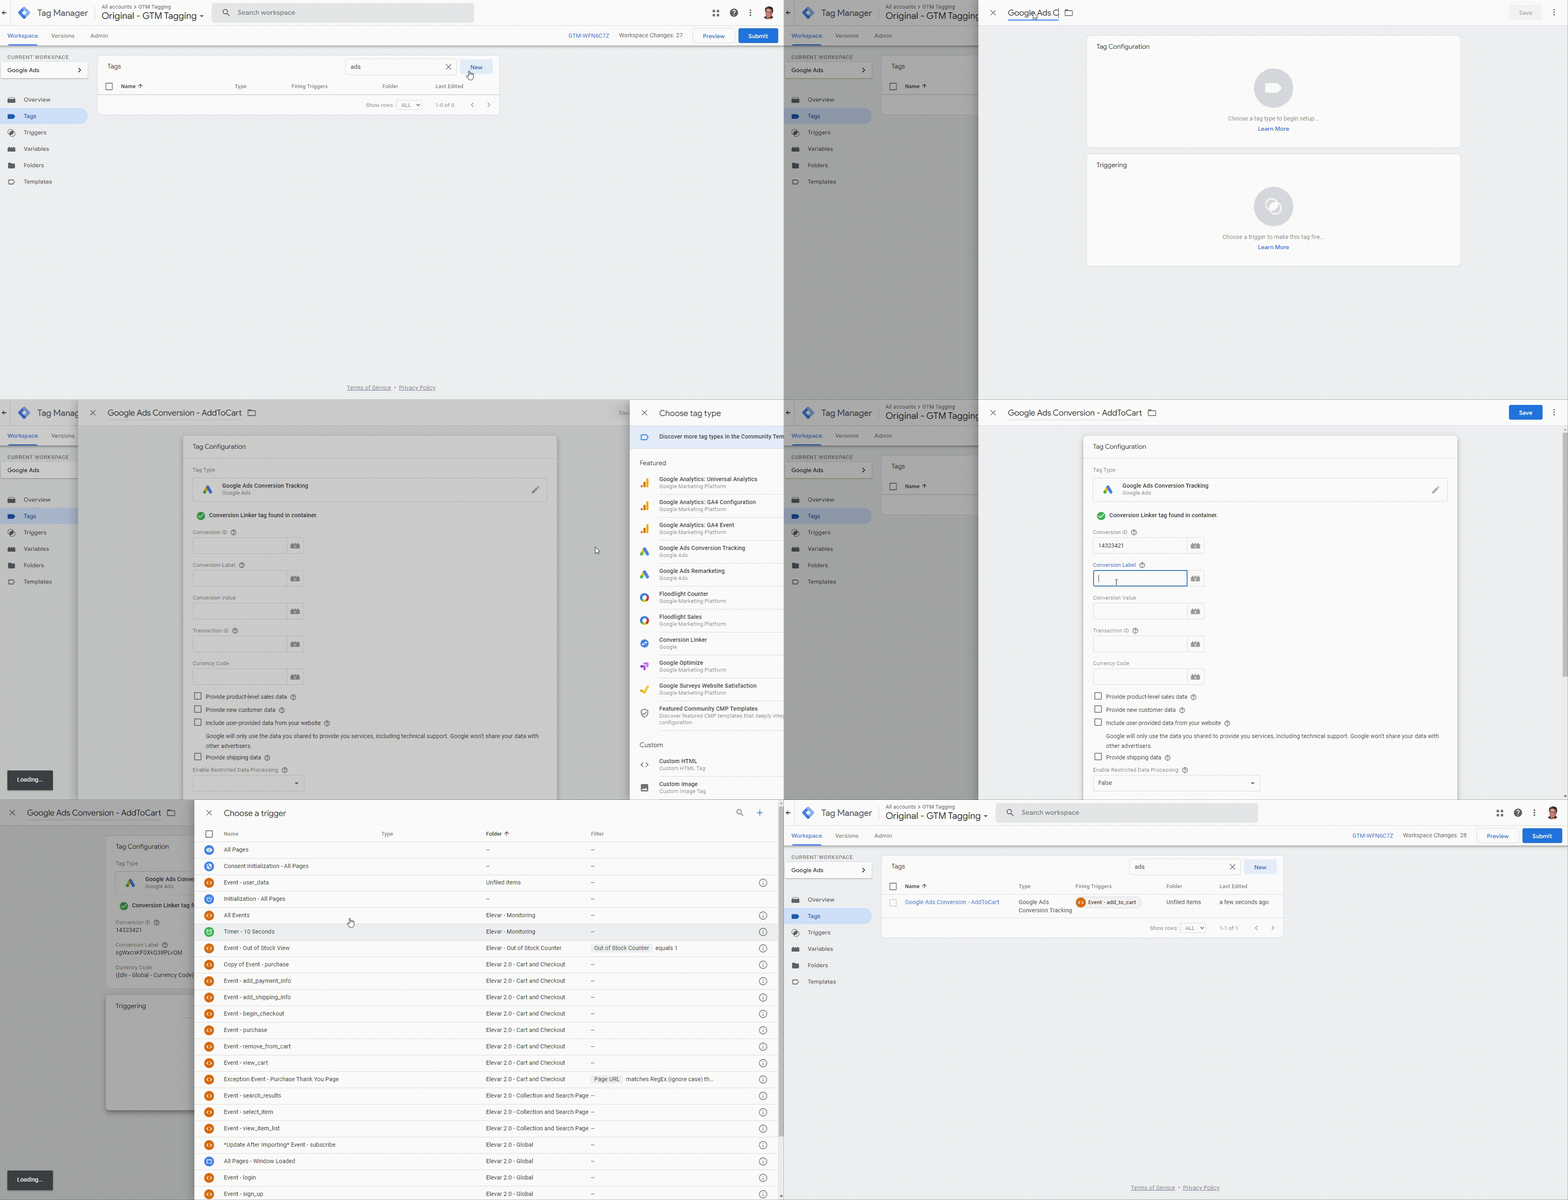
Create the Non-purchase Conversion Tag: (AddToCart Conversion)
- (See Figure 5)

Figure 5
Additional Information:
- The "conversion value" field is optional for non-purchase conversions.
- You'll need to add the correct trigger based on what conversion tag it is for (e.g., All Pages, Event - begin_checkout, Event - view_item, etc.,)
- Repeat the process if you'd want to add a different conversion.
- For Page view conversion, do not add the currency code since the currency code will be available on all pages.
Worried You’re Making Decisions on Data You Can’t Trust?Check out our blog and discover Shopify Optimization & Analytics Tips from Elevar's data experts.
Updated 29 days ago
