How to Setup Postscript Flows
Overview
Follow this guide to learn how to set up abandonment automations and how to configure your Postscript flows.
How to set up your abandonment automations
To calculate the ROI of the net new identified cart abandoners, you will need to set up an Automation in Postscripts that sends messages to a specific group of shoppers.
Clone Existing Automation:
- Begin on Postscripts homepage and using the left-hand menu, click on the "Automations" tab.
- Once on the Automations page, locate and click on your existing Automation. An additional drop-down menu will appear, click on the "Clone Flow" tab.
- (See Figure 1)
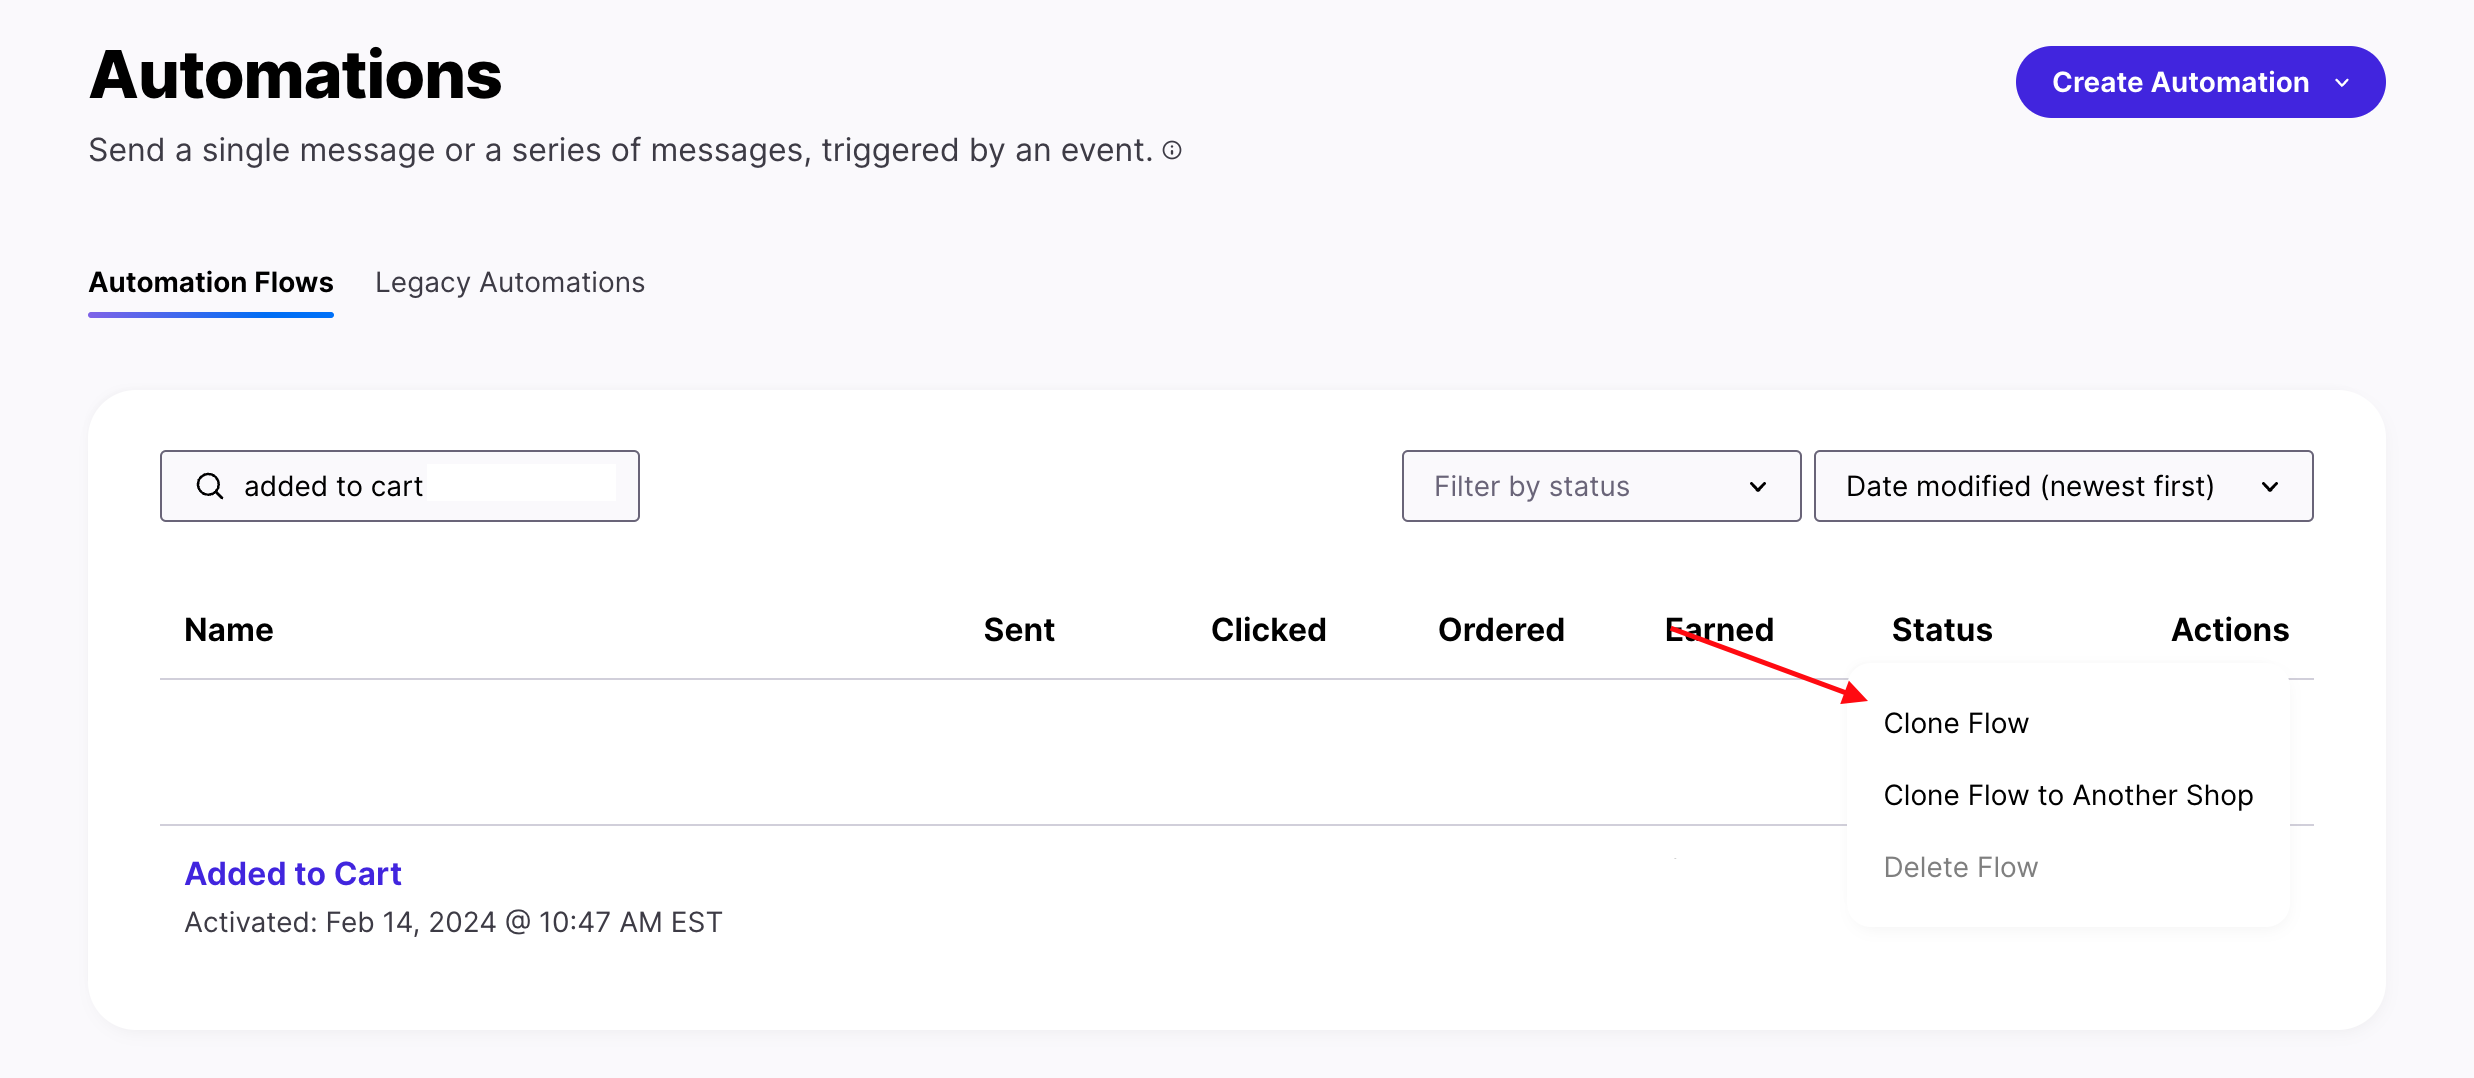
Figure 1
Customize the name and trigger
- After clicking on the "Clone Flow" button, you have the option to customize the name and trigger. Add "Elevar" to the name of the flow.
Edit Trigger Event or Property:
- Navigate to the section of the page titled "Trigger event or property".
- Use the drop-down menu to change the trigger so that it uses the Elevar server-side event as the trigger.
- (See Figure 2)
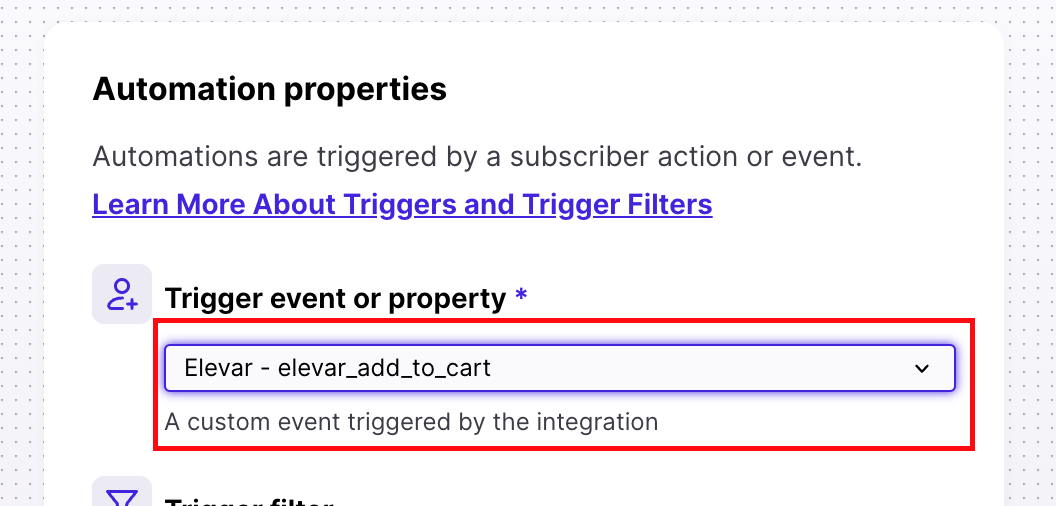
Figure 2
Cancellation Trigger:
- Navigation to the section of the page titled "Cancellation Trigger".
- Use the drop-down menus to add a cancellation trigger of the client-side event.
- (See Figure 3)
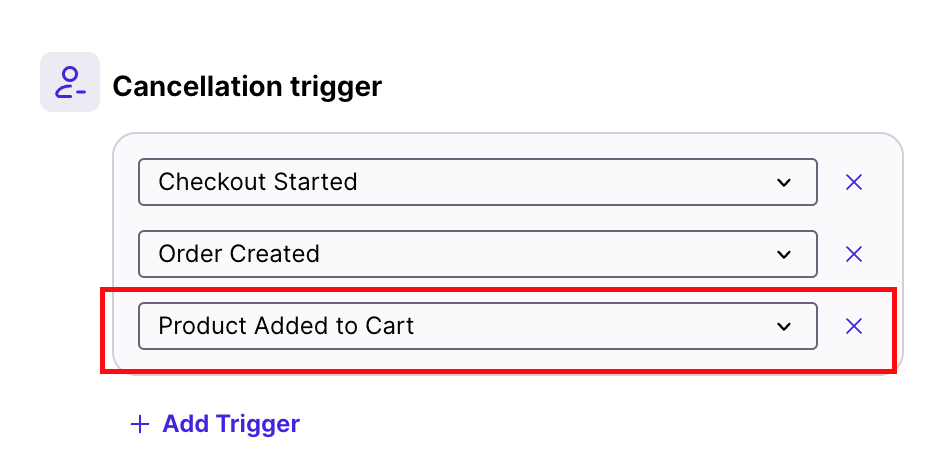
Figure 3
Subscriber Filter:
- Navigate to the section of the page titled "Subscriber Filter".
- Use the drop-down menus to add a Subscriber Filter to ensure users who are in the main client-side flow do not also enter the server-side flow.
- (See Figure 4)
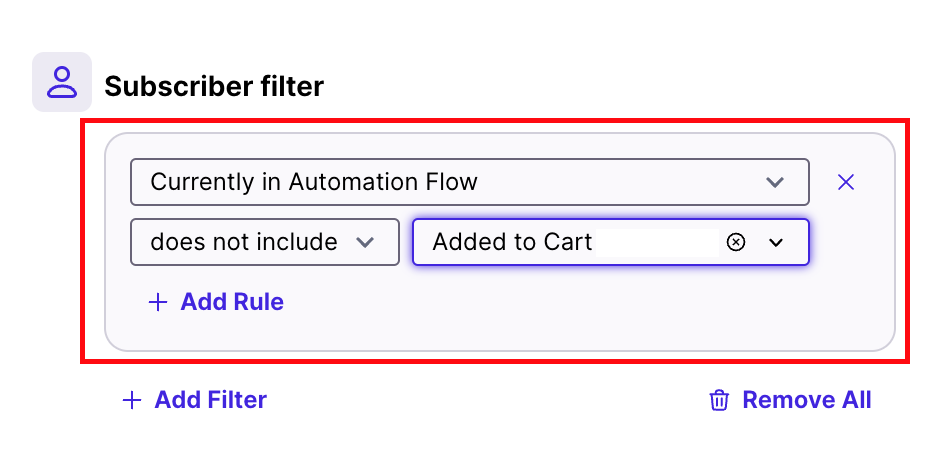
Figure 4
Customize the Message Copy
- Navigate to the section of the page titled "Send Message". Review the message copy and see if there are any invalid dynamic inputs.
- Locate and click on the "Merge Tags" button to see what dynamic inputs are available based on the trigger of the Automation.
- If you're passing a dynamic "Product Name" value, try using the "Producttitle" or "Varianttitle". If you're passing a dynamic checkout URL, try inputting a standard cart URL (e.g. website.com/cart) or the EventlocationURL (the page the shopper was on when they triggered the event).
- (See Figure 5)
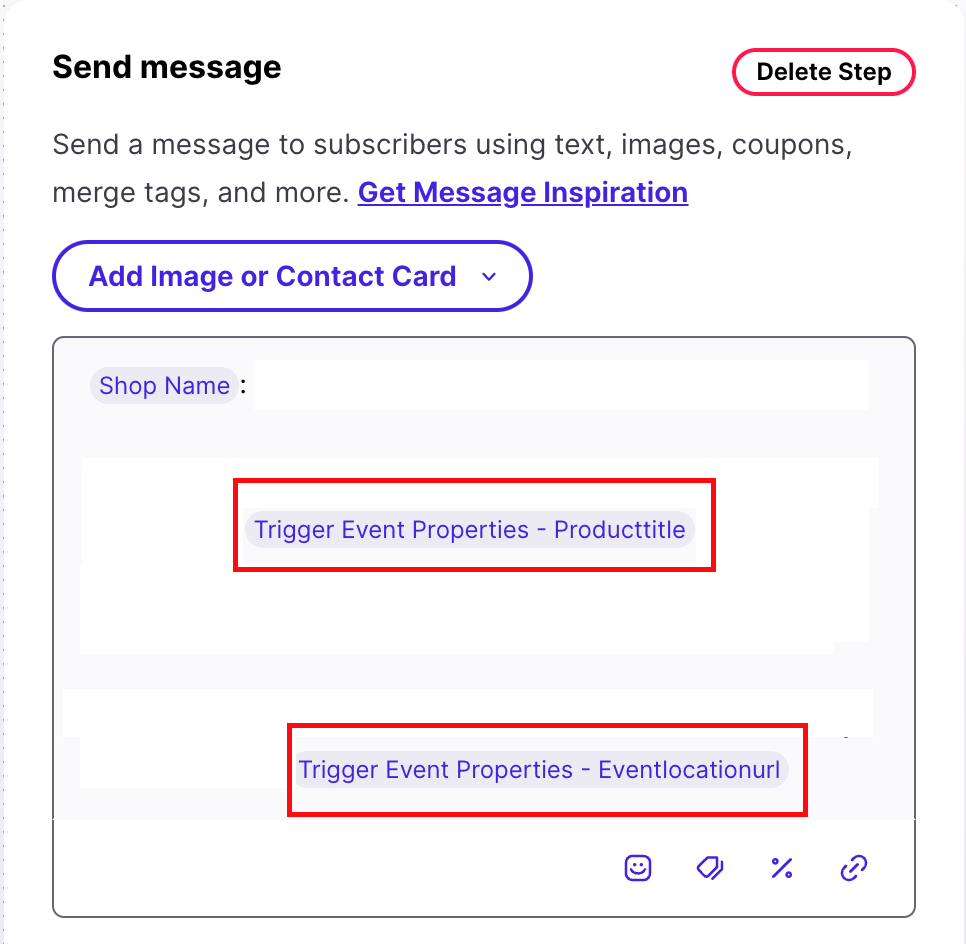
Figure 5
Activate the Automation:
- After completing all of the required steps, locate and click on the "Schedule or Activate" button located in the upper right-hand corner of the page.
- (See Figure 6)
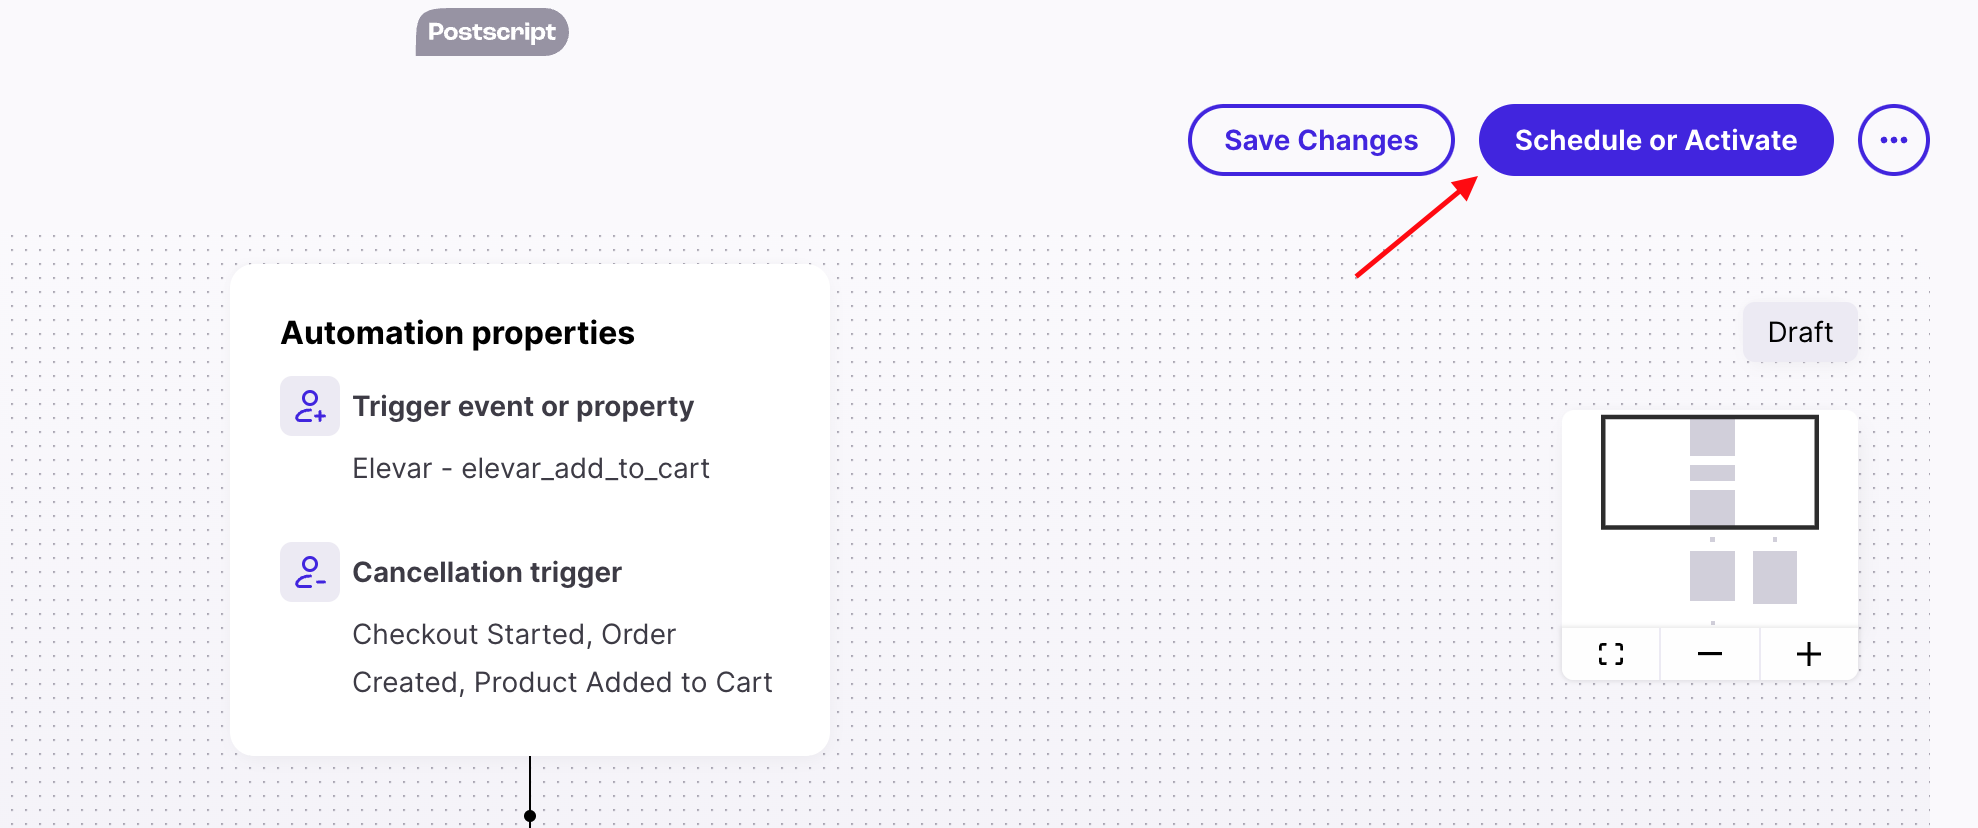
Figure 6
Updated 7 months ago
Did this page help you?