Updating Cookiebot for Consent Mode V2
Overview
Follow this guide to learn how to update your Google Tag Manger Template to account for the new values for consent mode v2.
How to Update Cookiebot for Consent Mode V2
Import Cookiebot Template to Google Tag Manager:
Download Container:
- Begin on your Elevar homepage and use the left-hand navigation menu to click on the "Pre-Built Tags" tab.
- Use the search function to locate and click on the "Cookiebot V2 Update - Template Only" container.
- Once inside of the Cookiebot container, navigate to the section of the page titled "Download Container" and click on the "Download Container" button.
- (See Figure 1)
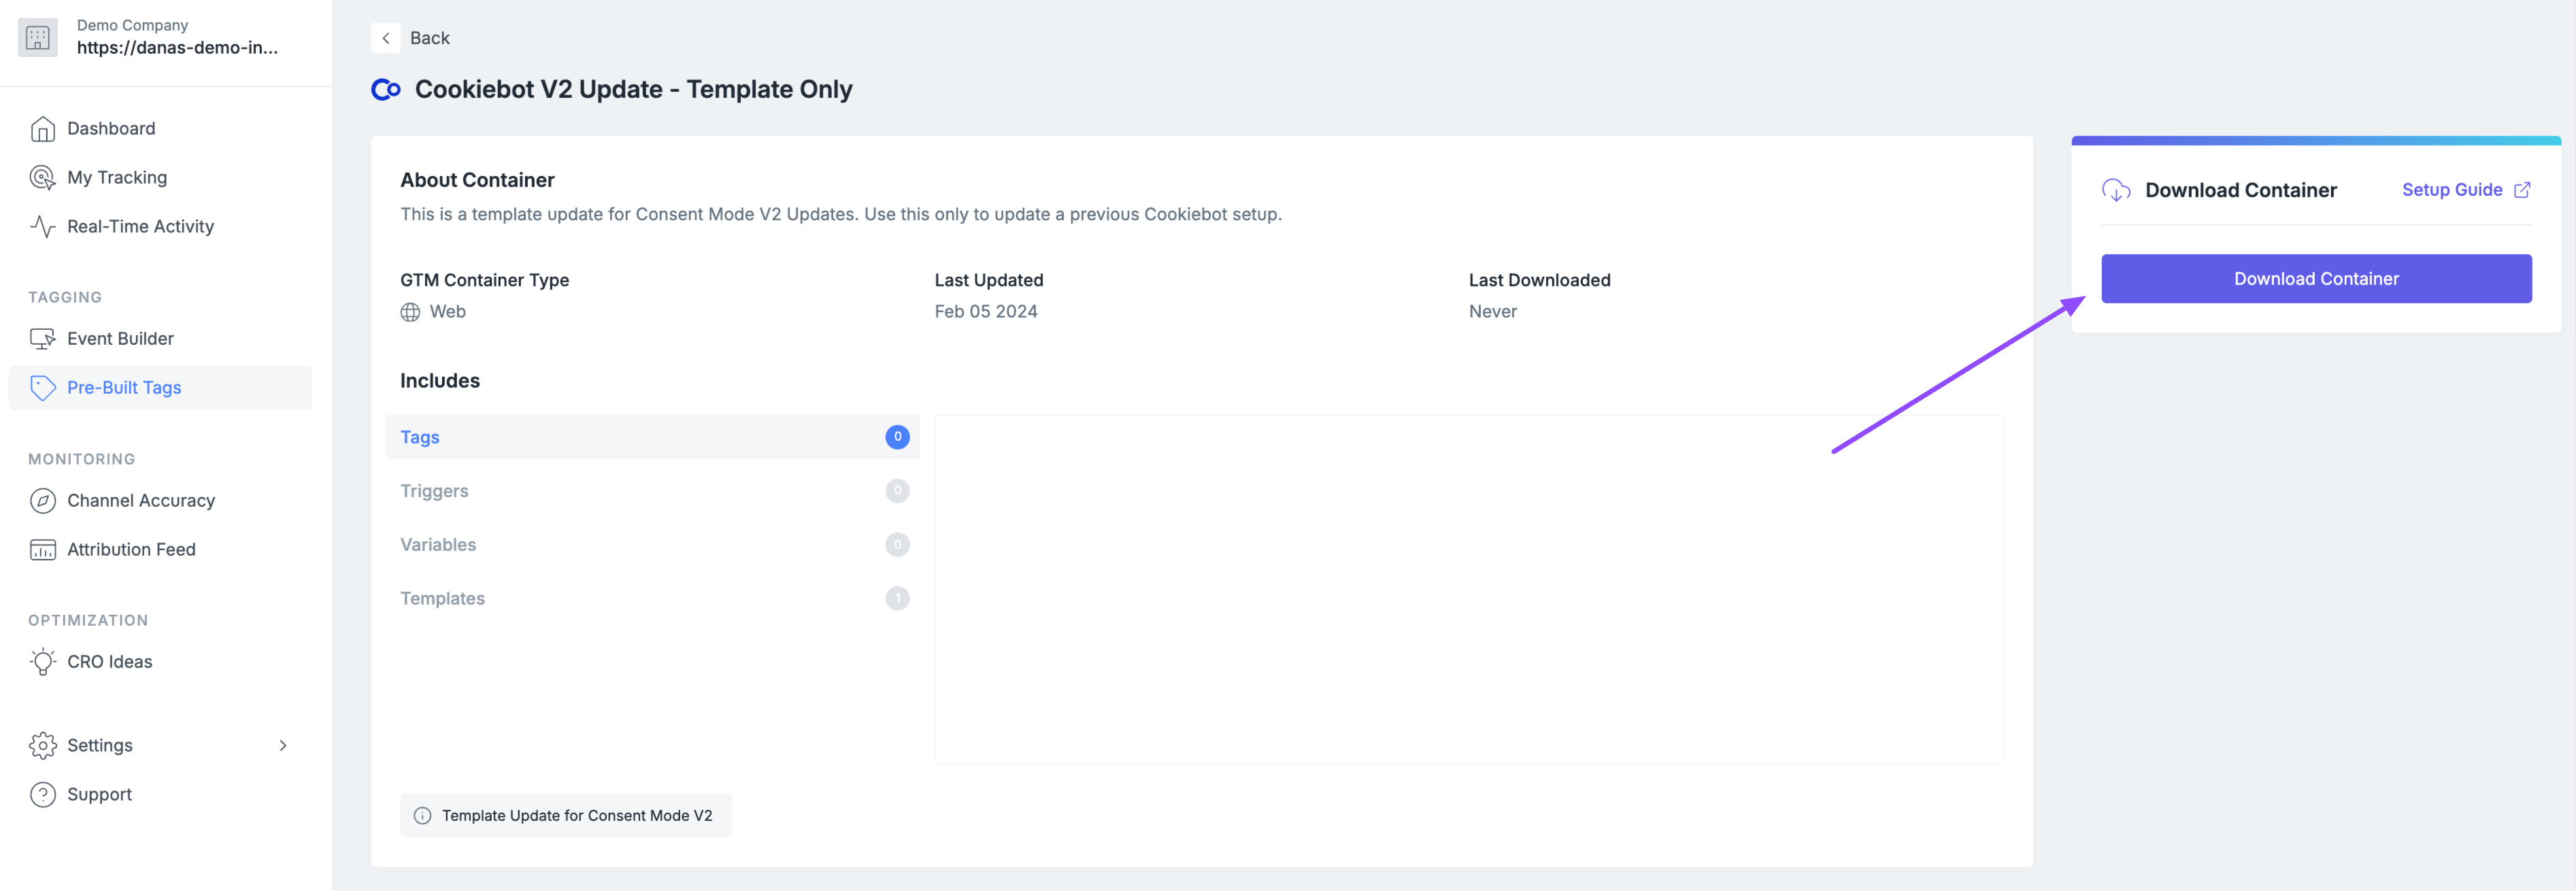
Figure 1
Download Pre-Built Cookiebot Container into Google Tag Manager
Import the Tags in Google Tag Manager:
- After you have downloaded the Cookiebot pre-built container from the Elevar app, import the tags into Google Tag Manager.
- Follow this guide to learn how to import containers into Google Tag Manager.
Review Default Consent Status:
- In your Pre-Built Consent Tags, there is a section where you can choose to allow certain cookies to fire before the shopper grants or denies consent.
- Please review desired default consent status before the user visitor provides a consent status. [What do these consent types mean?]
- (See Figure 2)
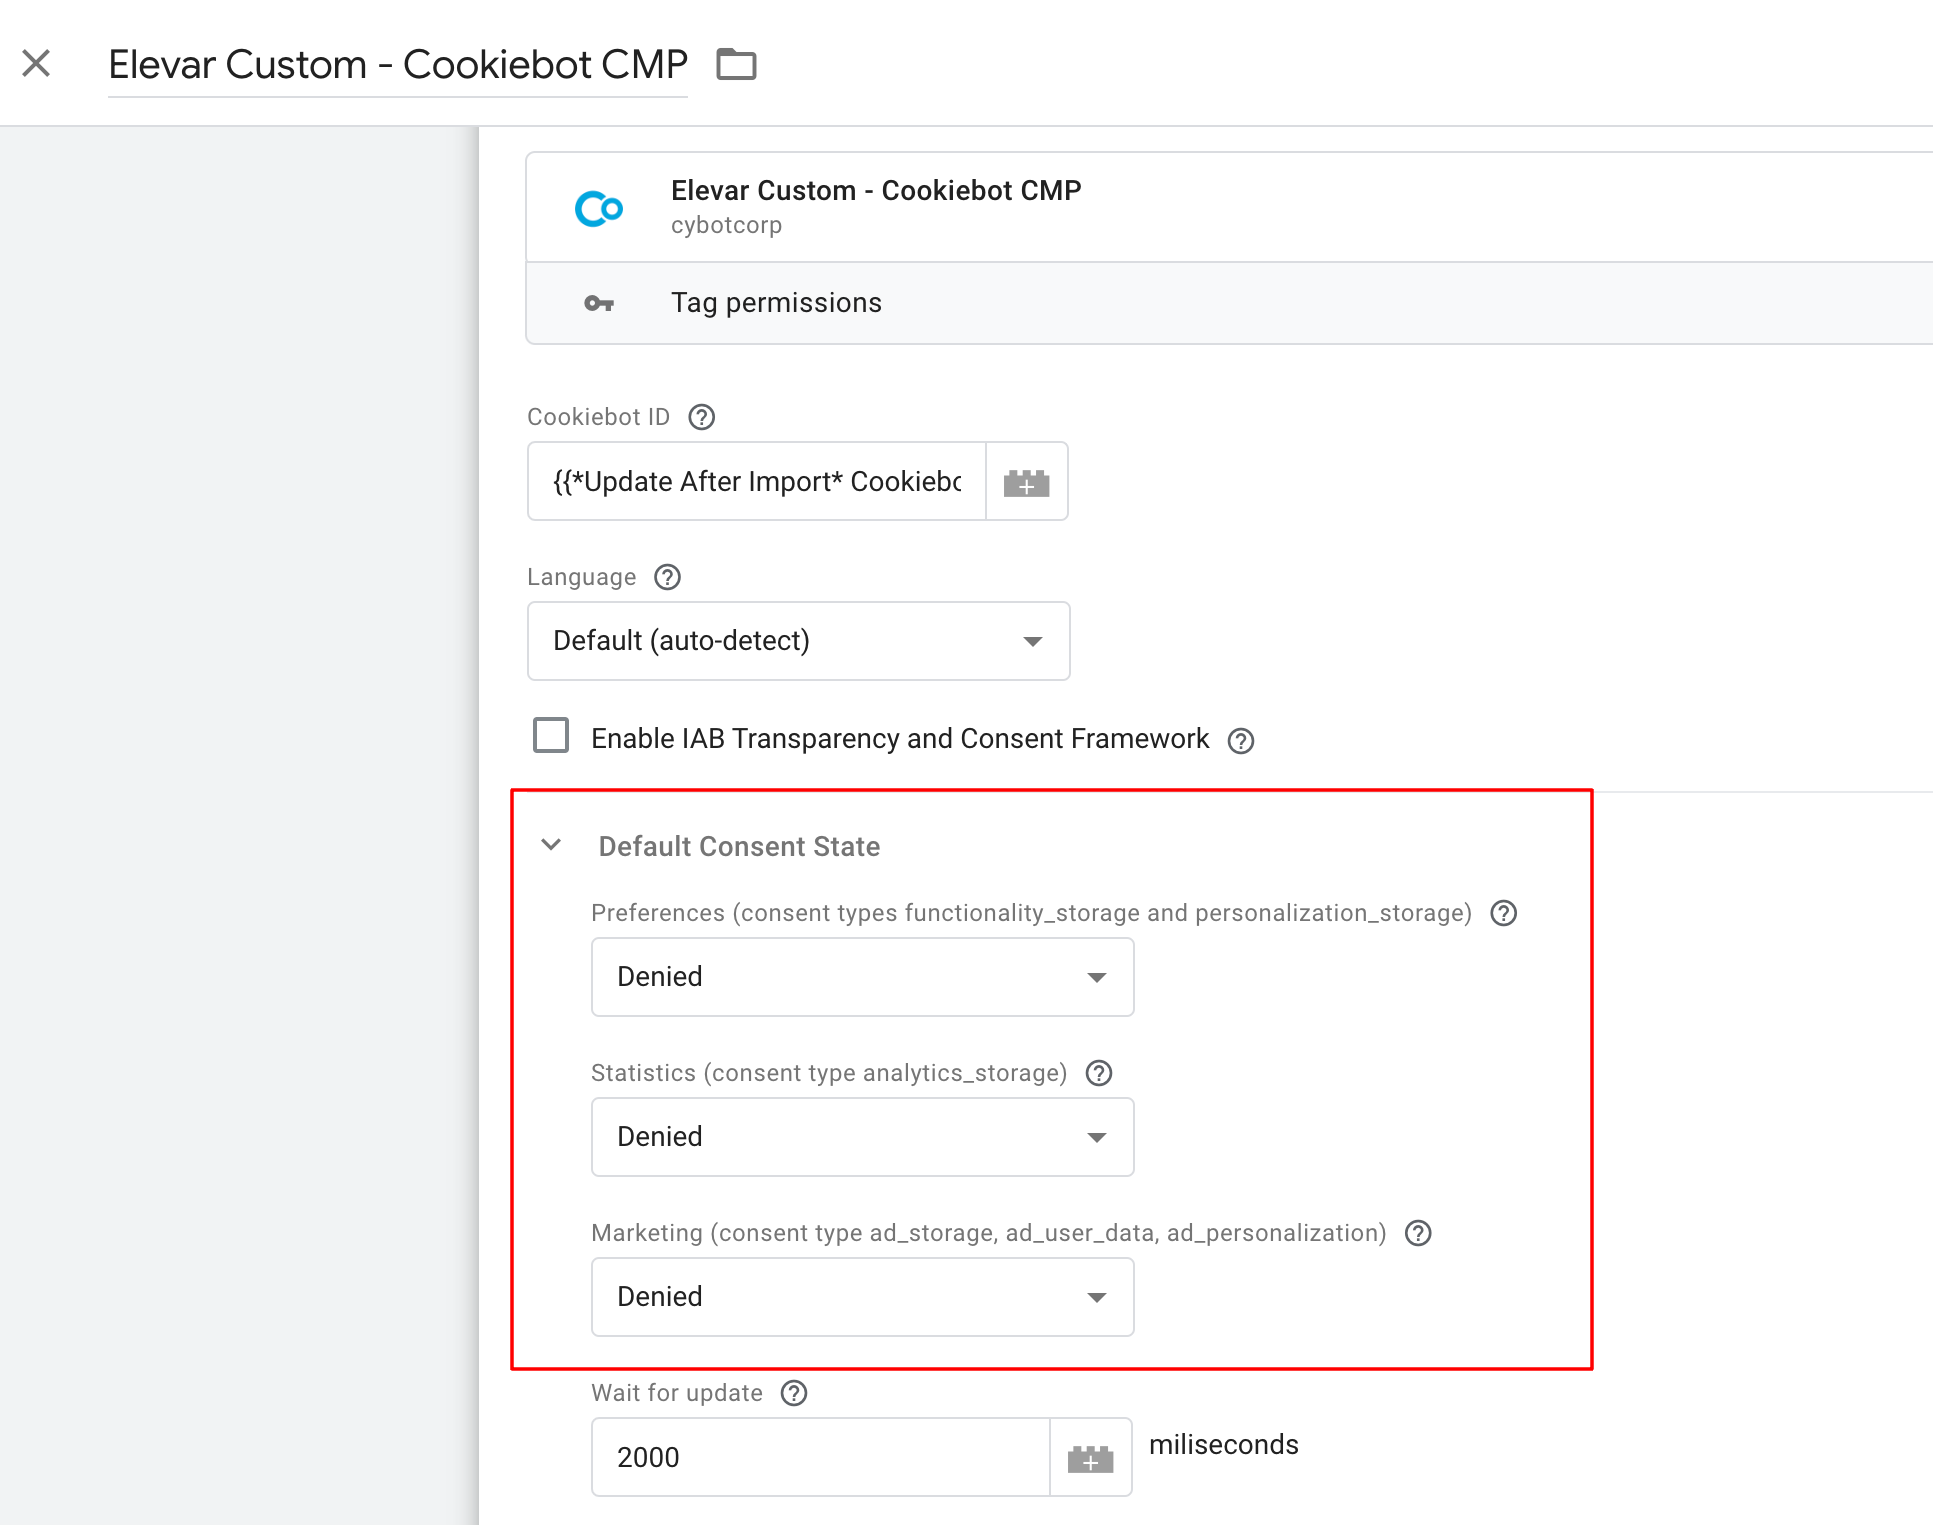
Figure 2
Note: Typically, the default statuses will vary by your region and legal requirements if you have opt-in or opt-out requirements.Elevar does not offer legal advice regarding GDPR or any consent compliance. Please consult your legal team if unsure.
Publish Your Changes:
- Once you have downloaded the Cookiebot container and imported it into Google Tag Manager with the correct default consent states selected, be sure to publish your changes in your workspace.
- Click on the "Submit" button located in the upper right-hand corner of the page.
- (See Figure 3)
- Click on the "Submit" button located in the upper right-hand corner of the page.
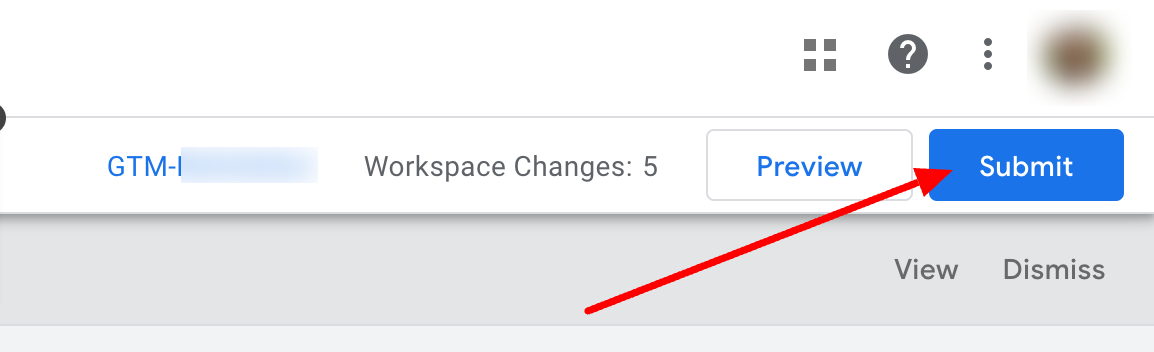
Figure 3
Confirm your consent now includes the new values:
- The best way to check your defaults are to view in Google Tag Manager Preview Mode. After Making your updates access Google Tag Manager and select preview.
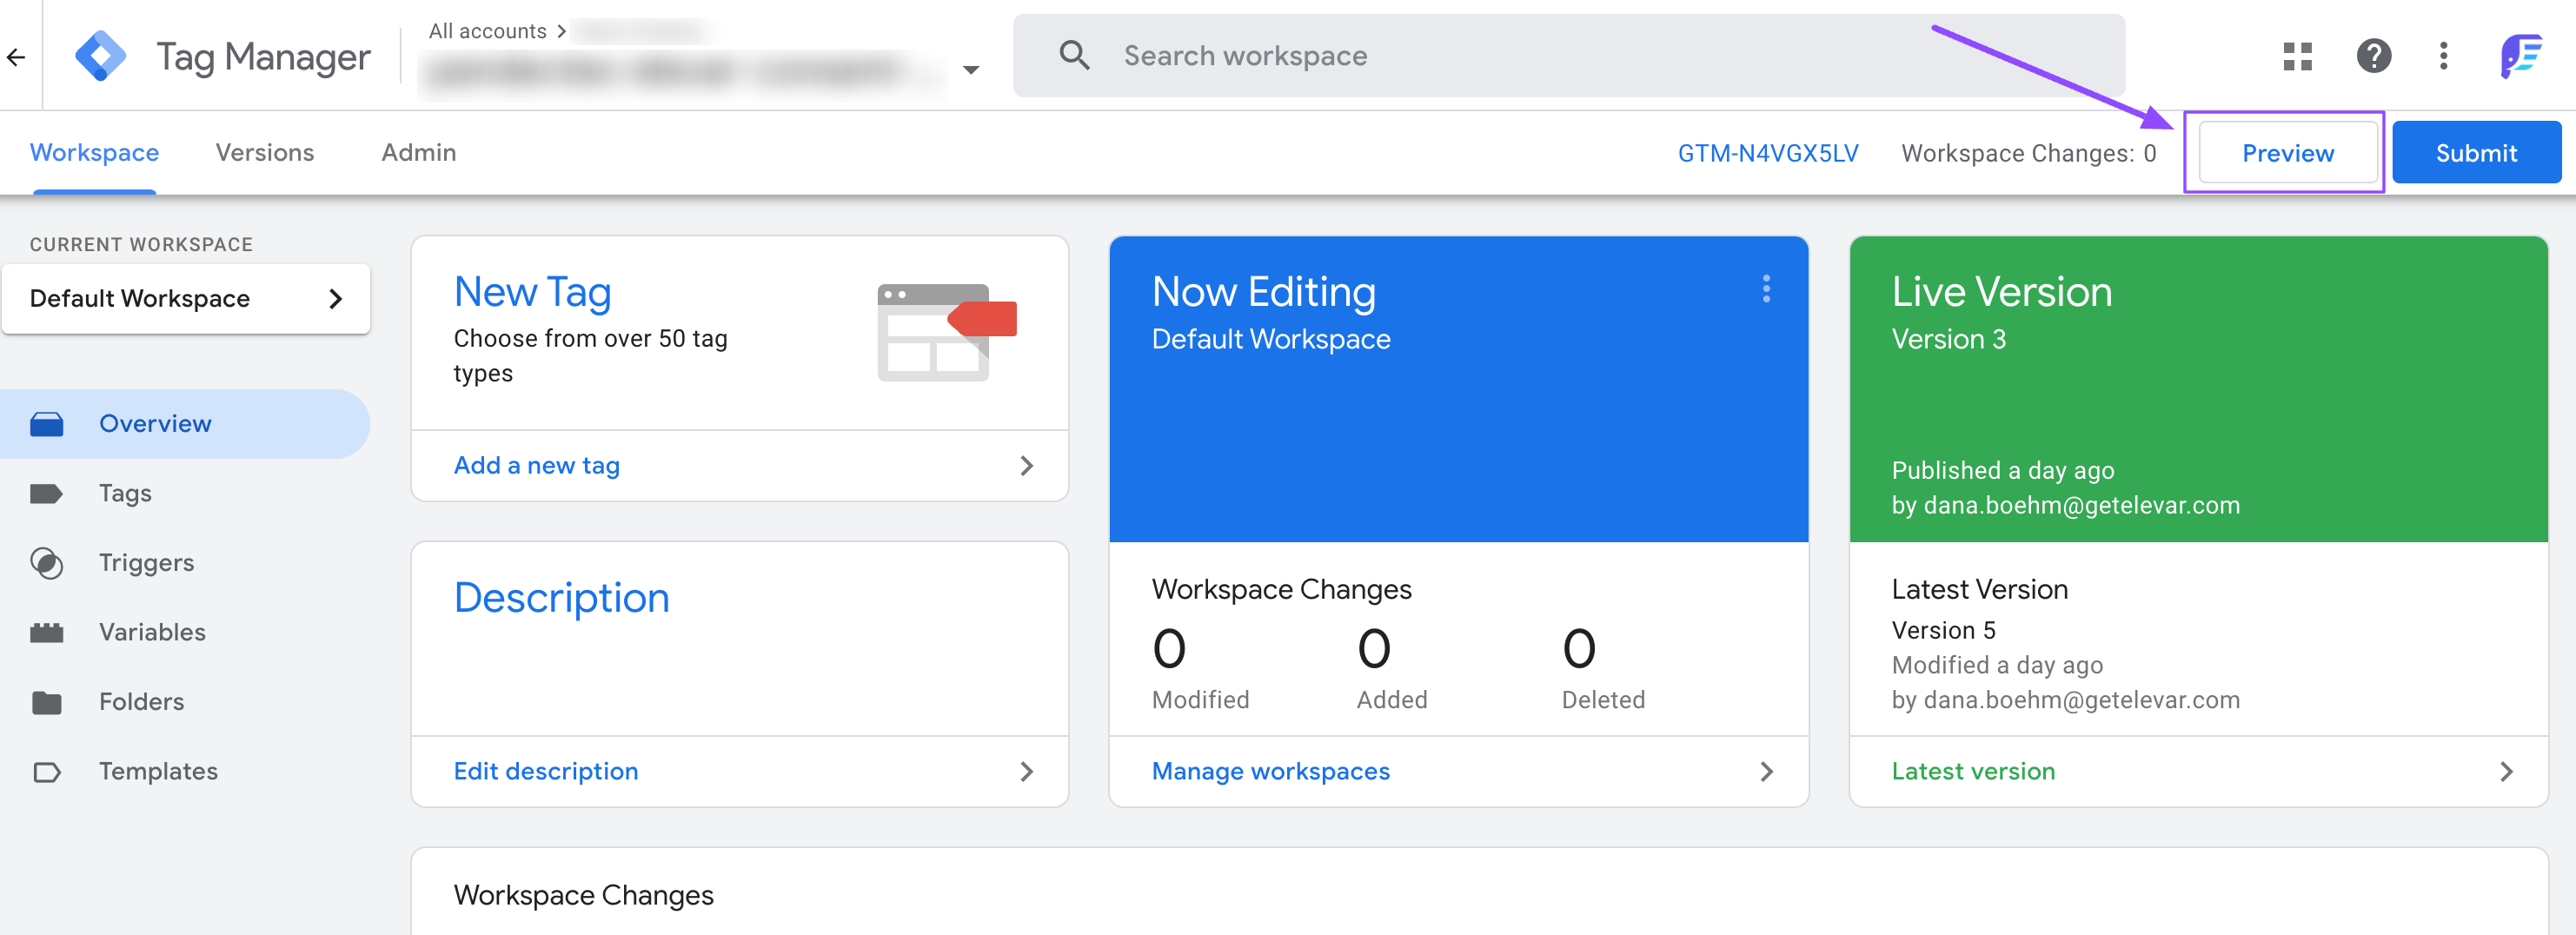
Enter your website URL and click connect
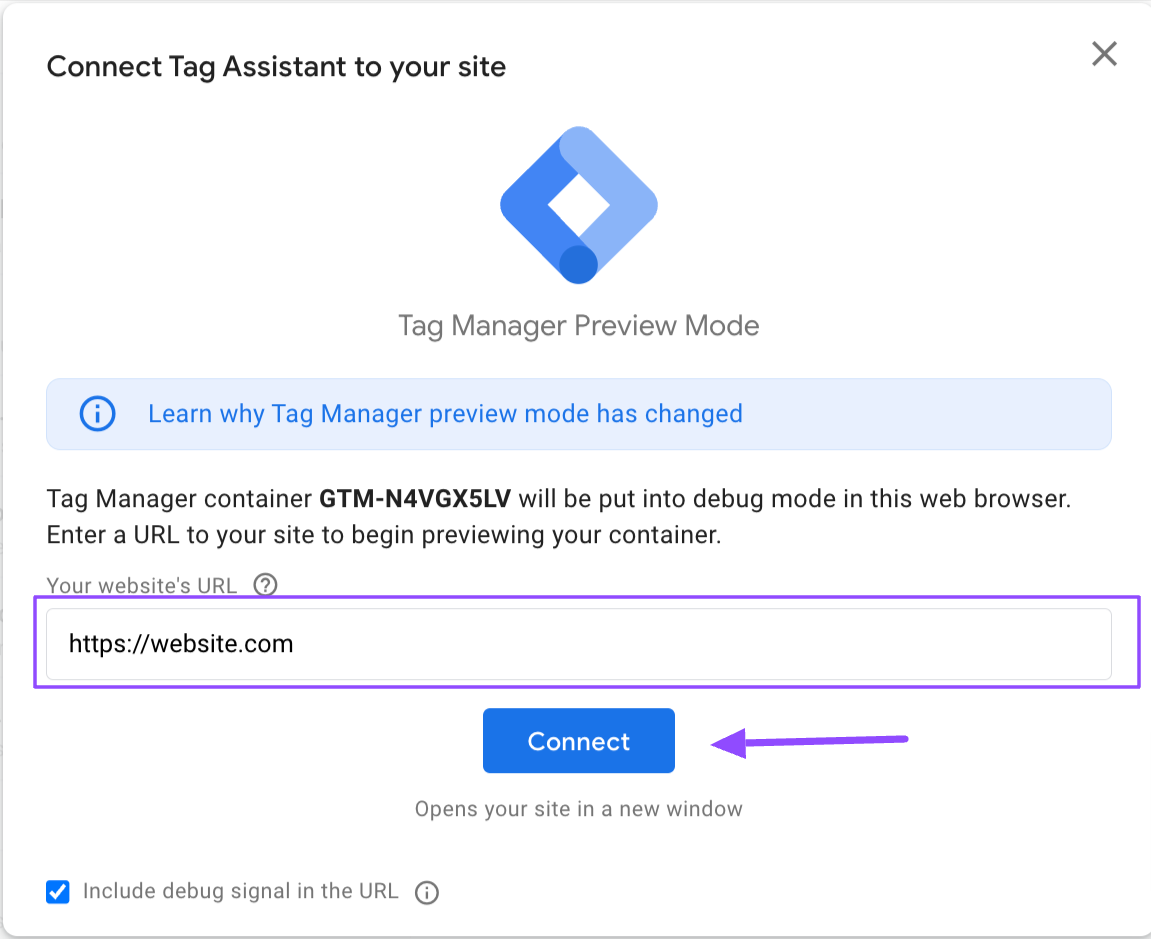
Your site will load and you'll want to return to the preview tab to confirm your consent defaults and consent updates.
Confirm consent default values
Follow these steps to confirm the defaults have been set.
- Click on the first Consent event in the left column, the lowest number and lowest in the list.
- Click on the Consent Tab
- Review the values in the On-page Default column. You are looking to see values for all the consent types and specifically the updates for consent mode V2 you will see the addition of ad_user_data and ad_personalization
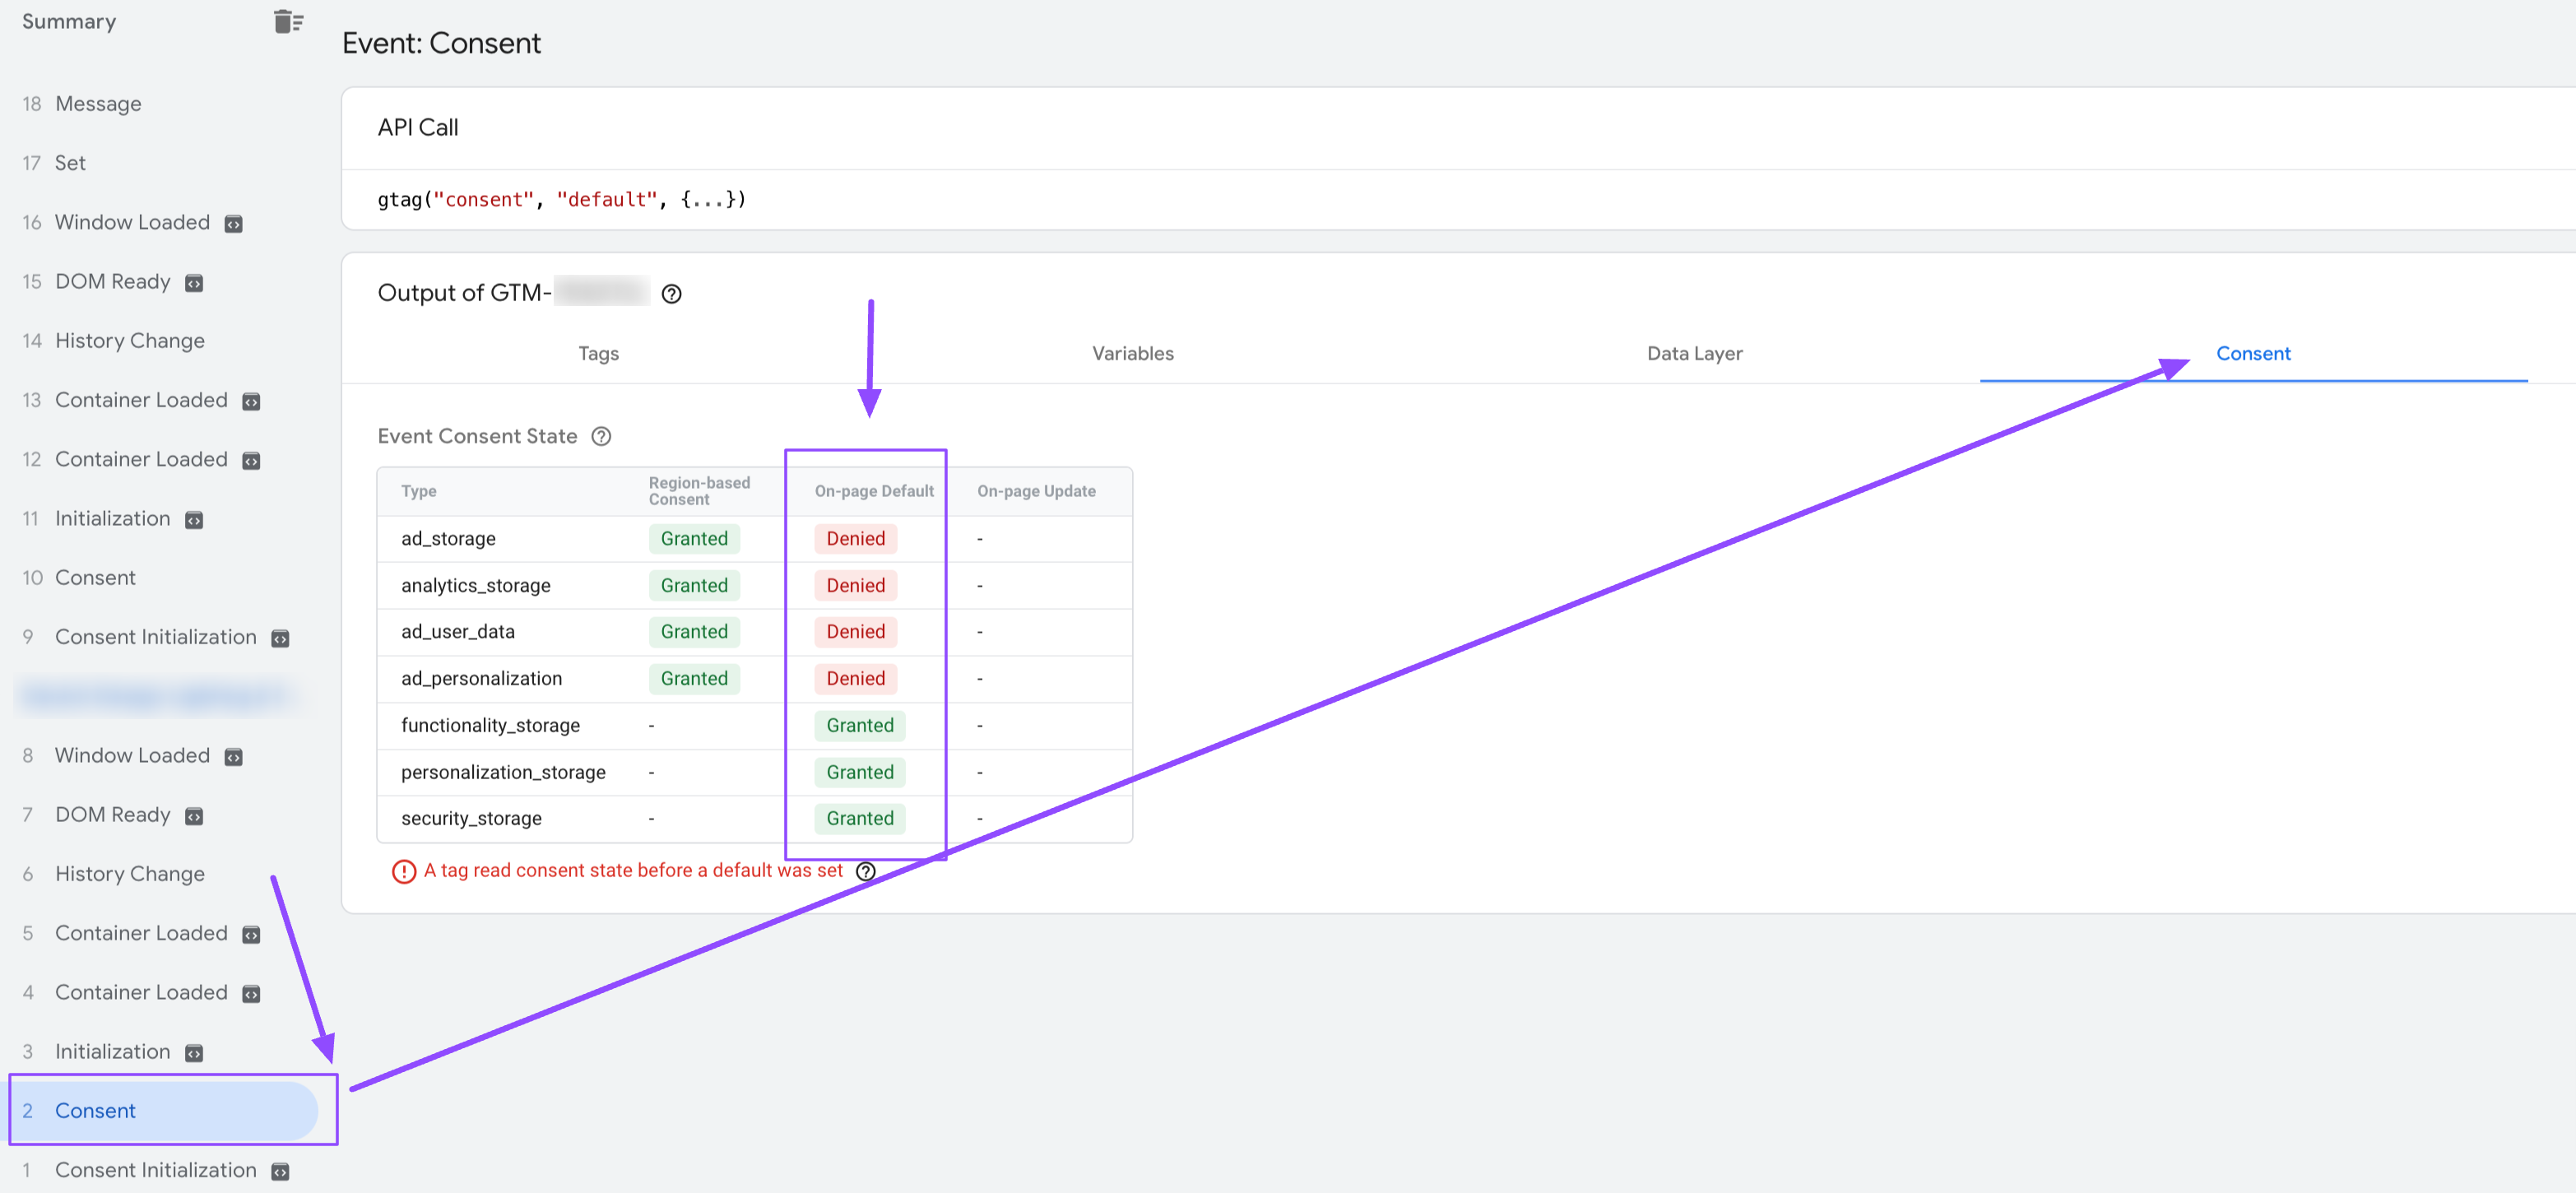
If you are seeing ad_personalization and ad_user_data like below your defaults are now updated for consent mode v2!
Confirm your consent update values
Next, we will confirm your consent update values if available. If your banner displays for your region, accept or deny your consent.
Now you'll want to select the most recent Consent event that was triggered by your update. You are looking to see that you now have values for all the consent types in the On-page Update column. Specifically the change for consent mode v2 is that you have values for ad_user_date and ad_personalization
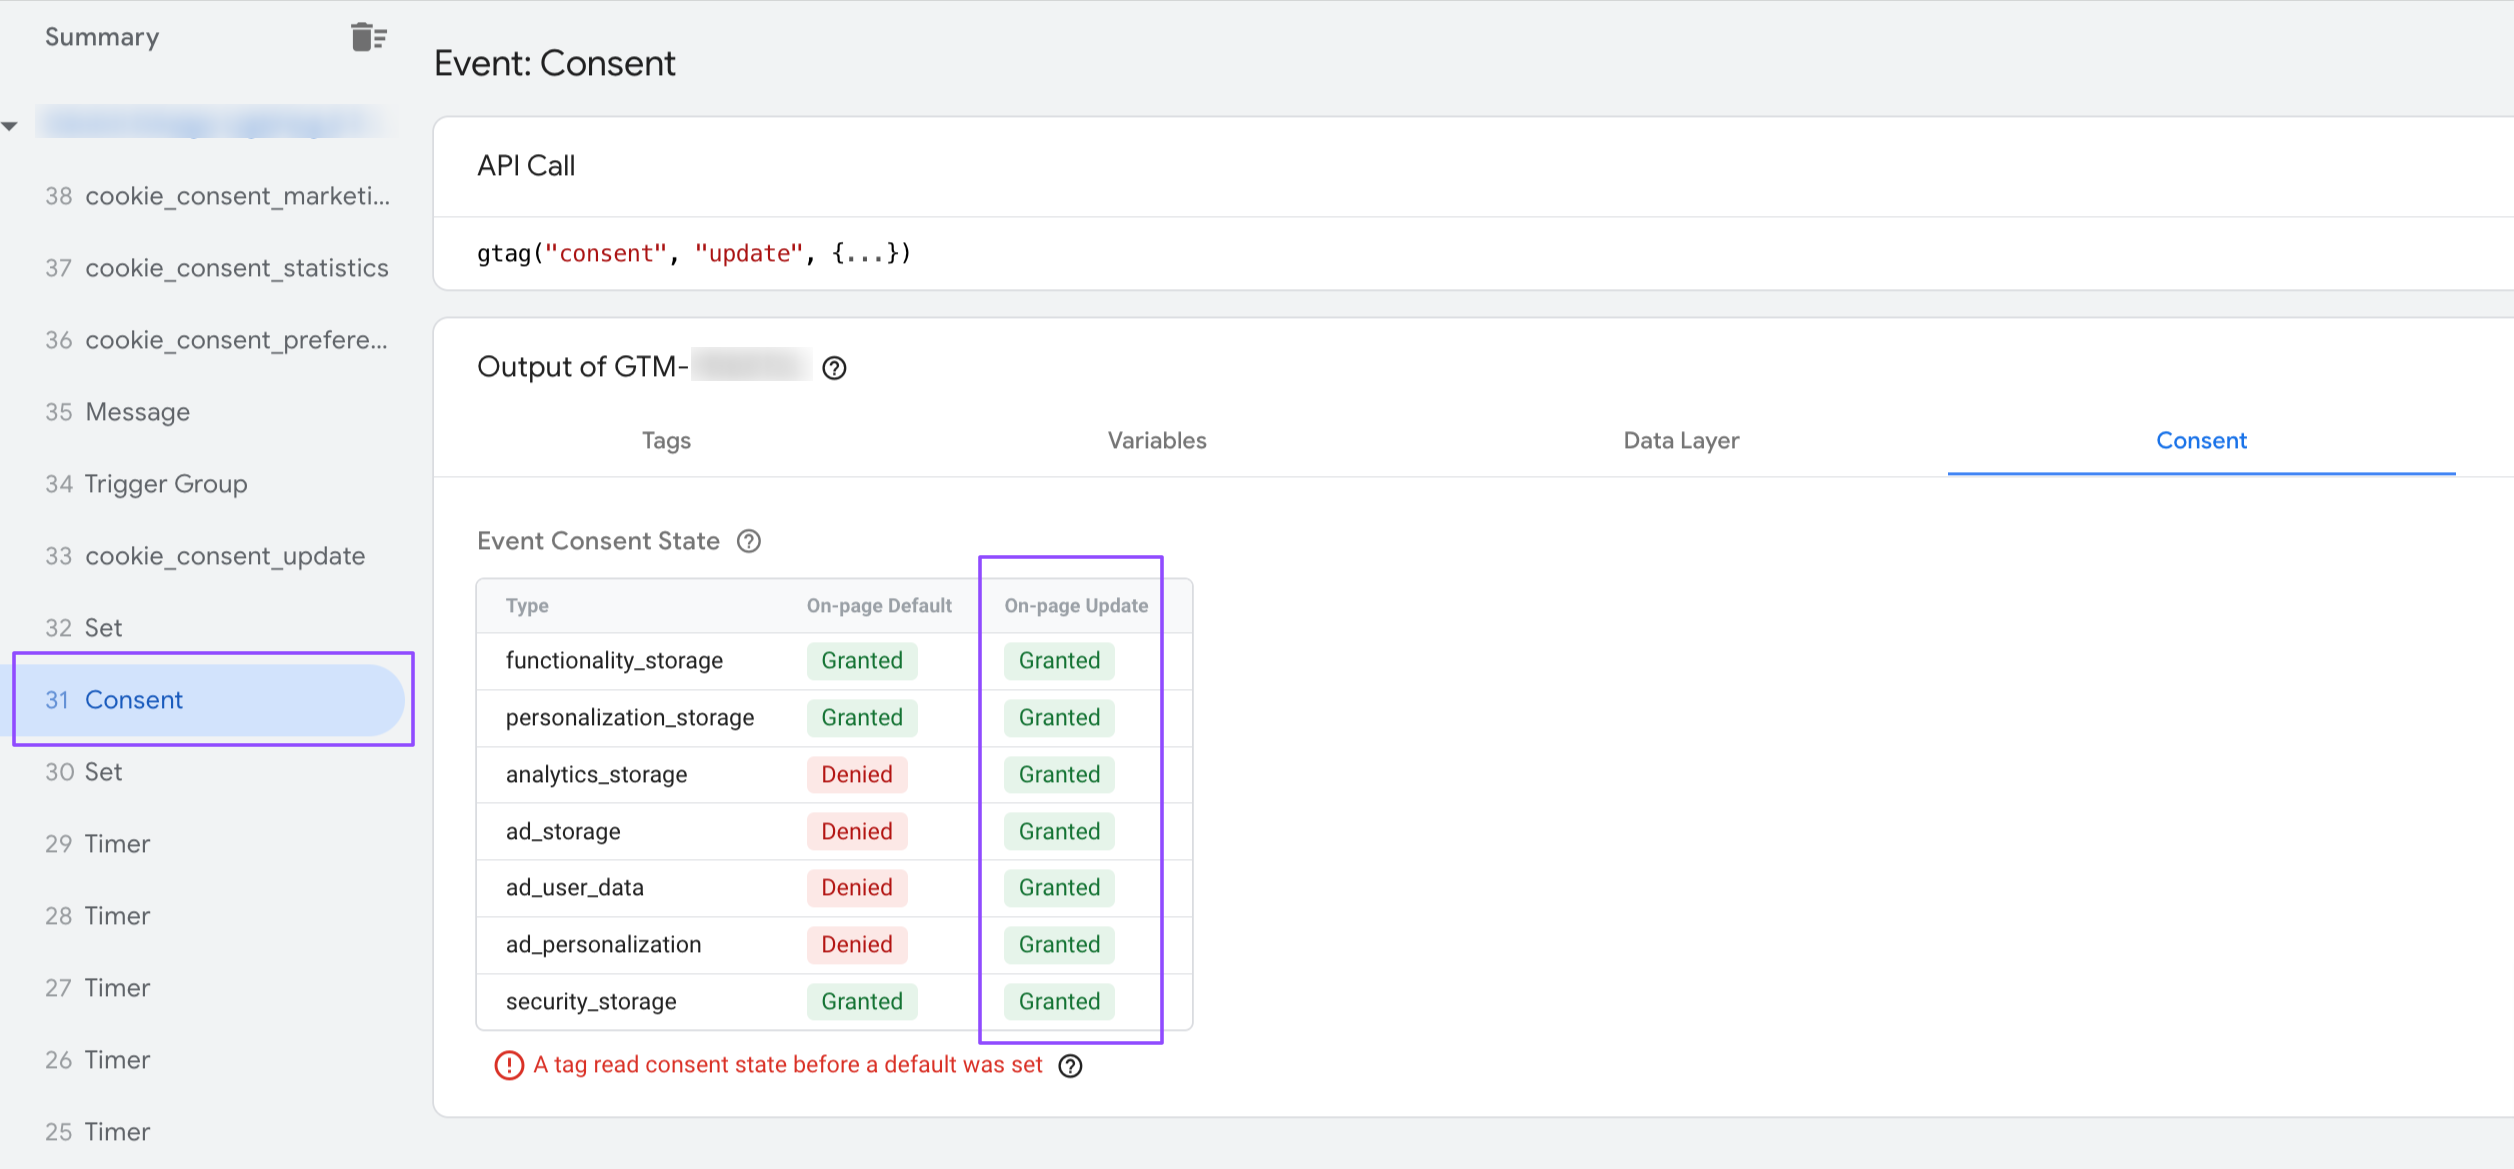
If you are seeing ad_personalization and ad_user_data like below you are all set for consent mode v2!
Still have questions, concerns, or lack confidence in your updates? We've got you covered!
Reach out to our support team to have them review your updates.
Updated 5 months ago