How to QA Shopify Store with GTM Container In Preview Mode
See how to verify your new tags and variables work as expected using Google Tag Manager(GTM) preview
Overview
Follow this guide to learn how to QA Shopify Store with GTM Container In preview mode.
If you have not followed our setup guide for Installing the Shopify source please do so before continuing.
Once you've successfully imported our web containers or pre-built container(s) to your GTM account, you will want to do the following:
- Enable Preview Mode in Google Tag Manager (GTM)
- Determine what tags you want to fire via GTM: Google Ads remarketing (?), Facebook (?), Google Analytics (?), and other marketing tags (?). Based on the answers to these then move on to the next step where you'll walk through each page.
- Page by Page QA: Collection Pages
- Page by Page QA: Product Pages
- Page by Page QA: Add to Cart
- Page by Page QA: View Cart
Enable Preview Mode in GTM
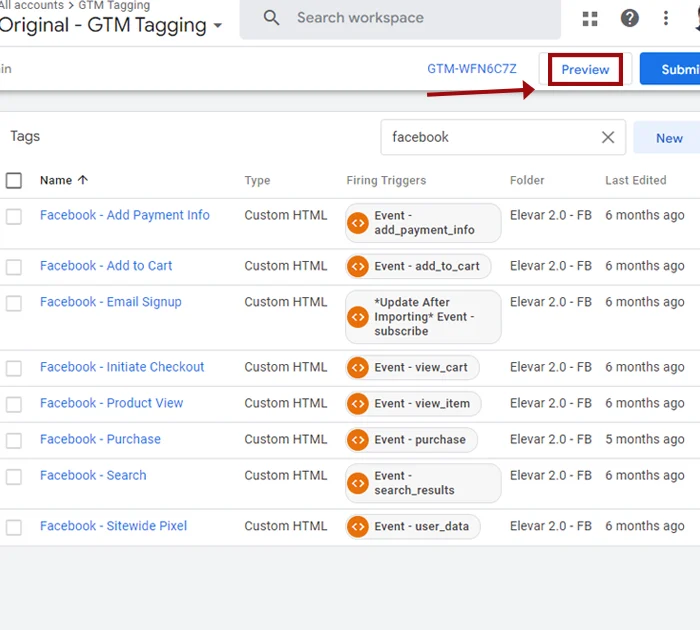
Inside GTM, after you've imported the pre-built container, click on Preview located in the top right-hand corner of the page.
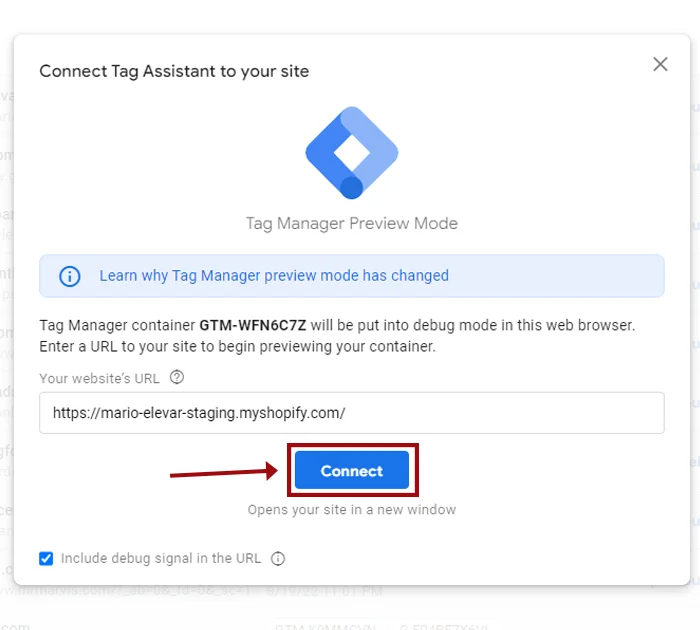
Enter Store URL > Click Connect
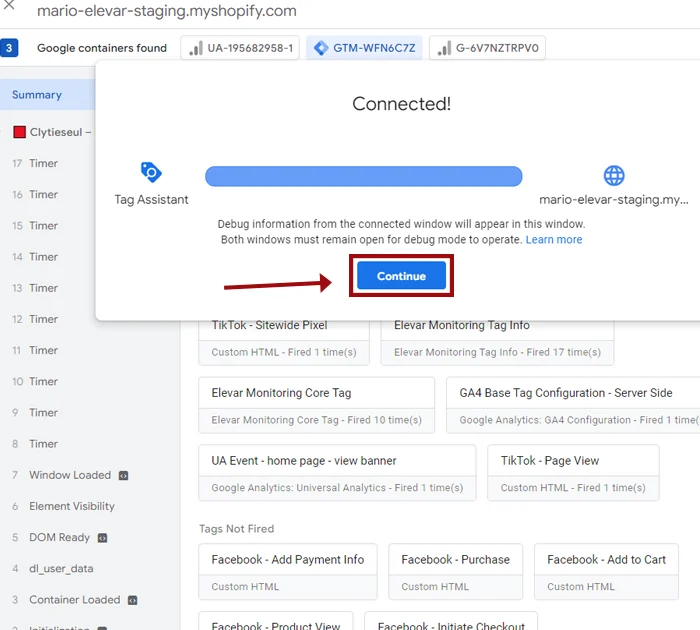
A new tab will open > Click Continue
Page by Page QA
Now that your GTM account is in preview mode, you can go to your website and verify each page fires successfully by viewing the browser console at the bottom of the screen:
Pages you need to review:
Confirm that the tags that are firing on the correct event (i.e., dl_view_item_list)
If you are not seeing the tag firing, then make sure that it is using the correct trigger.
Note: Below is how you can confirm that the dataLayer is working - check the "Data Layer" tab
Collection Page
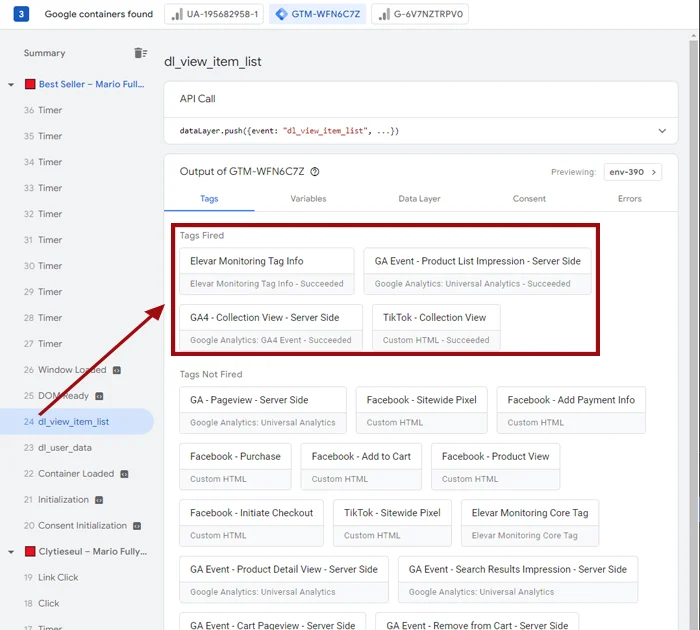
Navigate to your Collection Page and check the GTM preview mode window, you should see product impression data in the dataLayer that looks something like this:
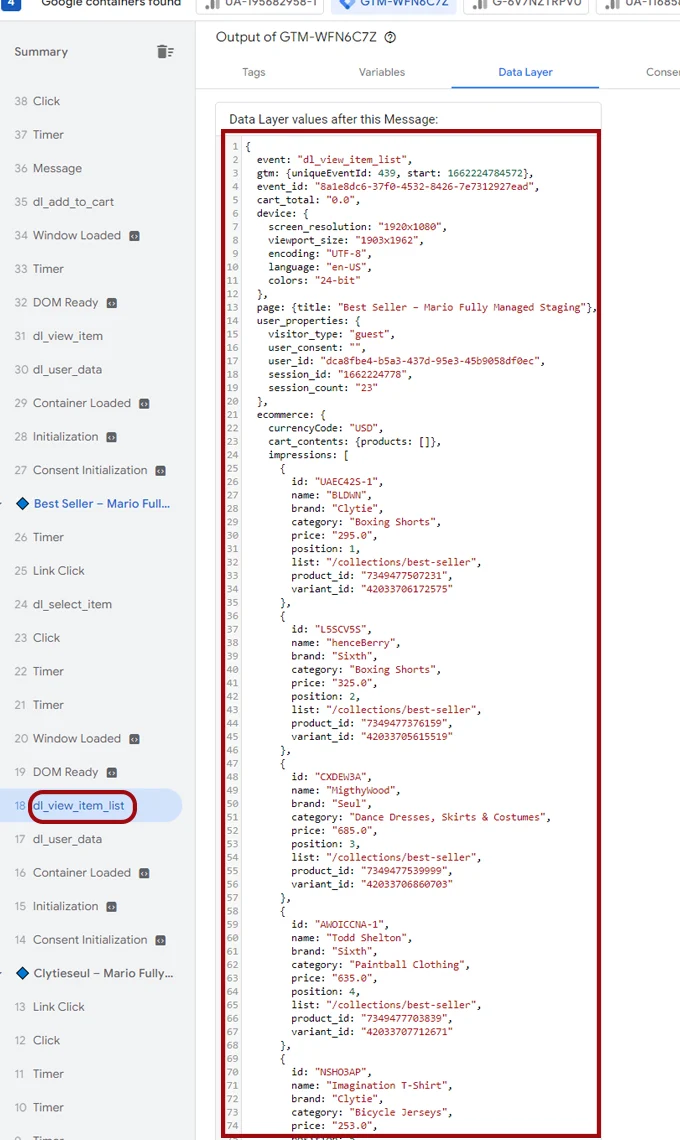
Notice the dl_view_item_list event on the left side of the preview mode and the dataLayer content on the right screen.
Product Page
Navigate to your Product Page. This page should have its own dl_view_item event that looks like this:
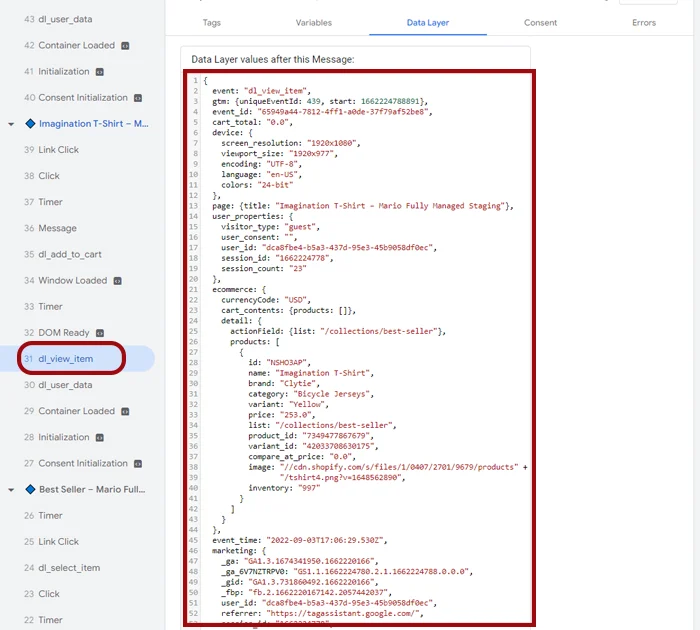
If any key dataLayer variables are empty like name, productId, or price then there is likely a conflict with your existing theme or there is no value on that Shopify object.
Add to Cart
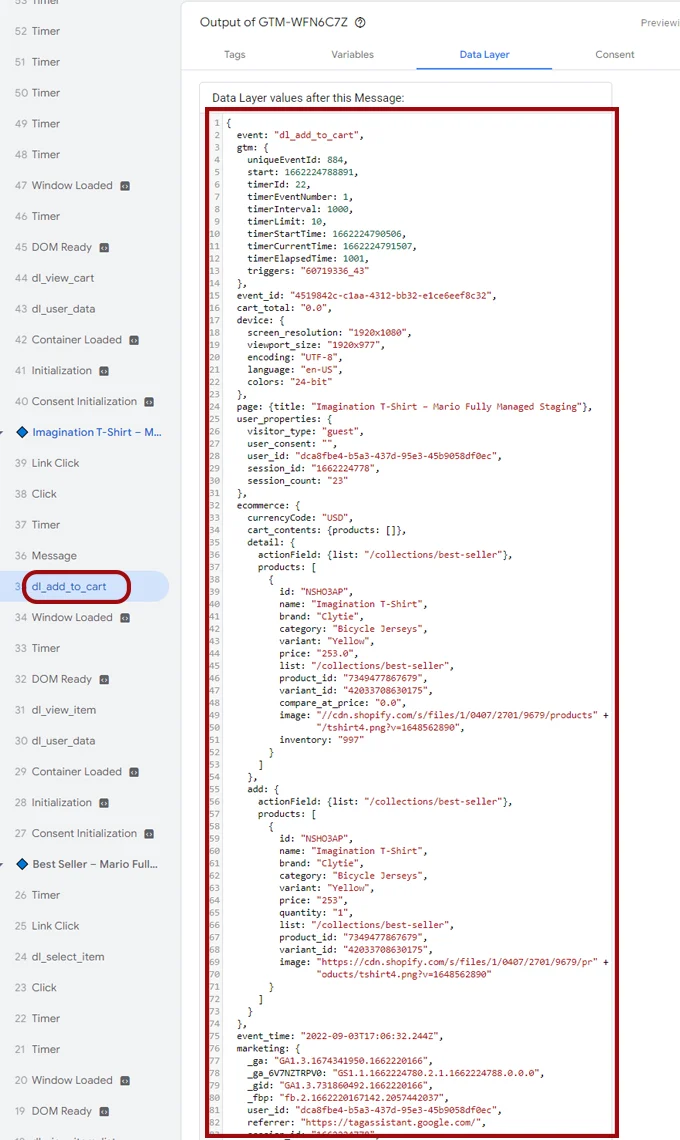
After you click the "add to cart" button on your product pages you should see another custom event called dl_add_to_cart that looks like the below:
View Cart
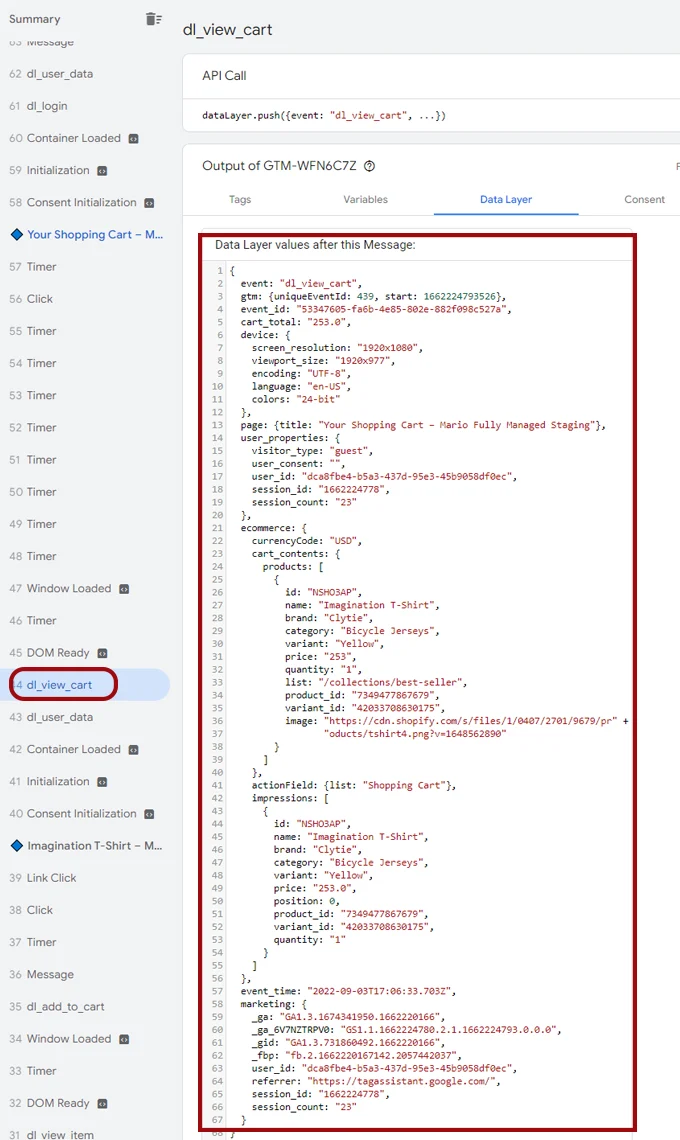
If you don't have a standalone cart and rely on just a mini-cart (ajax cart drawer) only then this might not be a critical page. Here is a cart page completed with all dataLayer data required:
Checkout and Thank You Pages
When tracking checkout funnel & thank you pages on Shopify, your code must use Shopify's Customer Events setting (AKA their Web Pixel API).
As this method of tracking loads code in an iframe, Google Tag Manager's preview mode won't work.
Instead, we recommend viewing data being share via pixel helpers if available for the destination your are troubleshooting or reviewing network data in the browsers developer tools.
Note: Be sure to double-check that you completed the "Configure Checkout Script" step by copying the dataLayer into your checkout scripts:

That's it!
Updated 6 months ago