How to Setup Omnisend Split Test Automations
Enhance your Omnisend abandonment flows with Elevar’s server-side tracking to capture more abandoners, improve flow performance, and overcome cookie-based tracking limitations.
Overview
Learn About Your Potential:
Using server-side tracking in conjunction with your existing Omnisend tracking will allow you to collect additional information with our identity solution and session enrichment.
You can expect to improve your abandonment flows & identify abandoners that your existing tracking misses due to cookie limitations!
Read this blog article to learn more. This article is focused on Klaviyo, but the concepts and wins can be applied to your Omnisend flows to observe improved performance!
How to Set Up Elevar Abandonment Automations
Duplicate Existing Automation:
- Navigate to Omnisend's "Automation" tab.
- Locate the existing Automation you would like to set up an equivalent Elevar automation for.
- Click on the vertical ellipsis, and select "Copy". (See Figure 1)
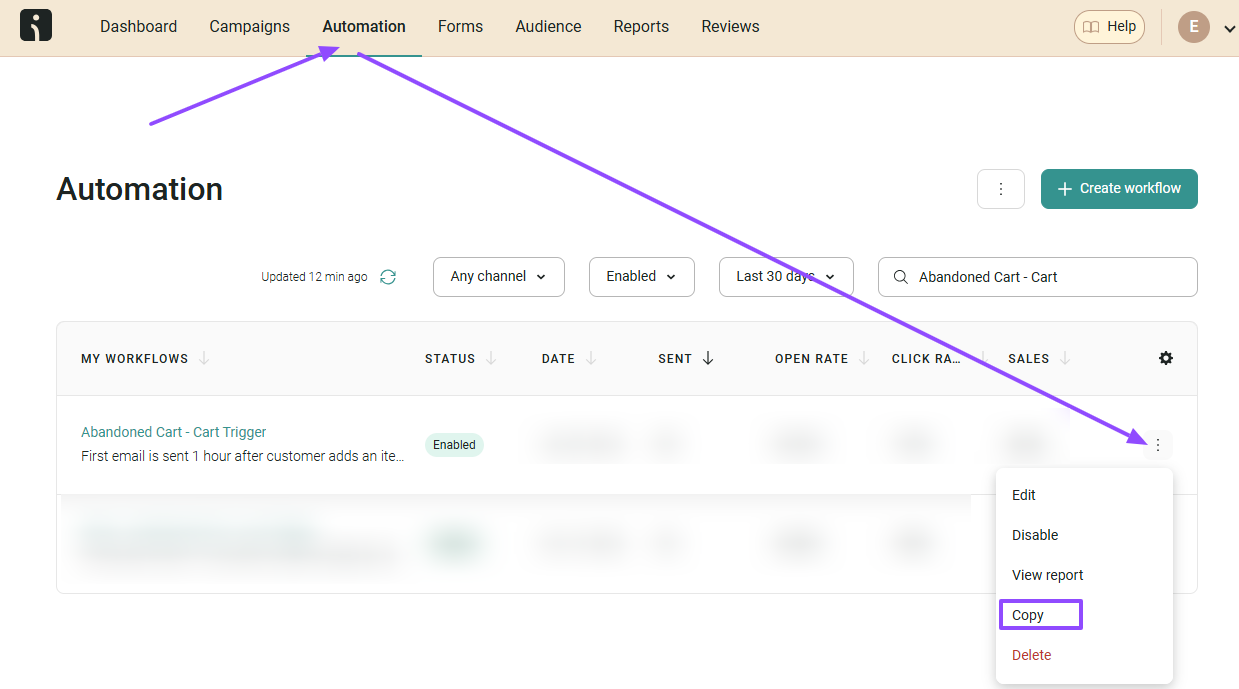
Figure 1
Update Trigger to Use Elevar Event:
- Edit the trigger in the copied flow to be the equivalent Elevar event.
- For more information on how to find the equivalent Elevar event, reference Elevar Events and Properties Sent to Omnisend.
Update Exit Conditions:
- Keep the existing exit conditions on the copied flow.
- Add the equivalent Omnisend event that you removed as the flow trigger in order to exclude users that your original Omnisend tracking and flow will include.
- Add any additional higher funnel Elevar equivalent events as exit conditions as you'd like to ensure the user enters your preferred Elevar abandonment flow.
- See Figure 2 for an example original cart abandonment trigger setup
- See Figure 3 for an example Elevar cart abandonment trigger setup
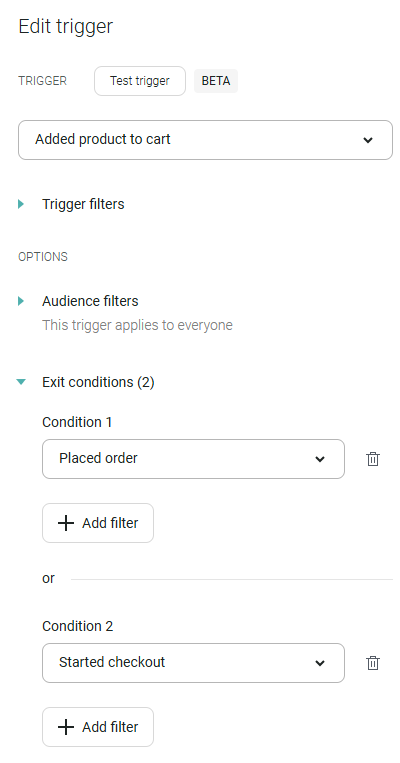
Figure 2
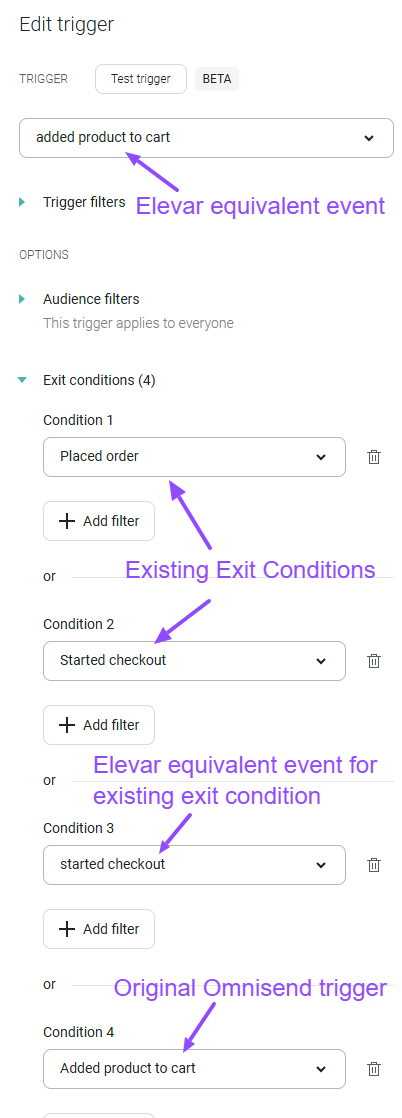
Figure 3
Update Messages as Needed to Reference Elevar Event Data
- Edit the content of any messages in the automation as needed.
- Abandoned products widgets should continue to function without updates.
- Review any dynamic fields being pulled into the message to ensure they are working. Update to Elevar fields where necessary.
Preview Message to Ensure All Dynamic Fields Are Populating As Expected
- Once you have the message edited, click the "Preview & test" button to preview the message populated with an Elevar event. See Figure 4.
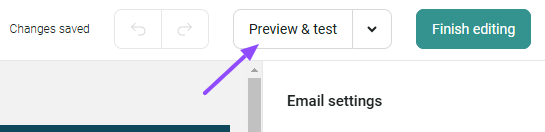
Figure 4
- If everything is populating as expected, exit the preview and click "Finish editing".
Start Workflow
- Once happy with the automation, in the top right nav, you can click "Start workflow" to launch the automation, or click "Save & Close" to launch later.
Analyze Results
- Let the new Elevar automations run in parallel with your existing automations for a minimum of 2 weeks. Then analyze the results! How to Calculate Additional Revenue from Omnisend Server-Side Tracking