

How to Set Up OpenAI as a Server-Side Destination
Learn how to set up OpenAI in Elevar as a Server-Side Destination
Overview
Follow this guide to learn how to set up your OpenAI server-side destination.
Prerequisites:
- Before you can enable your OpenAI Server-Side Destination, you will need to install our Shopify Source in your Elevar App. Follow our guide on how to implement the Shopify Source.
Add OpenAI as a Server-Side Destination
Locate OpenAI Destination:
- Begin on the Elevar Dashboard and use the left-hand navigation menu to access the "My Tracking” page.
- Once in "My Tracking", select the "Add Destination" button in the upper right hand corner of the page.
- A side bar pop-up window will appear, titled "Add Destination".
- Within this pop-up, use the search function and type "OpenAI".
- Once the OpenAI destination appears from the search function, click on it.
- (See Figure 1)
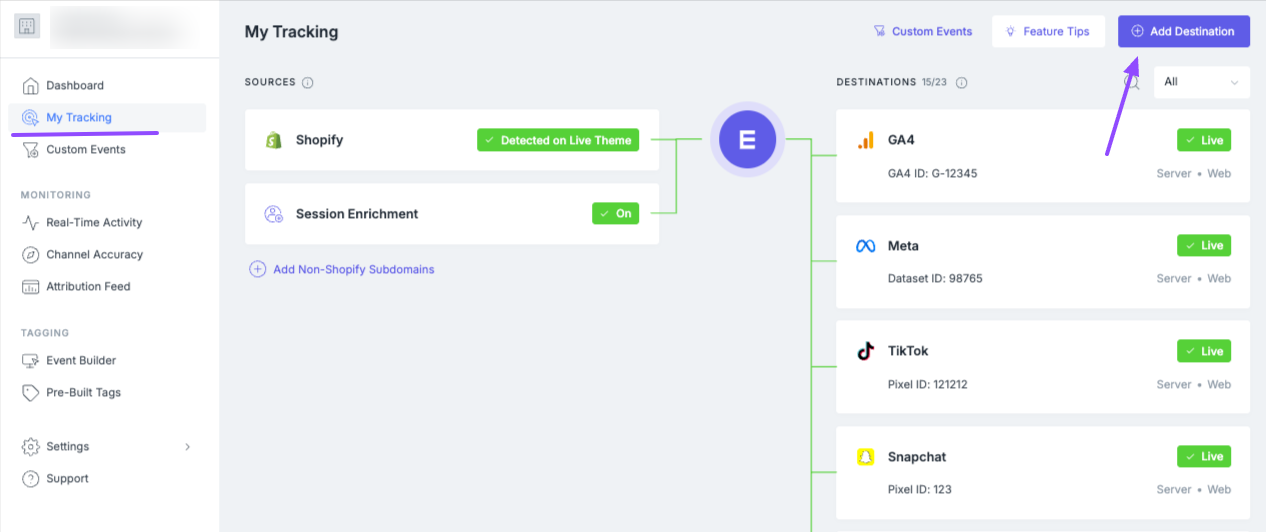
Figure 1
Get Started:
- After locating and clicking on the OpenAI destination, you will be taken to the overview screen.
- Click the "Get Started" button in the lower left-hand corner of the Overview box.
- (See Figure 2)
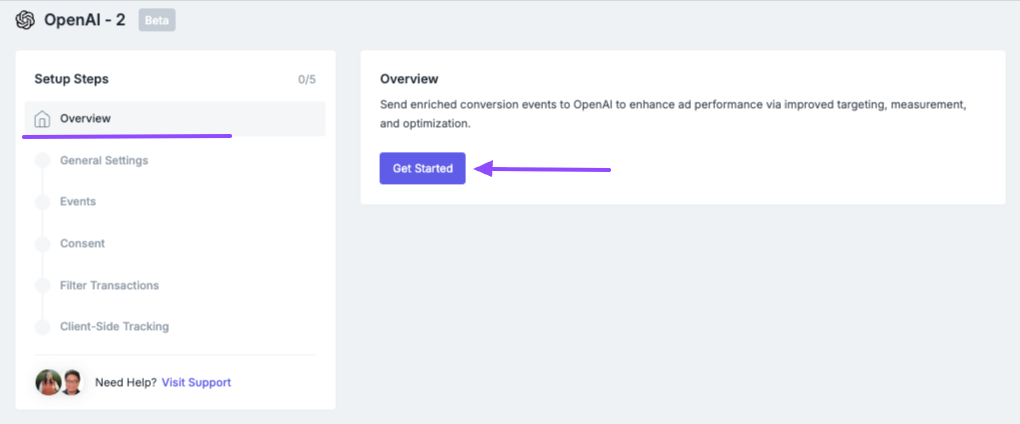
Figure 2
Entering OpenAI Settings
OpenAI Settings:
- Within the "OpenAI Settings", you will need to add in certain OpenAI IDs to connect your account.
- Add in your OpenAI Pixel ID
- Add in your OpenAI Conversion Key
- If you have "Markets" enabled in your Shopify Source, you will see the "Markets" section in your OpenAI destination.
- Select either the "All Markets", "Specific market(s)", or the "No Market ID" button to specify which markets will send data to OpenAI.
- If you have selected "All Markets" navigate to the section titled "Destination Label" and use the text box to enter a label. This is how your destination name will appear across the Elevar app (e.g., My Tracking, Reports, History) and helps to identify your destination across our app, especially when you have multiple instances of the same destination.
- If you have selected "Specific market(s)", navigate to the section titled "use the drop down menu to select the market groups to specify which market's data will be sent to this destination. Then, navigate to the box titled "Destination Label" and use the text box to enter a label. This is how your destination name will appear across the Elevar app (e.g., My Tracking, Reports, History) and helps to identify your destination across our app, especially when you have multiple instances of the same destination.
- Once you have entered all of the required information for the OpenAI Settings, click on the "Save and Continue" button located at the bottom of this section.
- (See Figure 3)
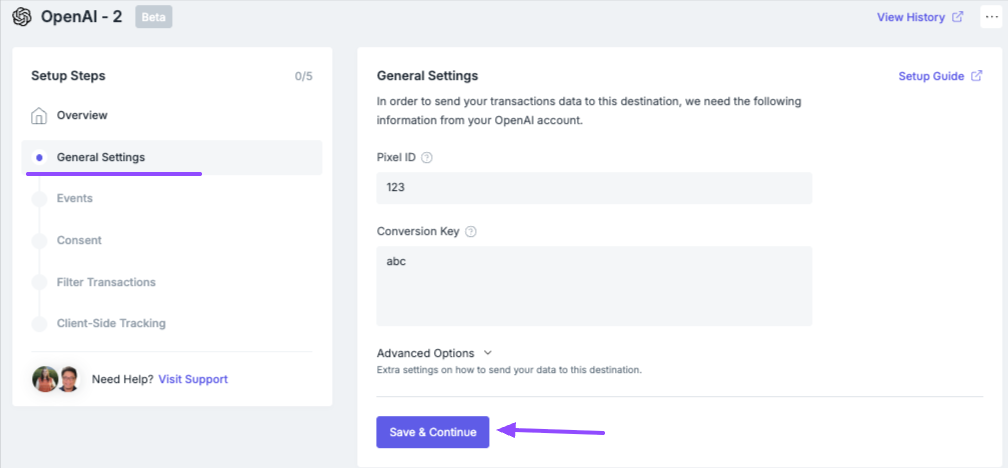
Figure 3
Select Events:
- Once you have entered your OpenAI Settings, you have to select the Event settings.
- Either click on the button labeled "Use best practices" or "Customize".
- Under the "Breakdown" menu, you can customize the events that are passed. OpenAI recommends sending data both via server-side & client-side; OpenAI will deduplicate the data for you.
- After selecting what events you want to send, click on the "Save and Continue" button located at the bottom of this section.
- (See Figure 4)
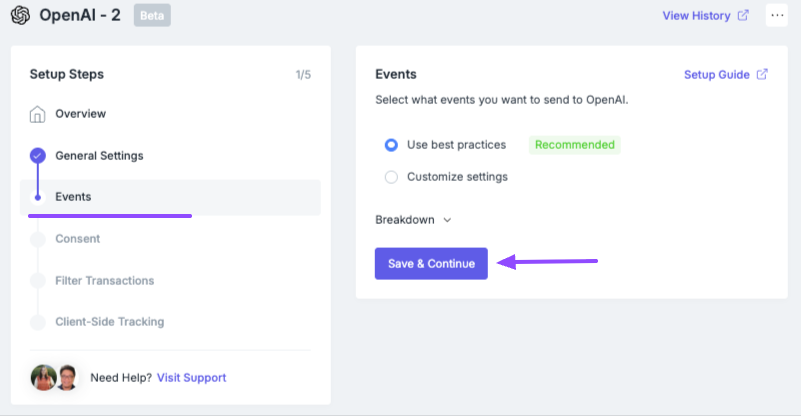
Figure 4
NOTE: Enabling Mid-Funnel Standard EventsIf you enable mid-funnel standard events within the destination settings, follow this guide to learn more about the new expanded standard events and how to configure them in your destinations and push the events to the data layer.
Configuring these events will allow the data to be passed both client-side and server-side, which allows for data enrichment of server sent events.
Consent:
- After selecting the Events settings, you will be prompted to enable Consent.
- To enable Consent, click on the "Yes, enable for this destination" button. If you do not want to enable Consent, click on the "No" button.
- If consent is required, select what categories you’d like the shopper to agree to before tracking fires. [Learn More]
- Once you have all of selected all of the information for enabling Consent, click on the "Save and Continue" button located at the bottom of this section.
- (See Figure 5)
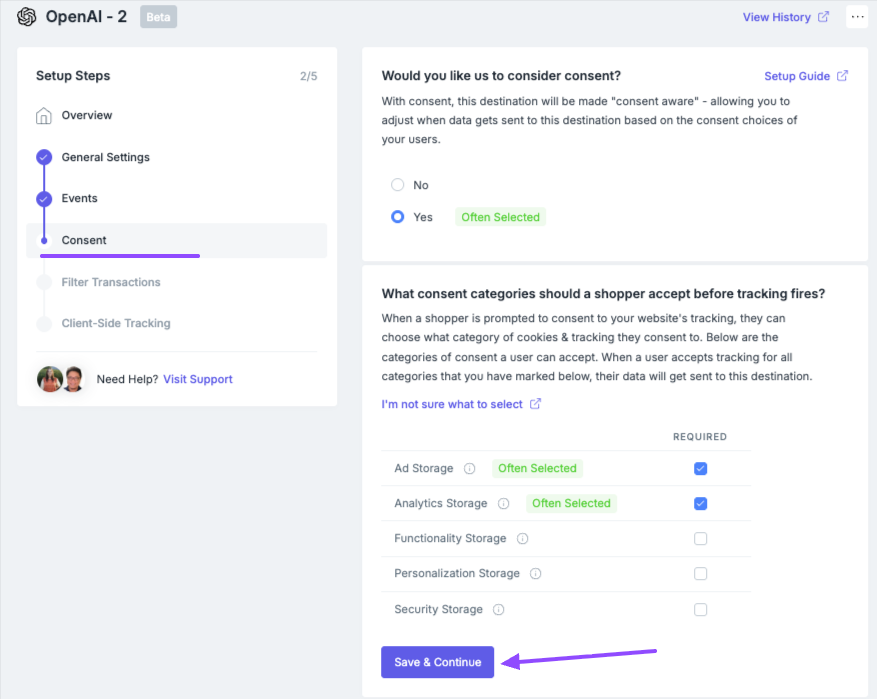
Figure 5
Enabling Consent:By enabling consent, your marketing data processing will depend on:
- Your consent platform configuration
- How your visitors interact with the cookie banner
- What geolocation they visit the store from
That's why you may see a decrease in data across your marketing platforms and lower marketing campaign performance.
For EU Stores: If you are making your tracking setup consent compliant for the first time, you may see a 10-80% decrease in data across all of your marketing destinations.
Filter Transactions:
- After selecting the consent mode settings, you need to choose whether or not to filter transactions.
- Currently, our recommended practices suggests selecting the "Yes, allow specific transactions" button which includes the "web" sales channel by default to allow orders created on your website to be sent to this destination.
- Or if you would like to block some transactions, click on the "Yes, block some transactions" button which blocks exchange and historical import orders by default.
- If you do not want to filter transactions, click on the "No, send all" button.
- Once you have all of selected all of the information for Filtered Transactions, click on the "Save and Continue" button at the bottom of this section.
- (See Figure 6)
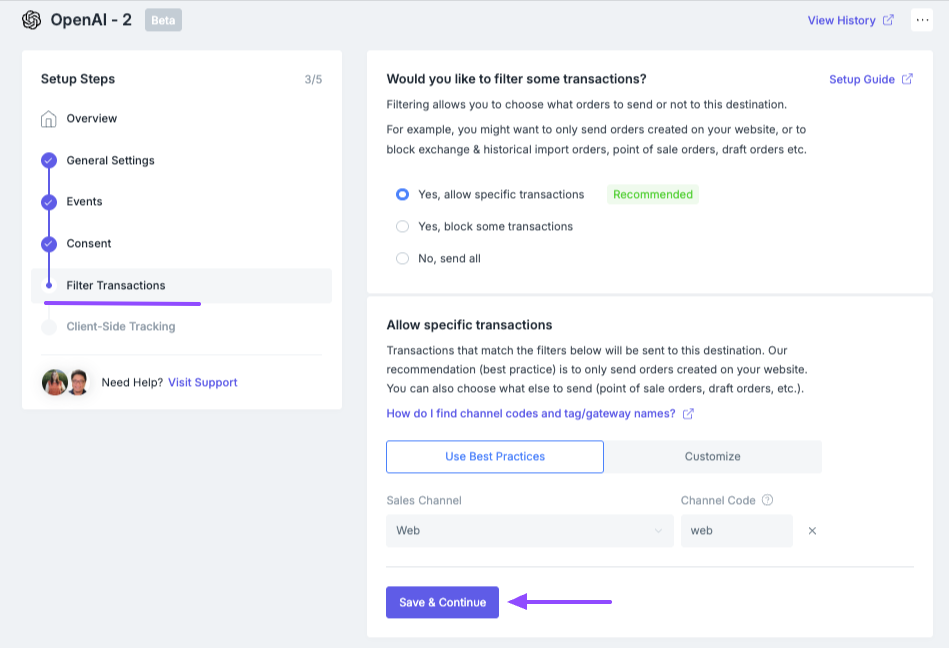
Figure 6
Learn More: Filtering TransactionsThinking you may need to block additional orders? Learn how to block these orders in this guide.
Not sure if you need to block orders? Look at what Sales Channels you have in Shopify!
Client-Side Tracking Setup:
- After selecting details for filtering transactions, you need to set up client-side tracking.
- Click on either the "Using Elevar" button or click on the "Using Google Tag Manager" button and set up the web container.
- After setting up the web container, click on the "Mark as Complete" button at the bottom of this section.
- (See Figure 7)
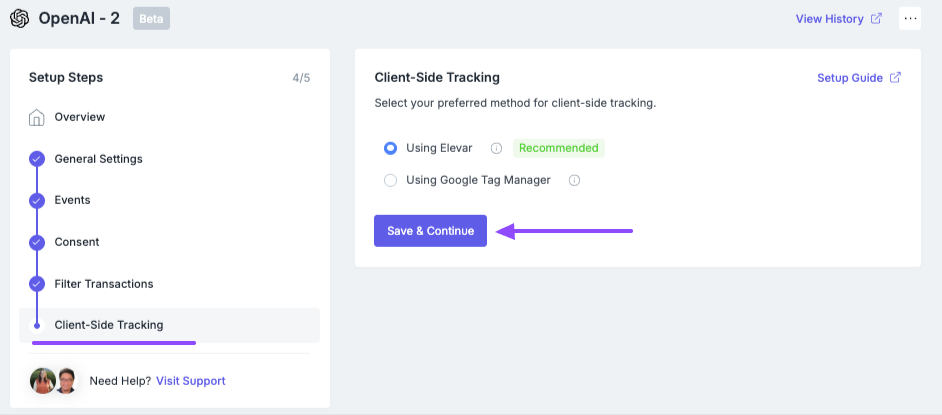
Figure 7
Go Live:
- After completing all of the previous OpenAI Setup Steps, an Overview page will appear.
- If all of the details within the Configuration Summary look correct, then click on the button labeled "Go Live" at the bottom of this section.
- A pop-up window will appear, asking for a confirmation of your changes.
- Click on the "Yes, Go Live" button located in the lower right-hand corner of the confirmation window.
- (See Figure 8)
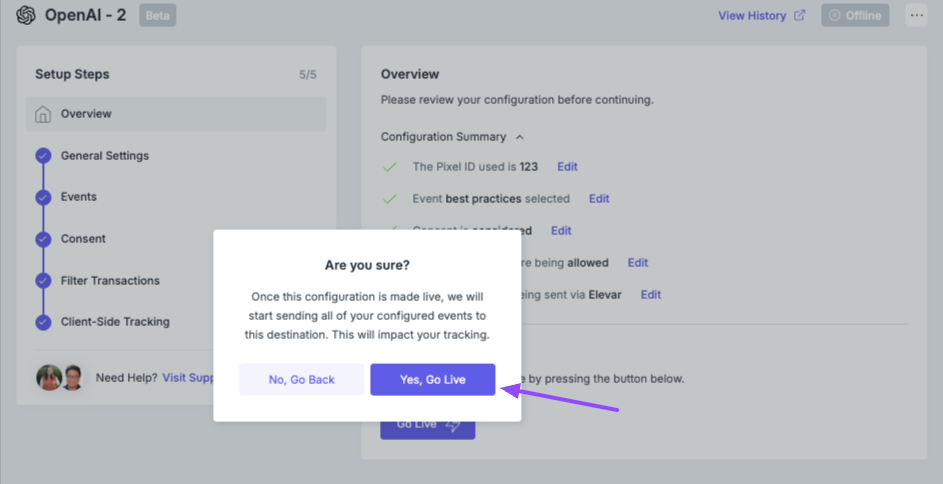
Figure 8
Remove Previous Tracking:To avoid duplicate events sent to your destination, we recommend removing your previous tracking.
Follow this guide to learn how to remove previous tracking.
Create Conversion Events in OpenAI:To view event data and use events in your campaigns, create conversion events in OpenAI.
Follow this guide to learn how to do this and see what events Elevar sends.
Updated about 1 hour ago