

How To Setup Iterable Split Test Journeys
Enhance your Iterable abandonment flows with Elevar’s server-side tracking to capture more abandoners, improve flow performance, and overcome cookie-based tracking limitations.
Overview
Learn About Your Potential:
Using server-side tracking in conjunction with your existing Iterable tracking will allow you to collect additional information with our identity solution and session enrichment.
You can expect to improve your abandonment flows & identify abandoners that your existing tracking misses due to cookie limitations!
Read this blog article to learn more. This article is focused on Klaviyo, but the concepts and wins can be applied to your Iterable flows to observe improved performance!
How to Set Up Elevar Abandonment Journeys
Duplicate Existing Journey:
- Navigate to Iterable's Messaging > Journeys section.
- Locate the existing Journey you would like to set up an equivalent Elevar automation for.
- Click on the vertical ellipsis, and select "Duplicate Journey". (See Figure 1)
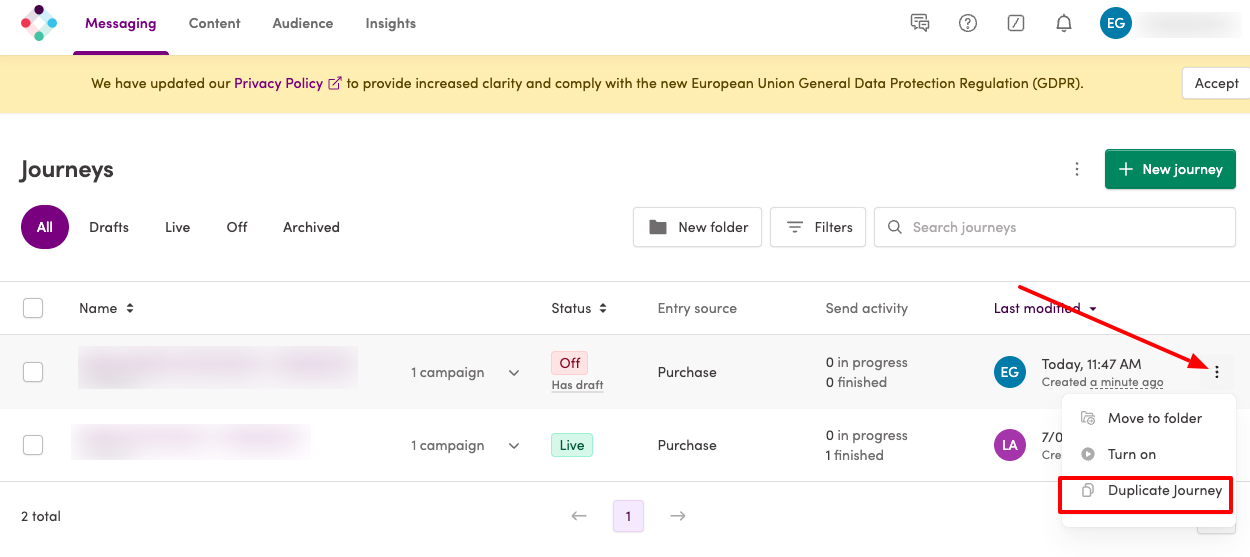
Figure 1
Update Trigger to Use Elevar Event:
- Edit the Entry Source in the copied flow to be the equivalent Elevar event.
Update Exit Rules:
- Keep the existing exit conditions on the copied journey
- In the "Multiple journeys" setting, add the equivalent Iterable journey that you duplicated in order to exclude users that your original Iterable tracking and journey will include. See Figure 2.
- Add any additional higher funnel Elevar equivalent events as exit rules as you'd like to ensure the user enters your preferred Elevar abandonment flow.
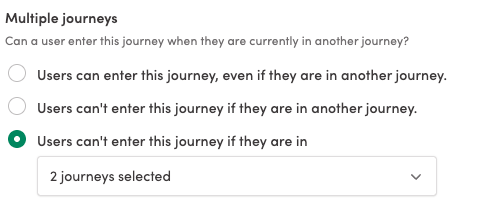
Figure 2
Update Messages as Needed to Reference Elevar Event Data
- Edit the content of any messages in the journey as needed.
- Review any dynamic fields being pulled into the message to ensure they are working. Update to Elevar fields where necessary.
- Available fields can be viewed in Settings > Data Schema Management or Insights > Events.
- See Figure 3 for an example displaying dynamic product information in a browse abandon flow.

Figure 3
Preview Message to Ensure All Dynamic Fields Are Populating As Expected
- Once you have the message edited, click the "Preview" button to preview the message populated with an Elevar event. See Figure 4.
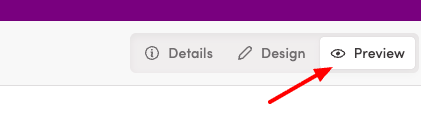
Figure 4
- You can also use the "Test Journey" feature to make sure the journey works as you expect.
Start Workflow
- Once happy with the journey, click Publish!
Analyze Results
- Let the new Elevar automations run in parallel with your existing automations for a minimum of 2 weeks. Then analyze the results in Insights > Reports.
Updated 20 days ago
Did this page help you?