Disabled Google Consent Mode v2 Updates for Pandectes
This guide is specific to Pandectes with a disabled GCM integration
Overview
This guide is for updating your consent setup if you have Google Consent Mode Disabled within Pandectes Settings > Integrations
This means that you have set your default consent states using a tag inside Google Tag Manager (GTM). You'll need to update your template to account for changes with Consent Mode V2.

Import Pandectes Container to GTM
Download Pandectes:
- Begin your Elevar homepage and use the left-hand menu to click on the "Pre-Built Tags" tab.
- Use the search function to locate the Pandectes Tag.
- Locate and click on the "Download Container" button.
- (See Figure 1)
- Once you download the pre-built container, import the tags in Google Tag Manager. How do I do this?

Figure 1
Assign Default Consent Status:
- In your Pre-Built Consent Tags, there is a section where you can choose to allow certain cookies to fire before the shopper grants or denies consent.
- Please select your desired default consent status before the user visitor provides a consent status. [What do these consent types mean?]
- (See Figure 2)

Figure 2
Publish Changes in GTM:
- Navigate to the Google Tag Manager homepage and click on the "Submit" button in the upper right-hand corner of the page.
- An additional confirmation page will appear, click on the "Publish" button in the upper right-hand corner of the page.
- (See Figure 3)

Figure 3
Customizations:
If you have made any customizations to your consent setup or GTM install you may need to make adjustments.
Confirm your consent now includes the new values:
- The best way to check your defaults are to view in Google Tag Manager Preview Mode.
- After Making your updates, access Google Tag Manager and click on the "Preview" button in the upper right-hand corner of the page.
- (See Figure 4)
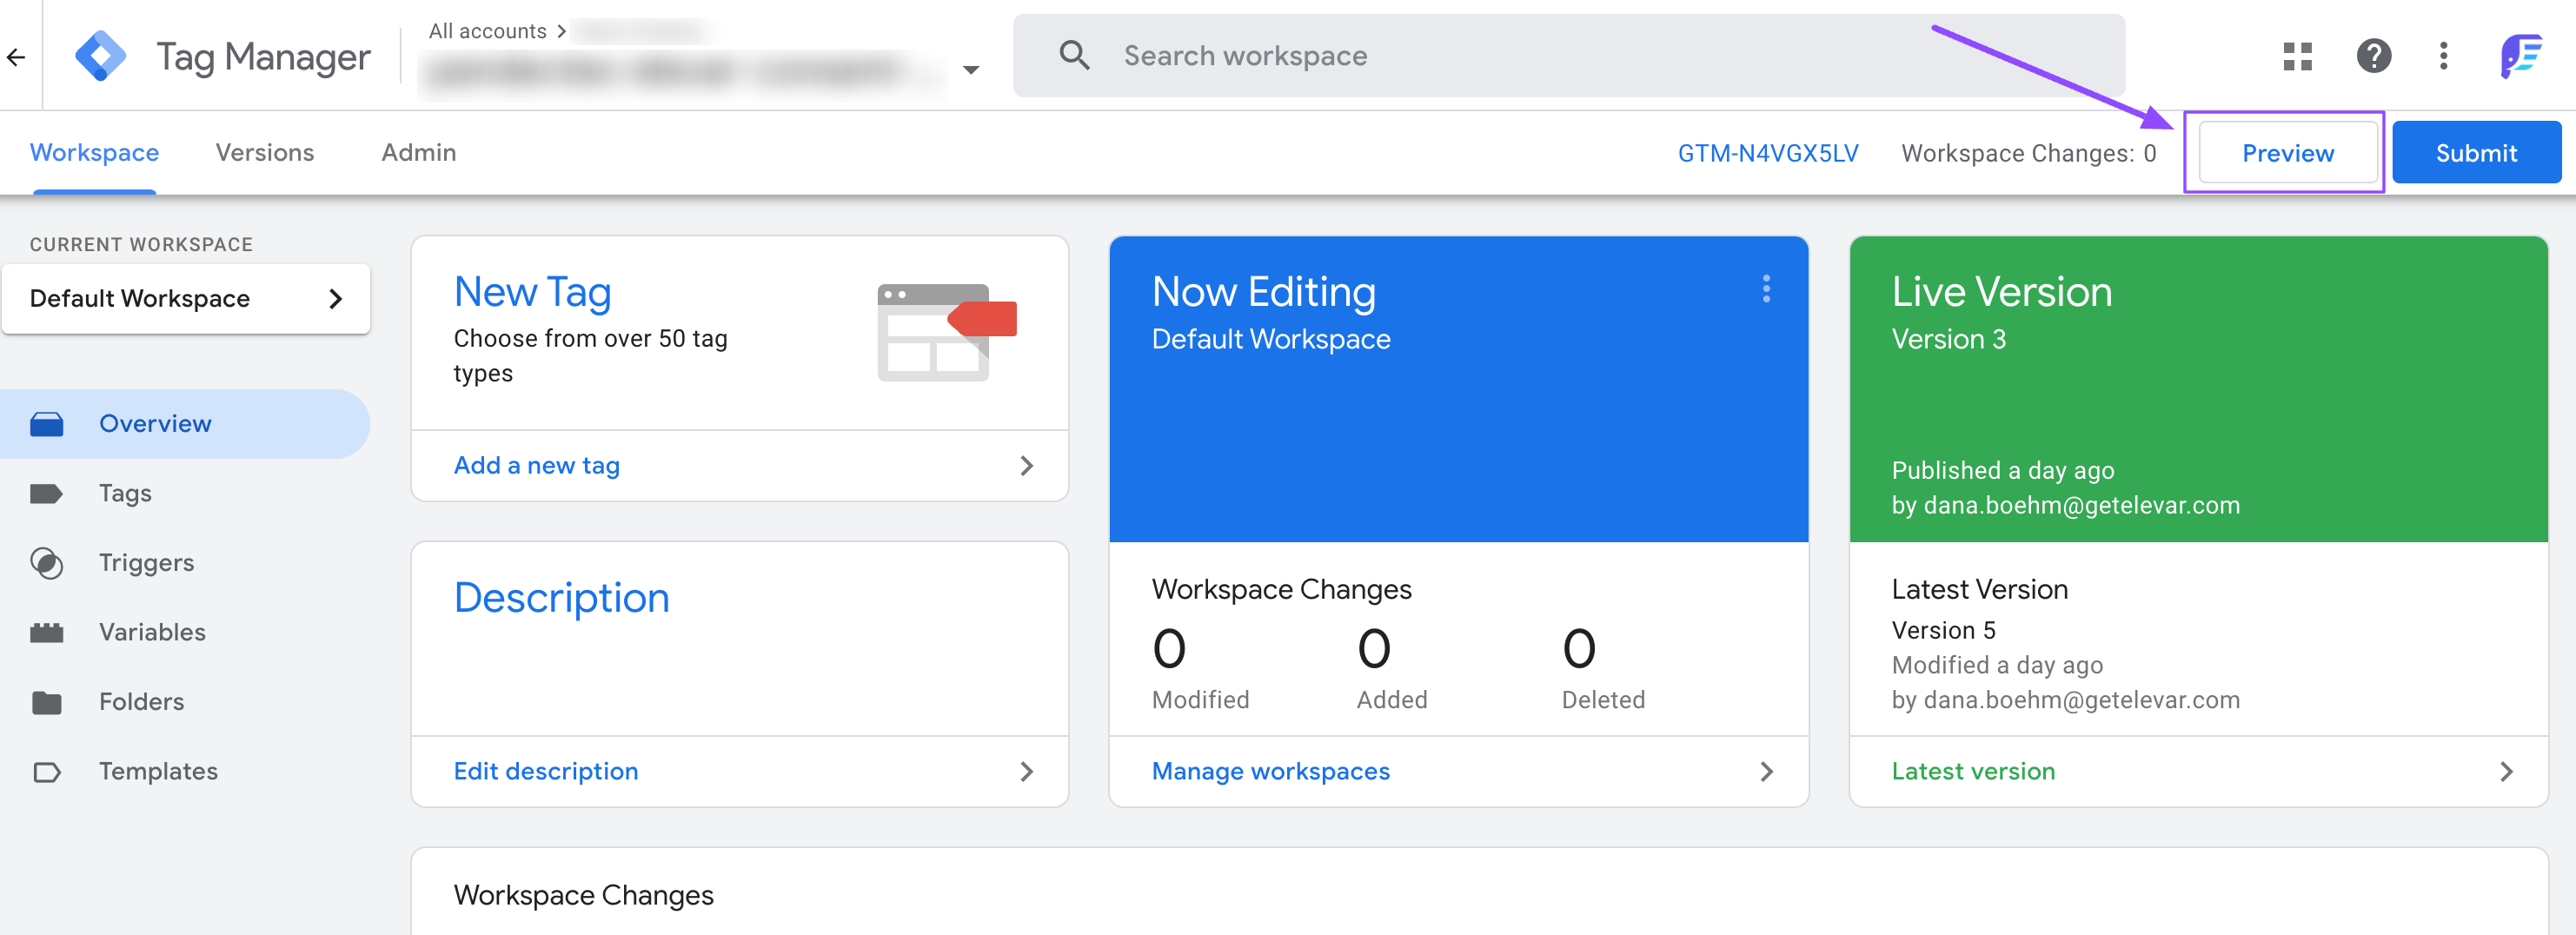 Figure 4
Connect Tag Assistant:
- A new window will appear in which you need to enter your website URL.
- Once you have entered your URL, click on the "Connect" button at the bottom of this section.
- (See Figure 5)
- Your site will load and you'll want to return to the preview tab to confirm your consent defaults and consent updates.
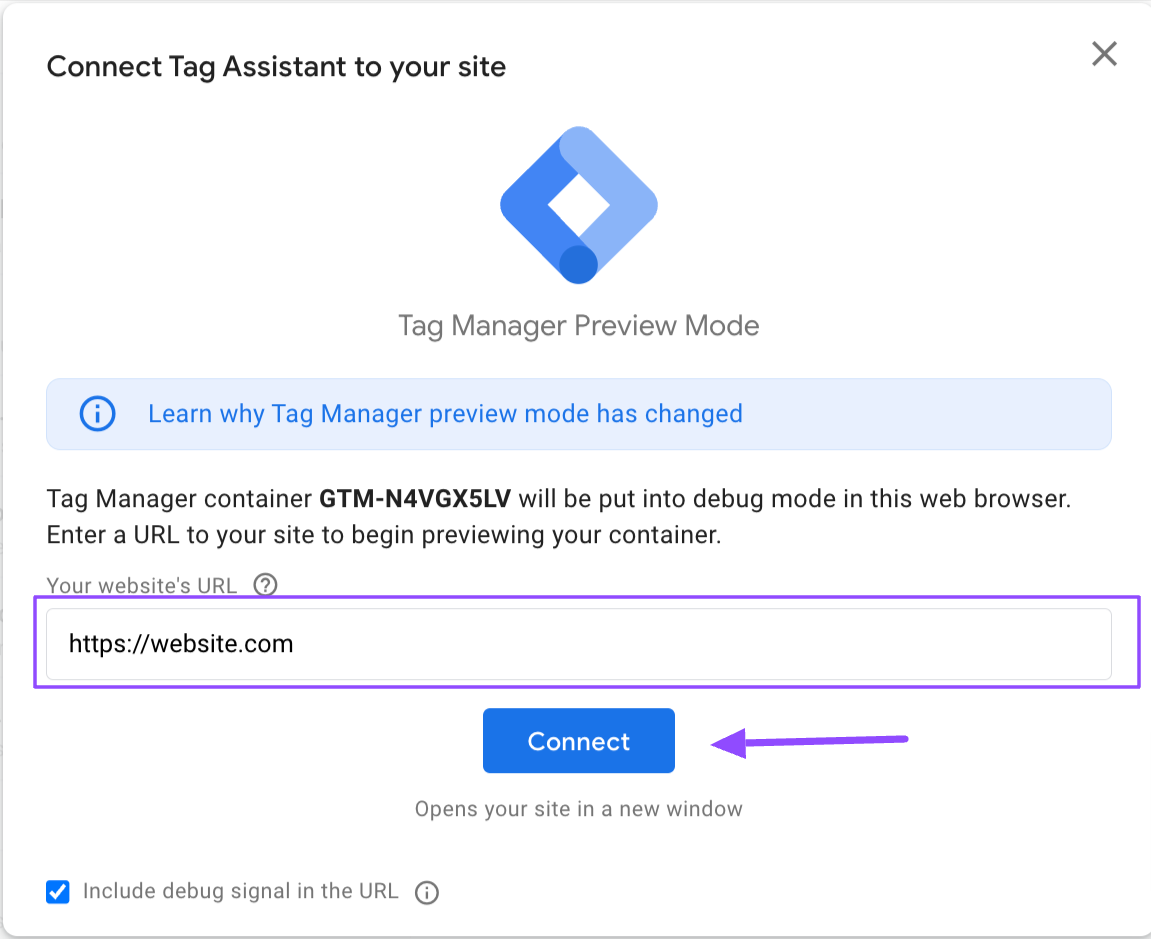
Figure 5
Confirm Consent Default Values:
- Follow these steps to confirm the defaults have been set.
- Click on the first "Consent" event in the left column, the lowest number and lowest in the list.
- Click on the Consent Tab
- Review the values in the On-page Default column. You are looking to see values for all the consent types and specifically the updates for consent mode V2 you will see the addition of ad_user_data and ad_personalization
- (See Figure 6)
- If you are seeing ad_personalization and ad_user_data like below your defaults are now updated for consent mode v2!
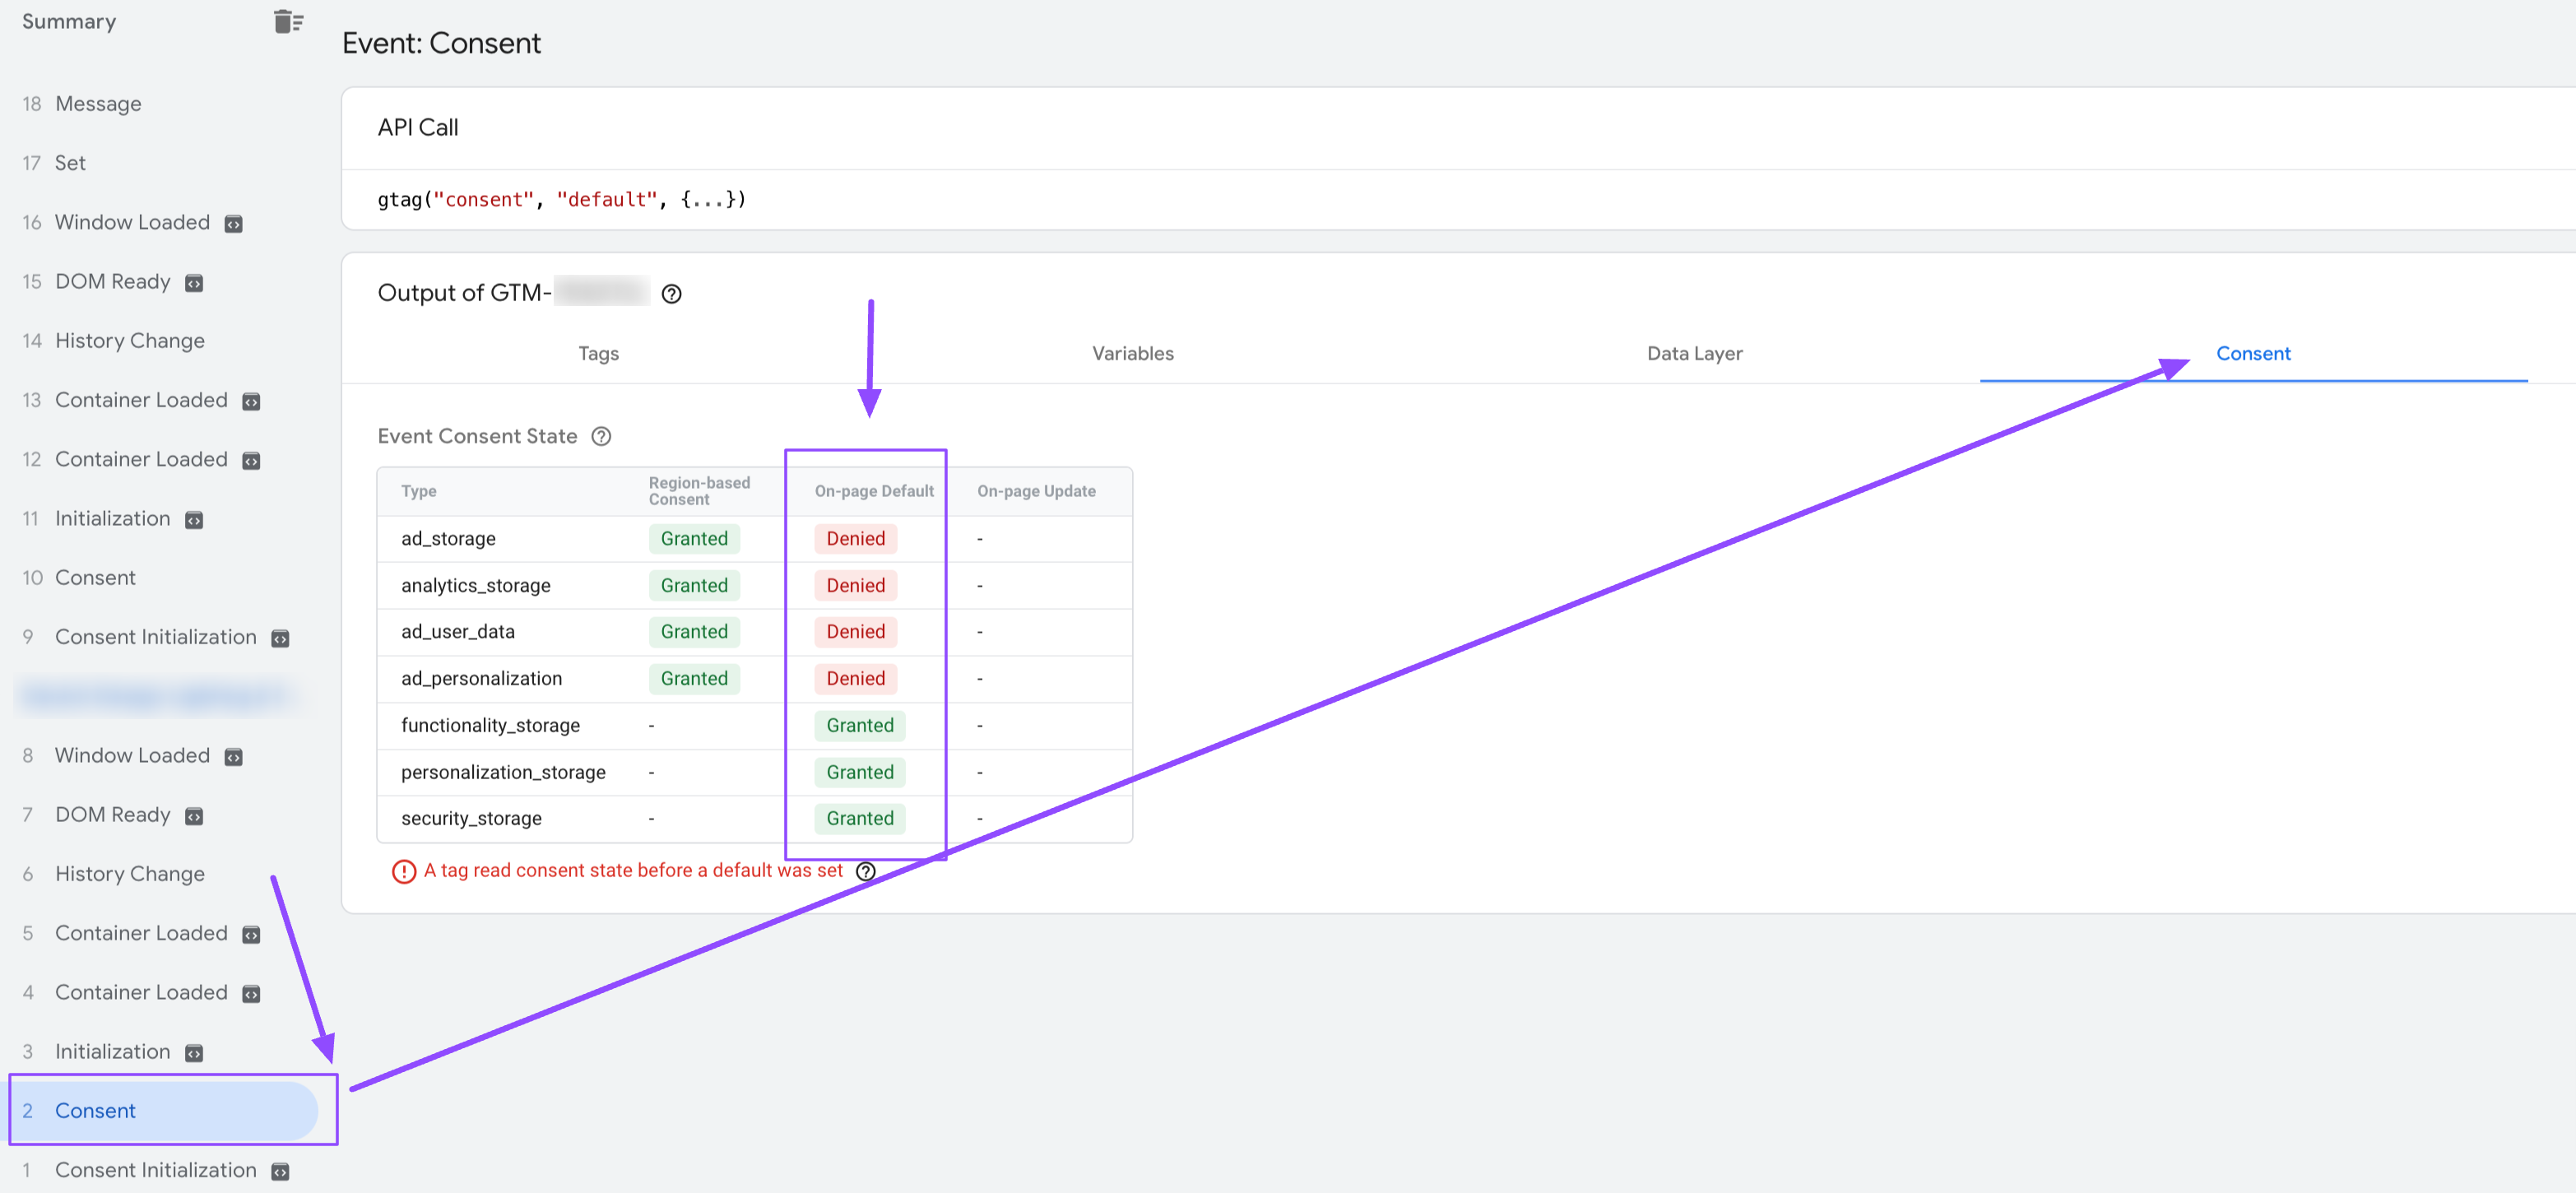 Figure 6
Confirm Consent Update Values:
- Next, we will confirm your consent update values if available. If your banner displays for your region, accept or deny your consent.
- You will want to select the most recent Consent event that was triggered by your update. You are looking to see that you now have values for all the consent types in the On-page Update column.
- Specifically the change for consent mode v2 is that you have values for ad_user_date and ad_personalization
- (See Figure 7)
- If you are seeing ad_personalization and ad_user_data like below you are all set for consent mode v2!
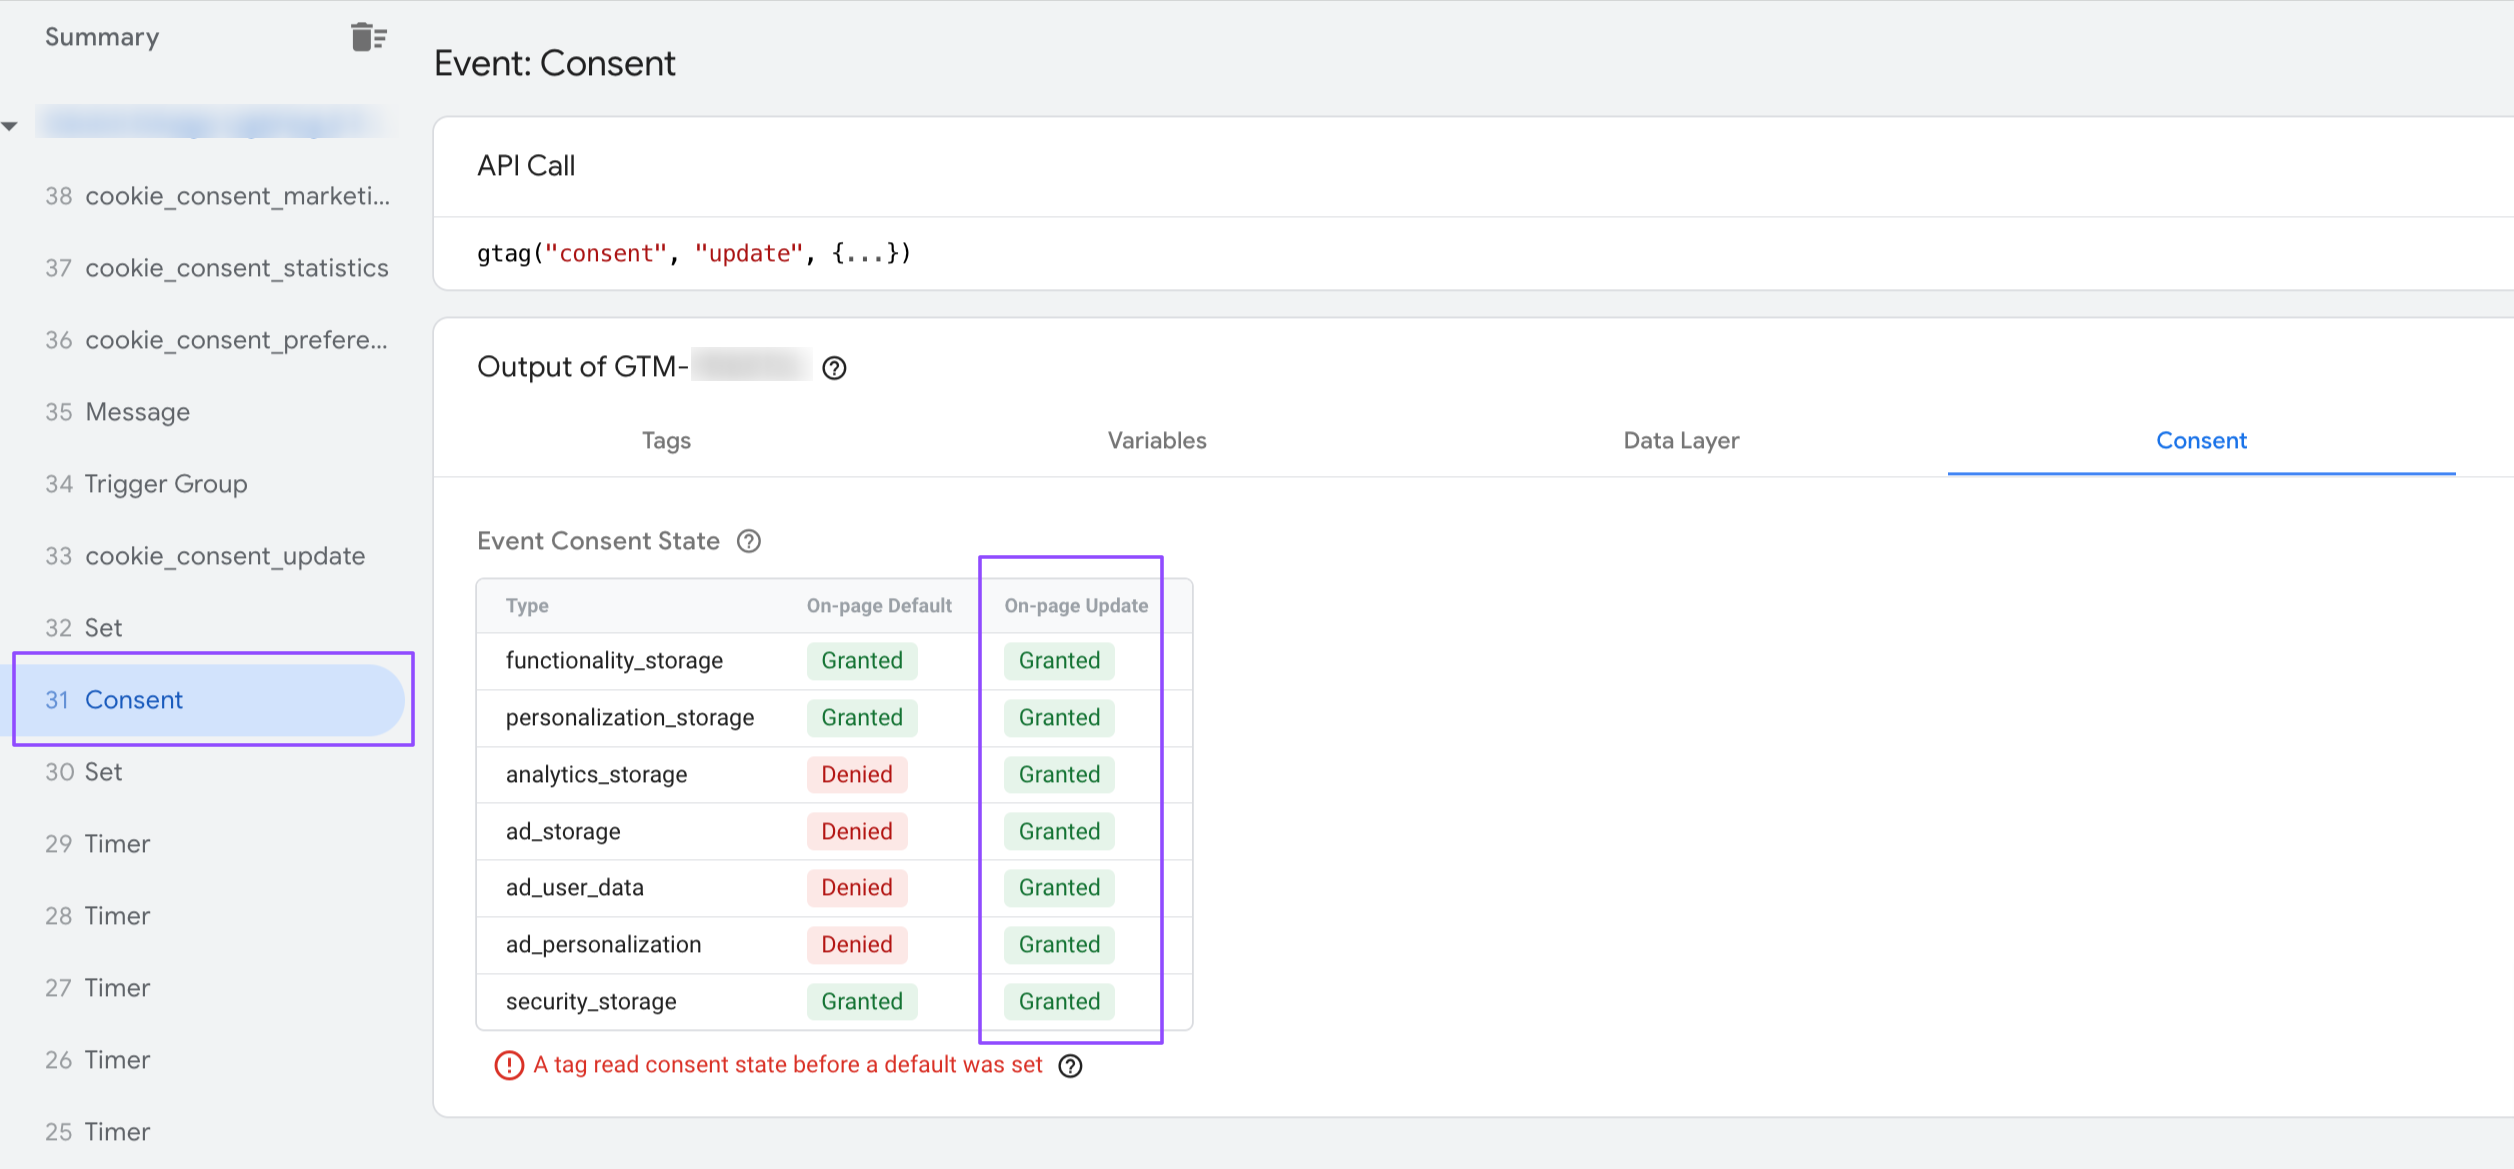 Figure 7
Still have questions, concerns, or lack confidence in your updates? We've got you covered!Reach out to our support team to have them review your updates.
Updated 4 months ago
Did this page help you?