How To Import A Pre Built Container Into Google Tag Manager
Importing and installing pre built Google Tag Manager containers
Elevar speeds up your Google Tag Manager tagging process by providing over 50 pre built tag sets. Although each set contains different tags, the process of downloading and importing pre built containers into a Google Tag Manager container is the same. Here, we'll review this process.
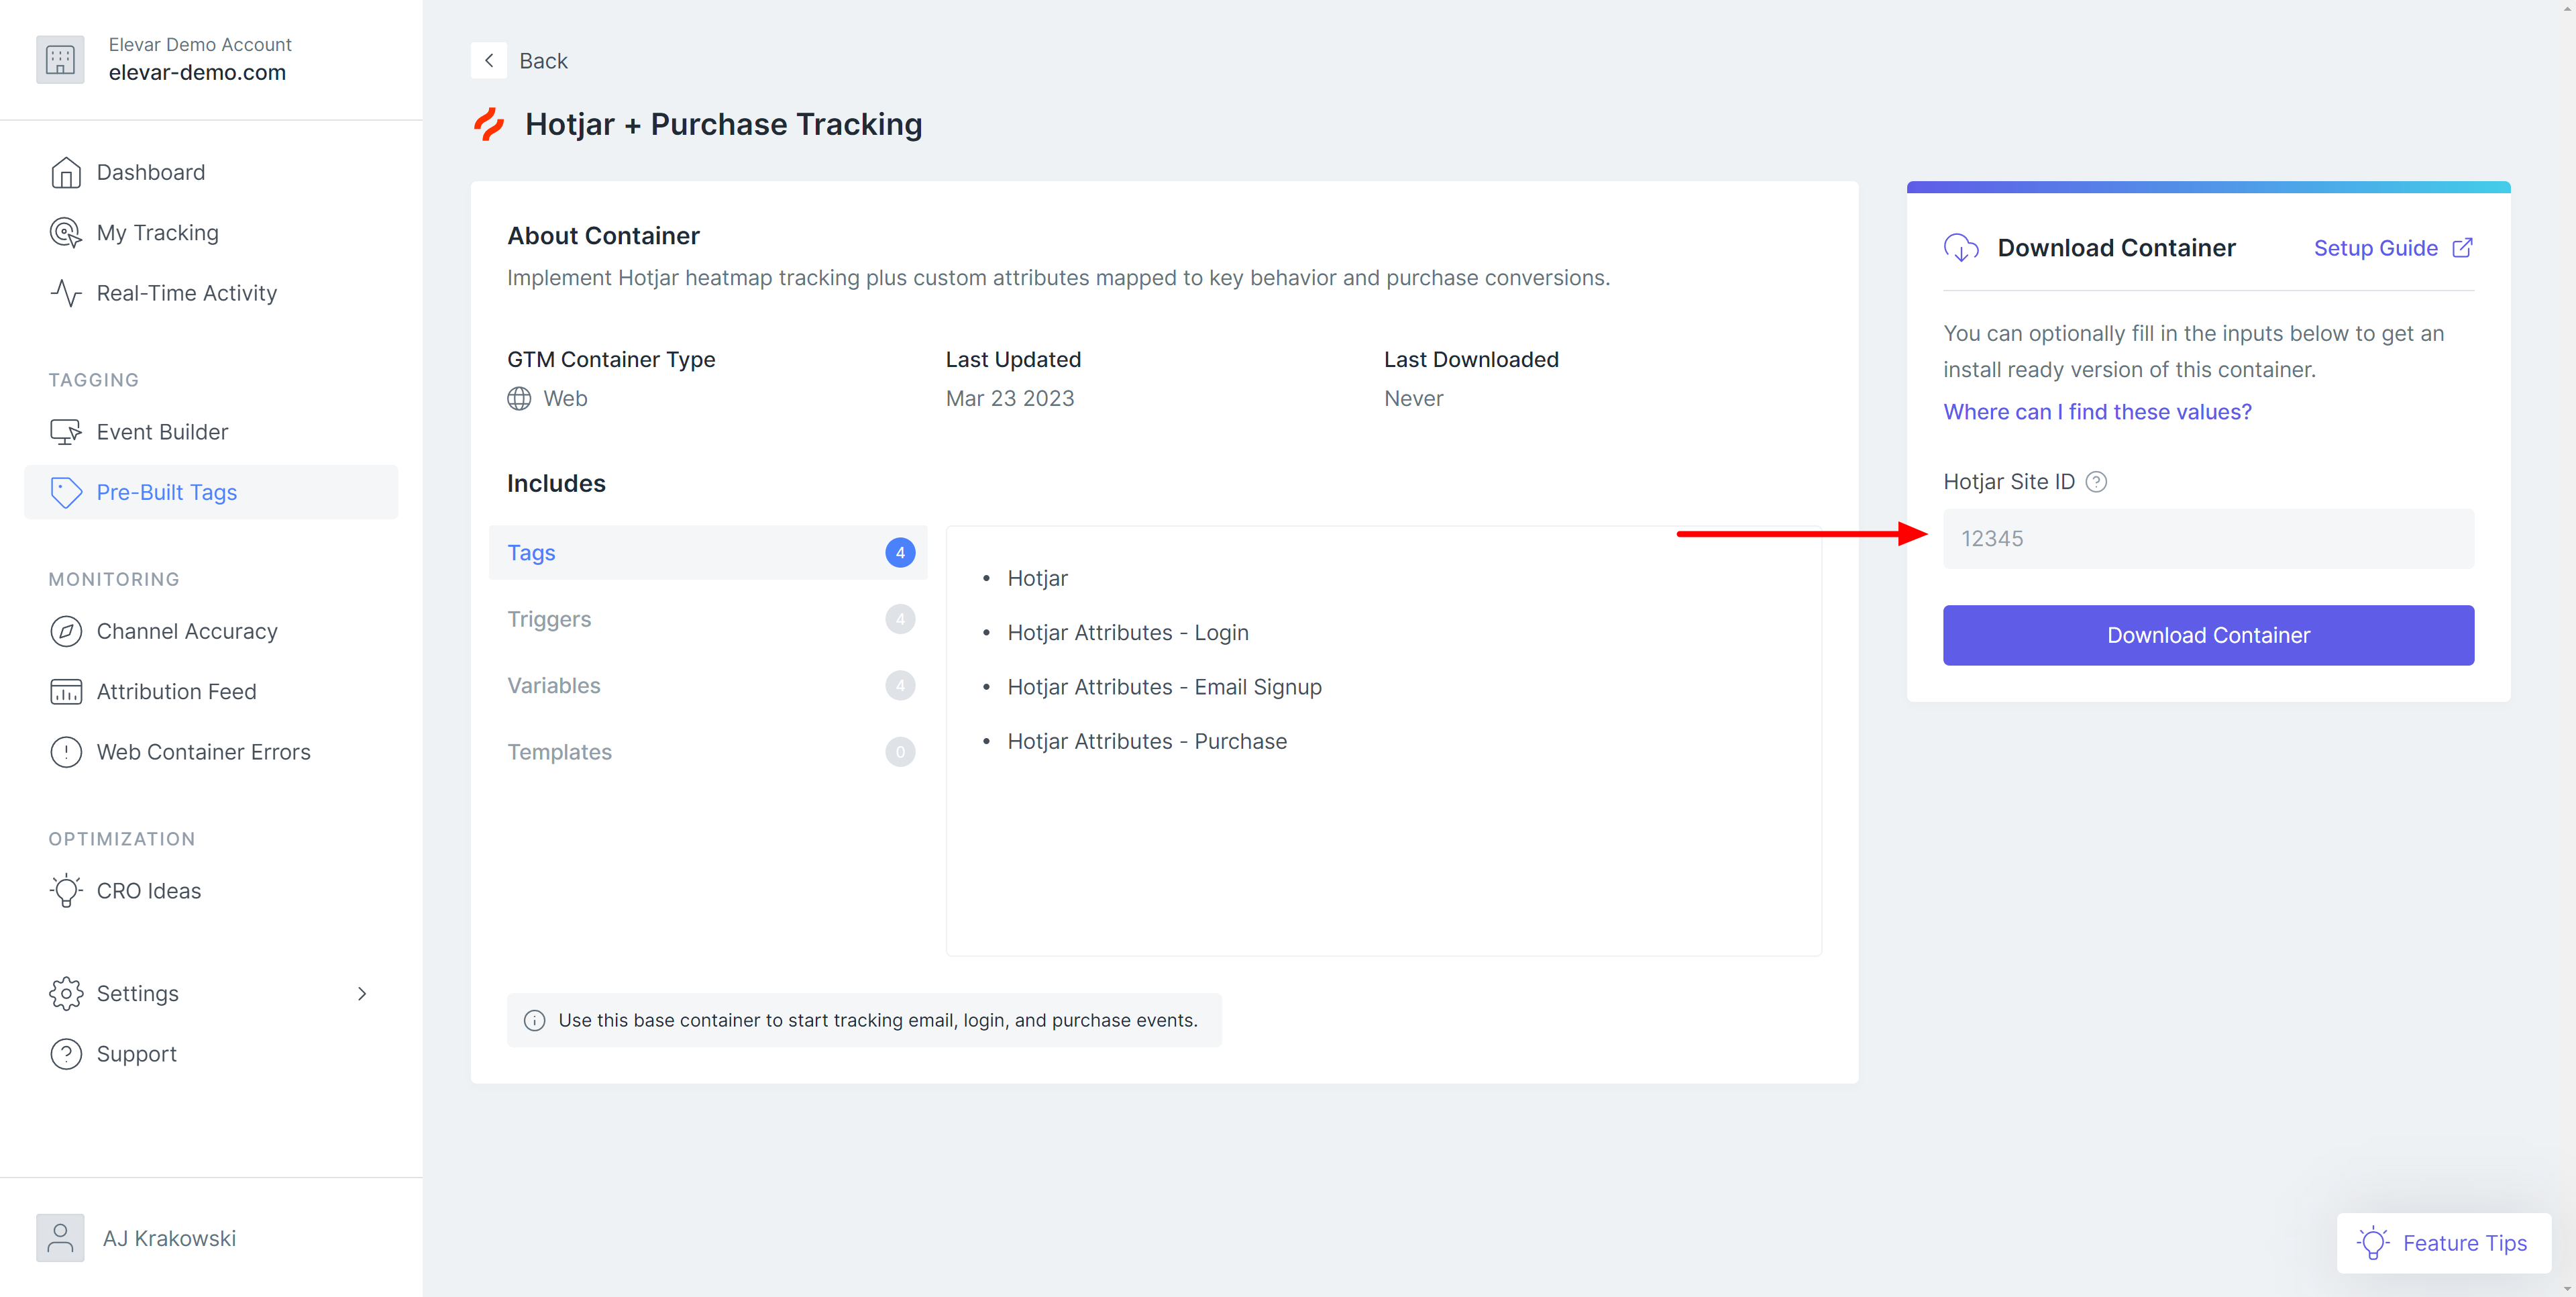
- Download a pre built container from the app by clicking pre built tags in the left navigation menu, searching for the appropriate container and clicking on it.

- Fill in the required information (all tags vary slightly) and then click download container.
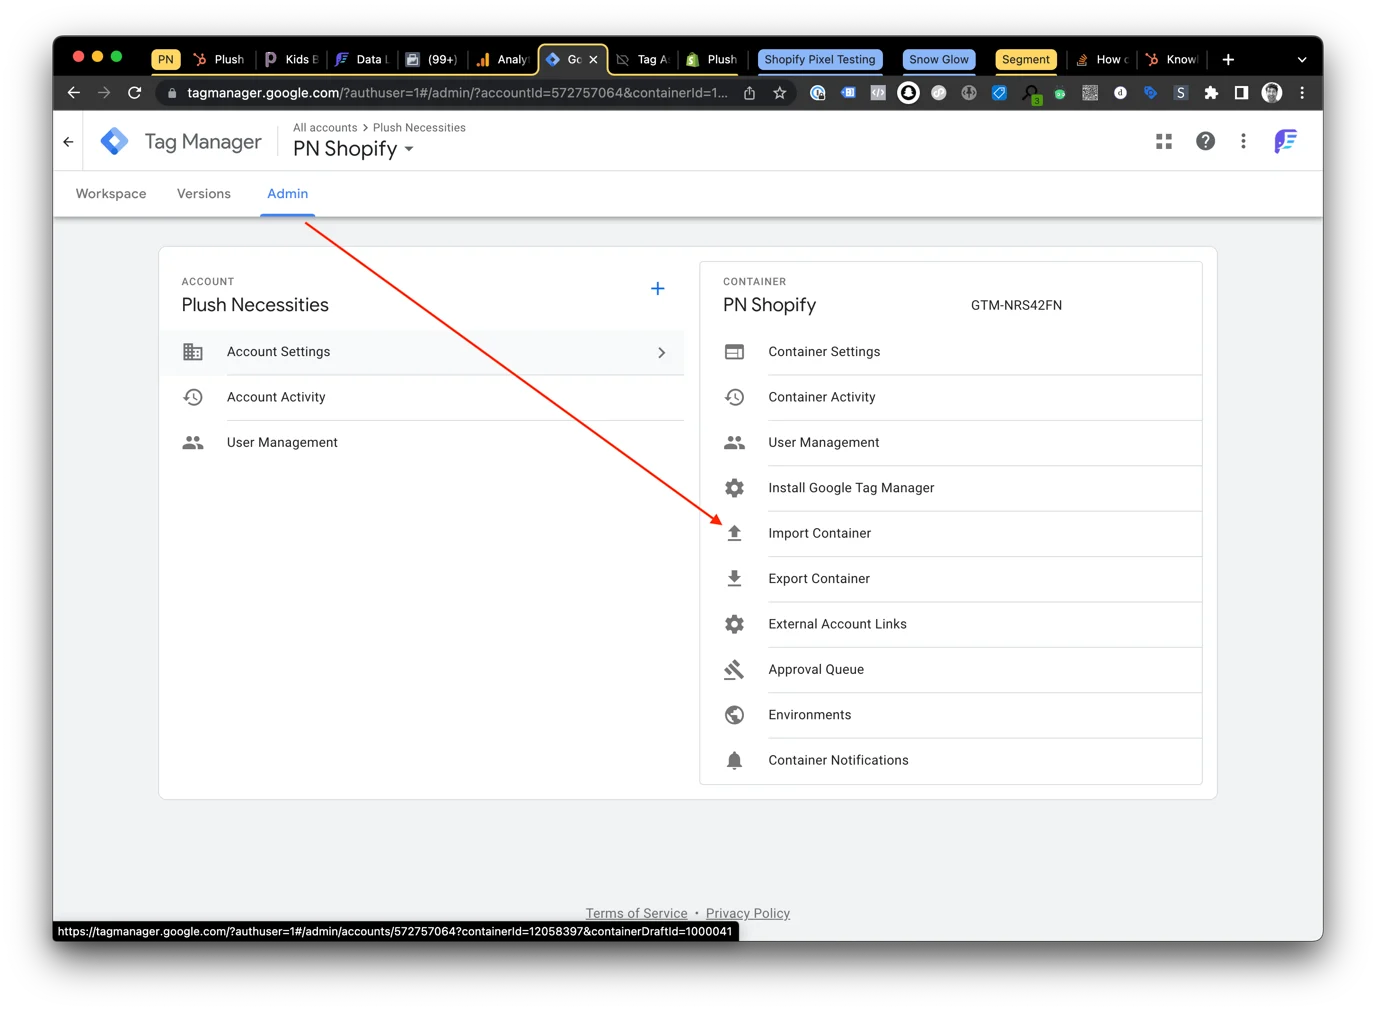
- Go to your Google Tag Manager container, click admin, then click 'Import Container'
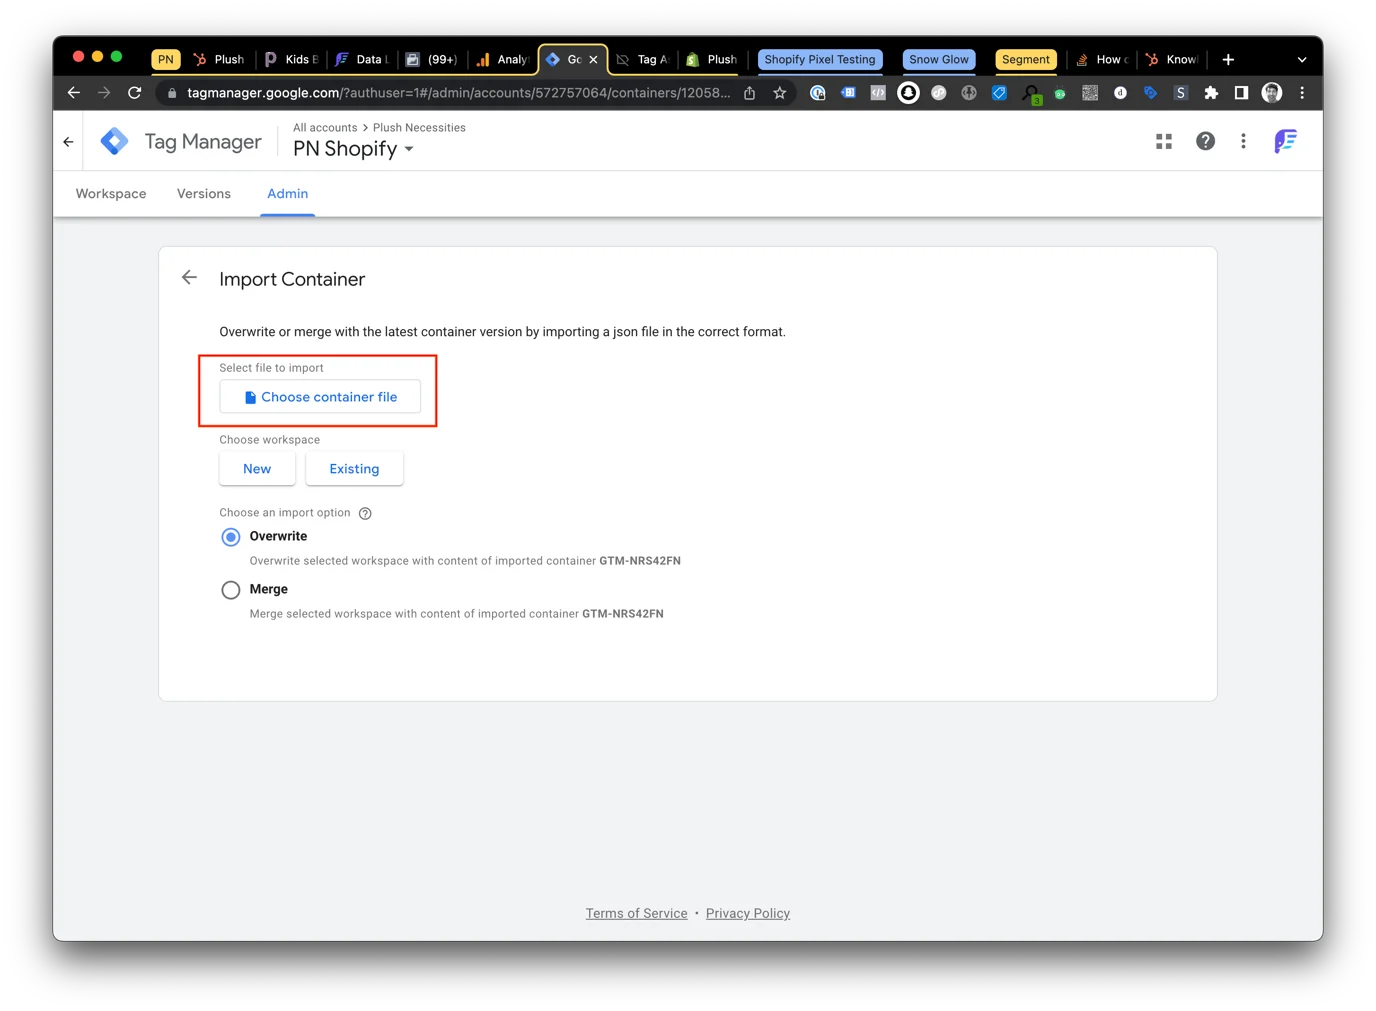
- Click 'Choose Container file' and select the .json file you downloaded from the Elevar app
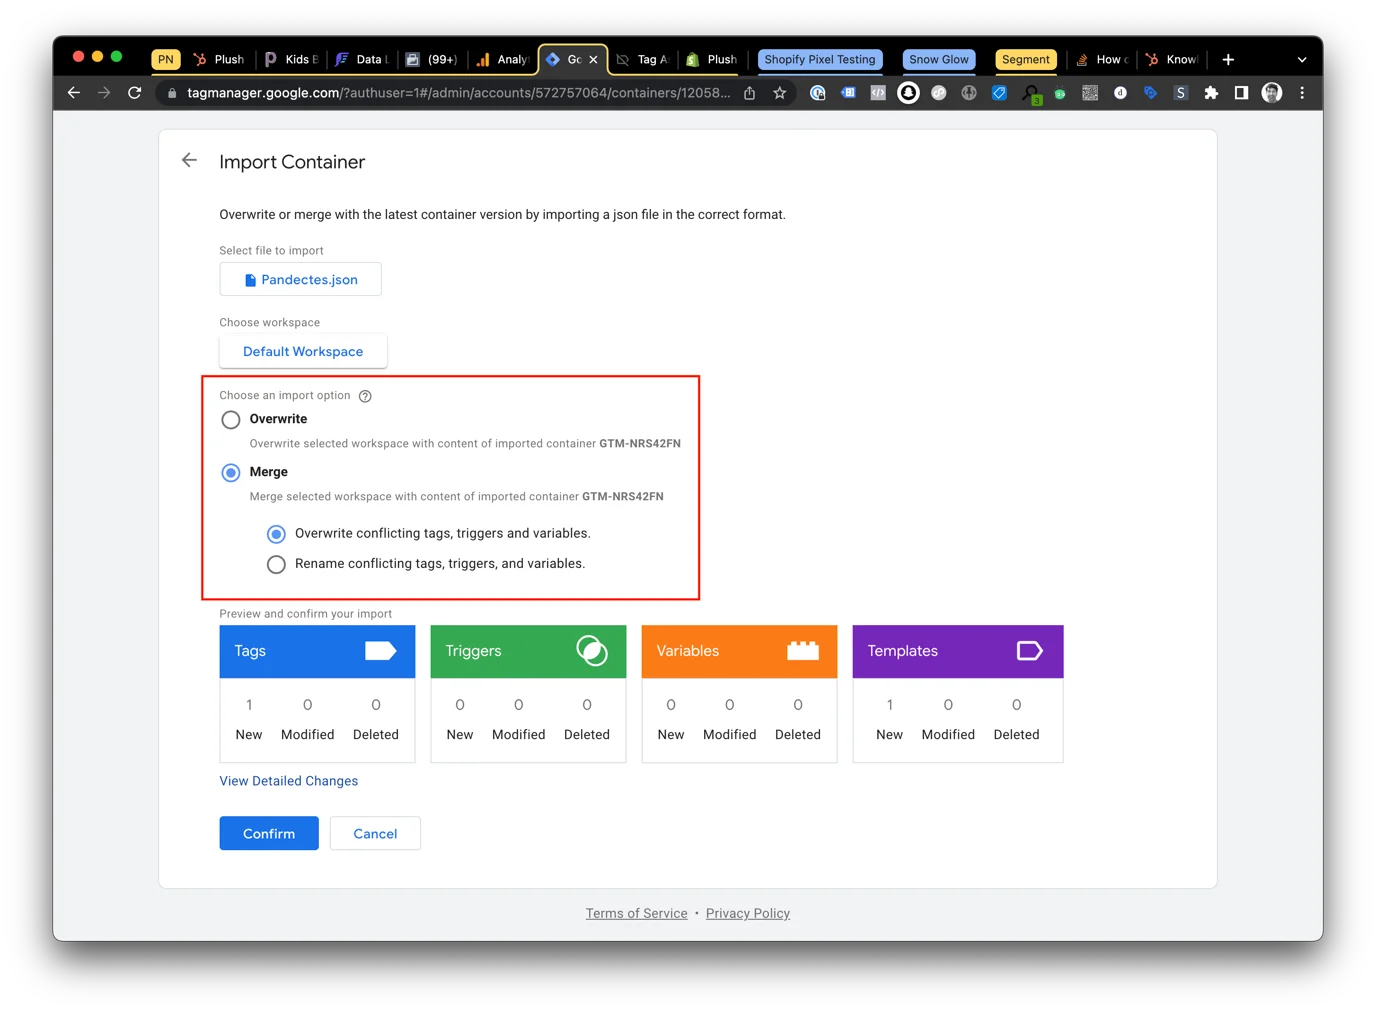
- Choose an existing workspace. This is likely the 'Default Workspace' unless you've created alternative workspaces, in this case, choose the relevant workspace.
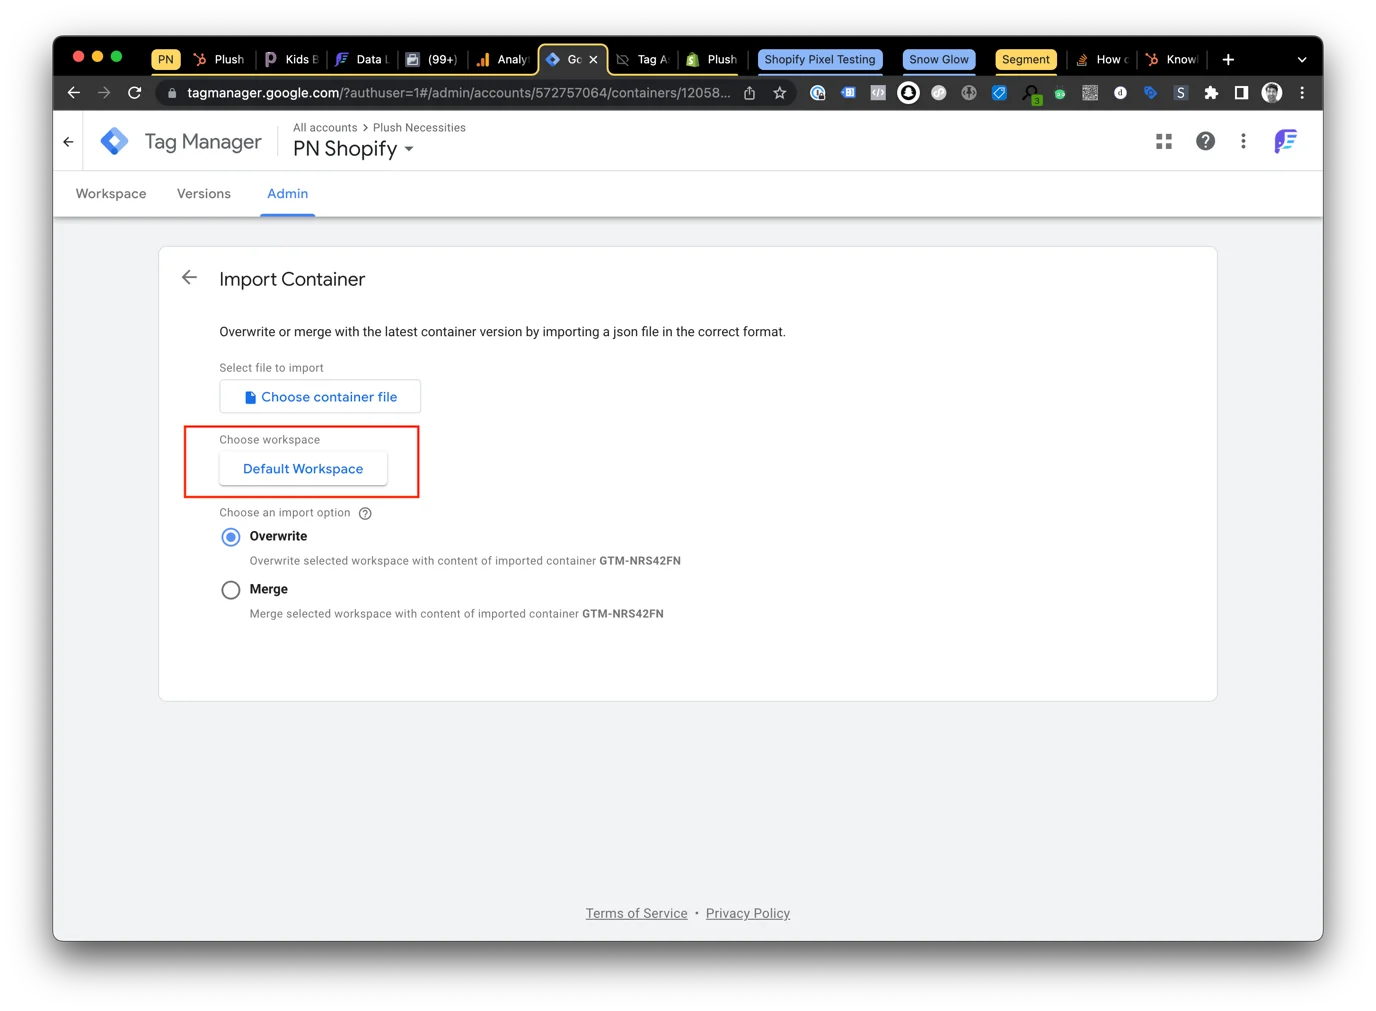
- IMPORTANT Choose 'Merge' then 'Overwrite conflicting tags, triggers and variables' and click confirm.
- Click the Workspace tab and then click publish to push your imported tags to the live environment, or click preview to ensure the new tags are behaving as expected before publishing.
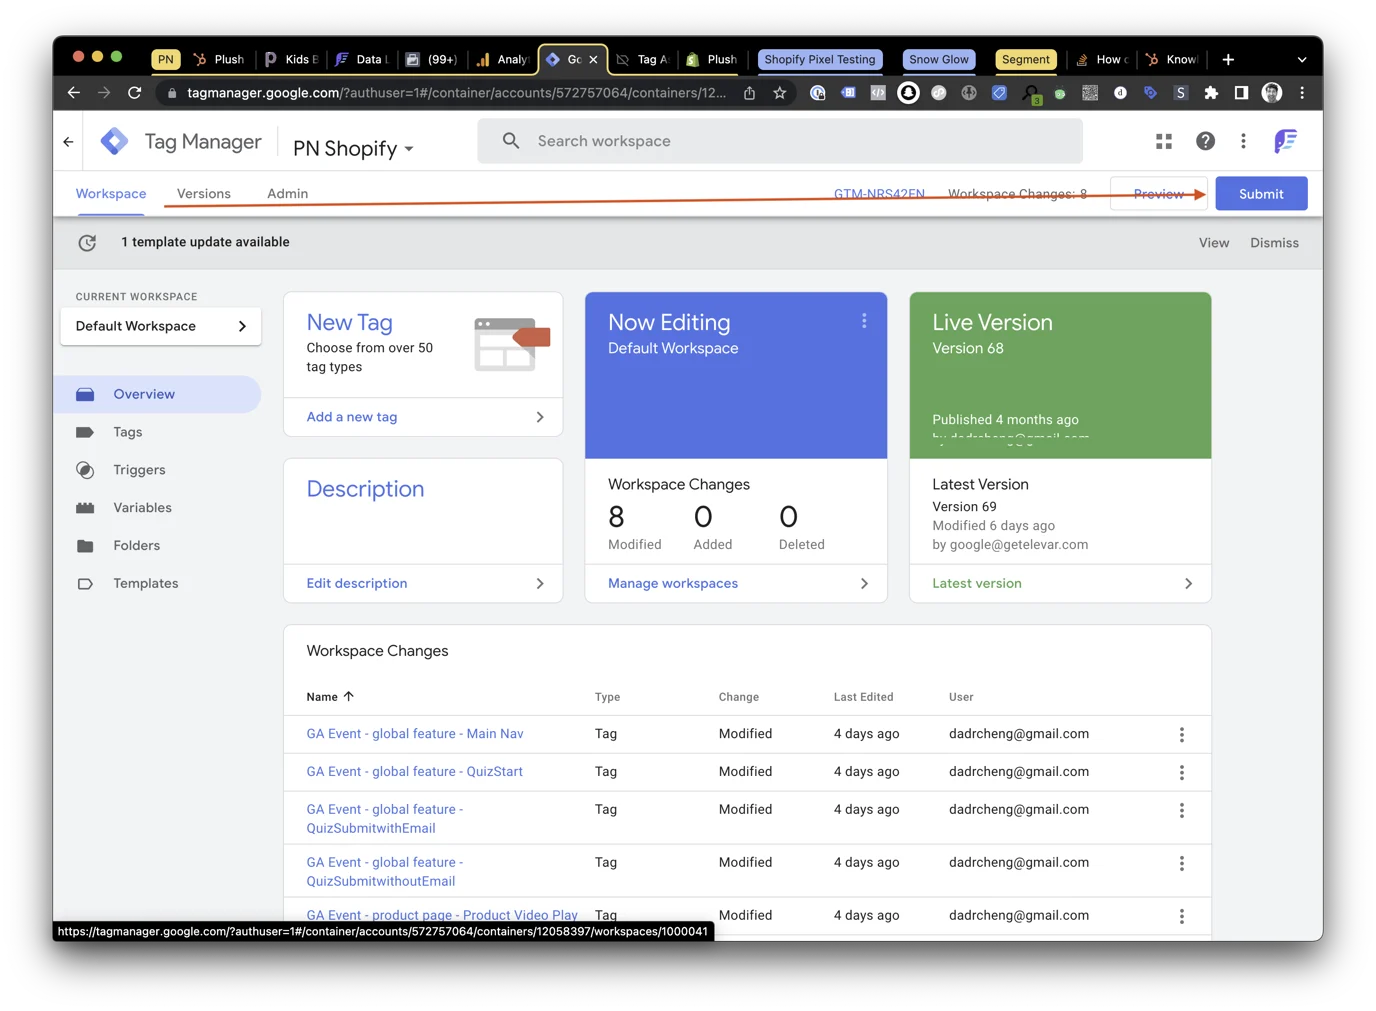
If published, your tags should now be active on your production environment.
Updated 5 months ago